Place the digestive biscuits in a zip-top bag and crush them with a rolling pin until fine crumbs form. This creates the base for your crust.
Mix the crushed biscuits with melted butter and a teaspoon of sugar in a bowl until evenly coated and crumbly.
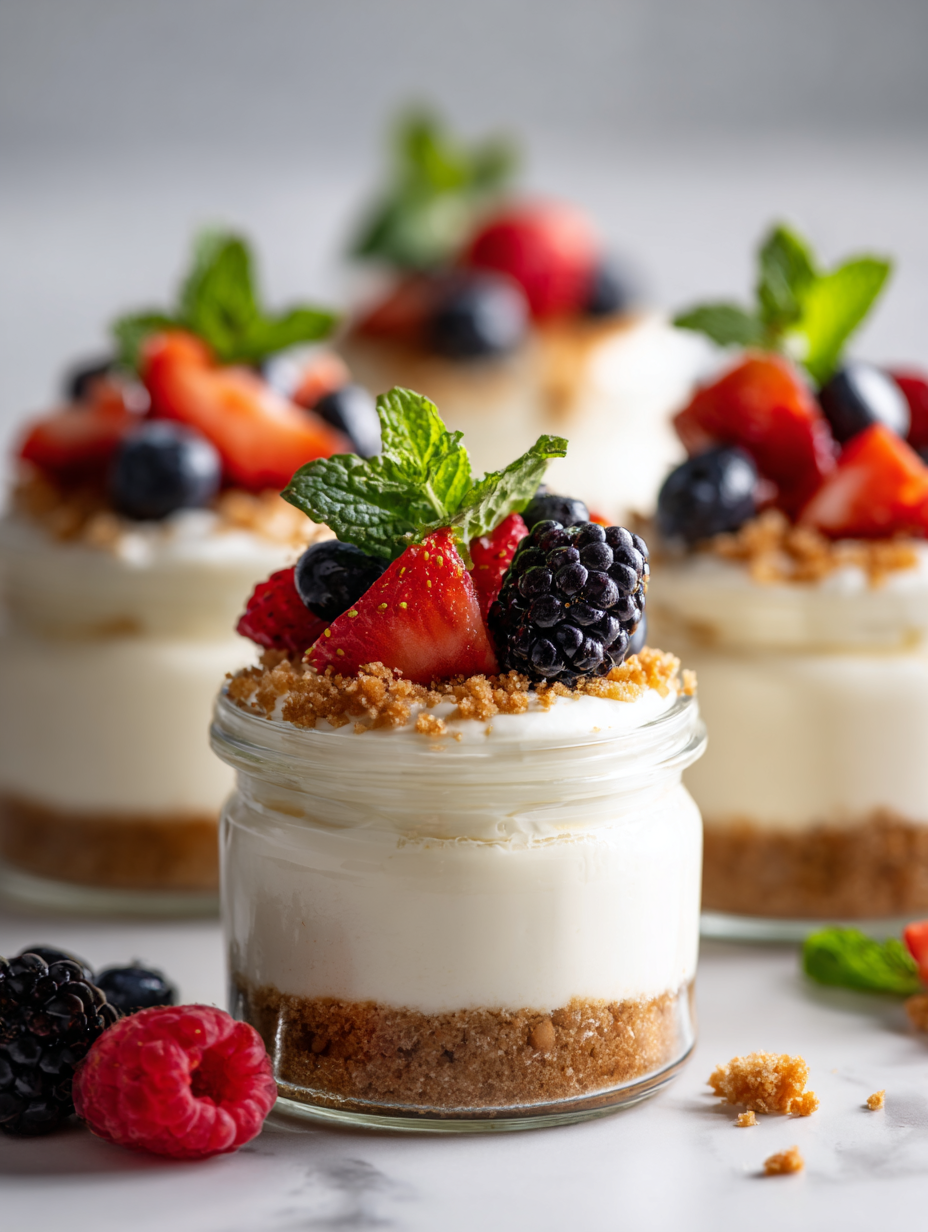
Spoon about 2 tablespoons of the biscuit mixture into the bottom of each jar, pressing it down firmly to form an even crust. Chill in the fridge for 10 minutes to set.
In a mixing bowl, beat the softened cream cheese and sugar with a whisk until smooth and fluffy, about 2 minutes. The mixture should be creamy and free of lumps.
Add the lemon juice and vanilla extract to the cream cheese mixture, and mix until well combined. The filling will brighten and slightly thicken.
In a separate bowl, whip the chilled heavy cream with a whisk or mixer until soft peaks form, about 2-3 minutes. You should see gentle ripples when you lift the whisk.
Gently fold the whipped cream into the cream cheese mixture, using a spatula or spoon, until fully incorporated and smooth. The filling should be light and fluffy.
Spoon or pipe the creamy filling into the chilled jars, filling almost to the top and smoothing the surface with the back of a spoon.
Add your favorite fruit toppings—fresh berries, sliced stone fruit, or a drizzle of chocolate—on top of each jar for color and extra flavor.
Cover the jars with lids or plastic wrap and refrigerate for at least 2 hours or overnight, allowing the flavors to meld and the filling to set.
Before serving, gently shake or stir the jars if needed, then enjoy the cool, creamy, and tangy cheesecake—perfect for a quick, personal treat.