
This no-bake coffee cheesecake came about during those mornings when I needed a pick-me-up that didn’t involve turning on the oven or waiting for something to bake. It’s the kind of dessert that feels both indulgent and practical, perfect for when you want something rich but don’t want to fuss around. The coffee flavor is bold but smooth, balancing creaminess with a hint of that deep roast aroma.
I love that it’s straightforward—no complicated crust or layers to mess with—and it’s ready in just a few hours, making it a real lifesaver after a long day. It’s one of those recipes that’s become a staple in my kitchen, especially when friends drop by unexpectedly or I just need a little caffeine-inspired comfort. Every time I make it, I remember how satisfying simple, honest ingredients can be.
This recipe is inspired by those late-night study sessions where caffeine and comfort collided. It’s a tribute to the quiet moments when a cool, creamy cheesecake infused with bold coffee notes offers a little escape, no oven needed.
Caffeine Meets Creaminess
- This cheesecake was my midnight comfort, blending the sharpness of coffee with creamy sweetness in a way that feels like a warm hug from the inside.
- I love how it turned out—rich, bold, yet surprisingly light, reminding me of those lazy mornings with a strong brew in hand.
- Making this recipe was a small act of rebellion against the oven-heavy desserts, a quick fix for my coffee cravings and sweet tooth at once.
- Every slice feels like a little victory, especially when I didn’t have to fuss with crusts or bake times, just chill and enjoy.
- It’s become my go-to when I want something impressive but effortless, perfect for spontaneous gatherings or solo indulgence.
Caffeine Meets Creaminess
This recipe was born out of a lazy Sunday afternoon when I realized I didn’t want to turn on the oven, but still craved something coffee-rich and creamy. I’ve always loved the idea of a dessert that feels indulgent but is actually straightforward to prepare. It’s a bit of a rebel move—skipping the bake, relying on chilling time, and letting the flavors develop slowly in the fridge. Every time I make it, I remember those easy, unhurried mornings that somehow turn into cozy afternoons with a slice in hand.
Trivia and Origins
- This no-bake coffee cheesecake has roots in 1970s dessert trends, when quick, fridge-set treats gained popularity.
- It’s inspired by European cheesecakes that often skip baking, emphasizing fresh ingredients and simple techniques.
- Coffee-flavored desserts surged in popularity during the coffeehouse culture boom of the early 2000s, influencing recipes like this one.
Ingredient breakdown: key components
- Coffee: I use strong, freshly brewed espresso for a deep, smoky aroma that really wakes up the palate. Swap with dark roast if you prefer a less intense kick.
- Cream Cheese: The creamy base that gives this cheesecake its richness—full-fat is best for texture, but light works if you’re watching calories. Just expect a slightly less velvety finish.
- Heavy Cream: Whipped until soft peaks, it adds airy lightness. If you want a firmer set, add a teaspoon of gelatin dissolved in a little warm water.
- Sugar: I prefer fine granulated sugar—it dissolves quickly and ensures a smooth filling. Brown sugar adds a caramel note if you’re feeling cozy.
- Graham Crackers: They make the base crunchy and buttery—substitute with digestive biscuits or even Oreo crumbs for a richer flavor, but keep an eye on the sweetness.
- Gelatin (optional): It helps the cheesecake set firmly if you need a sturdier slice. Dissolve thoroughly to avoid clumps, and don’t overheat.
- Cocoa Powder: For that final chocolatey depth, sift it over the top or blend into the crust. Use Dutch-processed for a smoother, less acidic taste.
Spotlight on key ingredients
Coffee:
- I use strong, freshly brewed espresso for a deep, smoky aroma that really wakes up the palate. Swap with dark roast if you prefer a less intense kick.
- Cream Cheese: The creamy base that gives this cheesecake its richness—full-fat is best for texture, but light works if you’re watching calories. Just expect a slightly less velvety finish.
- Heavy Cream: Whipped until soft peaks, it adds airy lightness. If you want a firmer set, add a teaspoon of gelatin dissolved in a little warm water.
Cream Cheese & Heavy Cream:
- Cream Cheese: The silky, tangy element that balances the coffee’s bitterness—warm to the touch, it blends smoothly and is key for that luscious texture.
- Heavy Cream: Fluffy and light when whipped, it melts into the mixture, giving the cheesecake its signature airy feel and rich mouthfeel.
Notes for ingredient swaps
- Dairy-Free: Swap cream cheese for a cashew-based cream or vegan cream cheese. Expect a slightly nuttier flavor and a softer set.
- Sweetener: Use honey or maple syrup instead of sugar. They add subtle flavor nuances and may affect the firmness slightly.
- Coffee: Substitute instant coffee granules with a strong cold brew concentrate for a smoother, less bitter coffee flavor.
- Crust: Replace graham crackers with crushed almonds or digestive biscuits for a nuttier or richer crust, adjusting butter accordingly.
- Gelatin: Use agar-agar powder as a vegetarian alternative. It sets differently—firm but slightly more brittle—so adjust the quantity.
- Whipped topping: For a lighter, dairy-free option, try coconut whipped cream. It adds a hint of coconut aroma and a slightly different texture.
- Chocolate garnish: Sprinkle dark chocolate shavings or cocoa nibs instead of cocoa powder for more texture and a richer chocolate note.
Equipment & Tools
- Springform pan: To shape and contain the cheesecake while it sets.
- Mixing bowl: For mixing crust and filling ingredients.
- Whisk and spatula: To blend ingredients smoothly and fold whipped cream.
- Parchment paper: To line the pan for easy removal.
- Microwave or small saucepan: To dissolve gelatin without overheating.
Step-by-step guide to no bake coffee cheesecake
- Gather your equipment: a 20cm (8-inch) springform pan, a mixing bowl, a whisk, a spatula, and parchment paper. Line the bottom of the pan with parchment for easy removal.
- Make the crust: crush 200g (7 oz) of graham crackers or digestive biscuits into fine crumbs. Mix with 100g (1/2 cup) melted butter and a tablespoon of sugar. Press evenly into the bottom of your prepared pan. Chill for 15 minutes while you prepare the filling.
- Brew a strong shot of espresso or 2 tablespoons of very strong coffee. Let it cool slightly. In a small bowl, sprinkle 1 teaspoon of gelatin over 2 tablespoons of cold water. Let it bloom for 5 minutes, then gently warm (a few seconds in the microwave) until dissolved.
- In a large bowl, beat 300g (about 10 oz) of softened cream cheese with 100g (1/2 cup) sugar until smooth and creamy, about 2 minutes. Mix in the cooled coffee and dissolved gelatin until well combined.
- In a separate bowl, whip 250ml (1 cup) of heavy cream until soft peaks form, about 3–4 minutes. Gently fold the whipped cream into the coffee mixture in two additions, maintaining airiness.
- Pour the filling over the chilled crust, smoothing the top with a spatula. Tap gently on the counter to settle the filling and remove air bubbles.
- Cover with plastic wrap and refrigerate for at least 4 hours, preferably overnight, until fully set. The cheesecake should be firm but creamy, with a slight jiggle in the center.
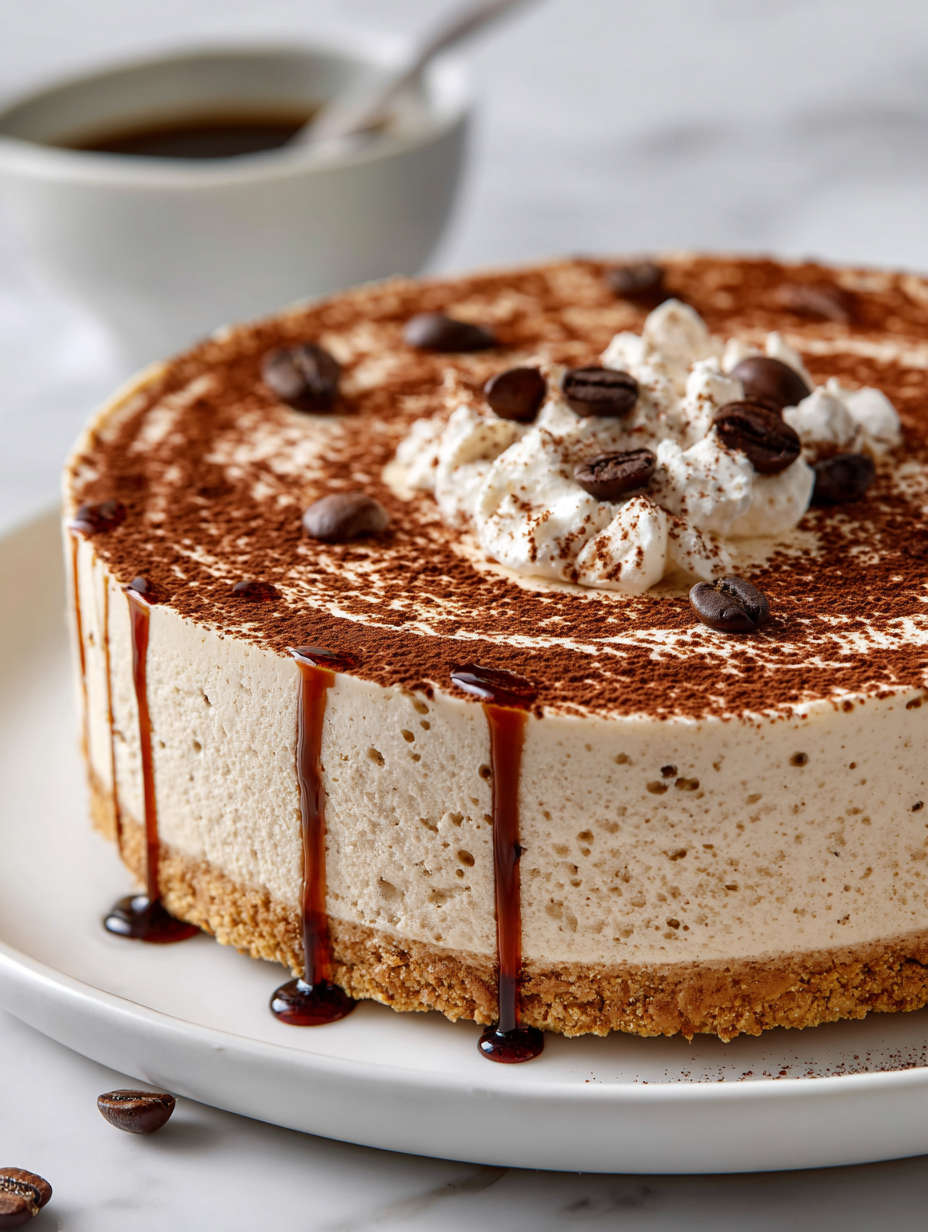
- Before serving, dust the top with cocoa powder or sprinkle with finely chopped espresso beans for extra texture and aroma. Carefully remove the sides of the springform pan, sliding the cheesecake onto a serving plate.
Once set, carefully remove the cheesecake from the pan. Slice with a sharp knife warmed in hot water for clean cuts. Serve chilled, garnished with cocoa or espresso beans for contrast.
How to Know It’s Done
- Crust is firm and holds shape when pressed.
- Filling is set, with a slight jiggle in the center when gently shaken.
- Surface appears smooth, with a matte cocoa finish or coffee sheen, no liquid pools.
No-Bake Coffee Cheesecake
Ingredients
Equipment
Method
- Line the bottom of a springform pan with parchment paper, then crush the graham crackers into fine crumbs and transfer to a mixing bowl.
- Mix the melted butter and sugar into the crumbs until evenly coated, then press this mixture firmly into the bottom of the prepared pan to create an even crust. Chill in the fridge for 15 minutes.
- Brew a strong shot of espresso or coffee and let it cool slightly. In a small microwave-safe bowl, sprinkle the gelatin over a tablespoon of cold water and let it bloom for 5 minutes. Gently warm it until dissolved, then set aside.
- In a large bowl, beat the softened cream cheese with 100 grams of sugar until smooth and creamy—about 2 minutes. Mix in the cooled coffee and dissolved gelatin until fully integrated.
- In a separate bowl, whip the chilled heavy cream until soft peaks form, about 3–4 minutes. Gently fold the whipped cream into the coffee and cream cheese mixture in two additions, maintaining a light, airy texture.
- Pour the filling over the chilled crust, smoothing the top with a spatula. Tap the pan gently on the counter to remove any air bubbles and ensure an even surface.
- Cover the pan with plastic wrap and refrigerate for at least 4 hours, or overnight, until the cheesecake is firm and set.
- Before serving, dust the top with cocoa powder or sprinkle chopped espresso beans for extra flavor and visual appeal. Carefully remove the sides of the springform pan.
- Slice with a hot, sharp knife for clean cuts. Serve chilled and enjoy the rich, coffee-infused creaminess with a hint of chocolate or espresso garnish.
Notes
Pro tips for perfect cheesecake
- flavor: Use freshly brewed espresso for a rich, smoky aroma that wakes up the palate. Swap with dark roast if preferred.
- Lighten it up: Whip the heavy cream until soft peaks for an airy texture; fold gently to keep it fluffy.
- Smooth blending: Warm the cream cheese slightly to make mixing easier and avoid lumps in the filling.
- Chill time: Let the cheesecake rest in the fridge for at least 4 hours or overnight to achieve a firm, clean slice.
- Temperature check: When dissolving gelatin, ensure it’s fully melted and slightly cooled before mixing to prevent clumps.
- Flavor contrast: Dust with cocoa powder or sprinkle espresso beans on top to enhance the coffee depth and add visual appeal.
- Crust crunch: Press the cookie crumbs firmly into the pan and chill before adding filling to prevent cracks or crumbling.
Common mistakes and how to fix them
- FORGOT to check gelatin consistency → Dissolve fully to avoid lumps.
- DUMPED in too much coffee → Use strong brew, but avoid overpowering the cream cheese.
- OVER-TORCHED the crust → Keep an eye on it; bake until golden, not burnt.
- MISSED chilling time → Chill at least 4 hours or overnight for best set.
Quick fixes and pantry swaps
- When the filling is too runny, splash in a bit more whipped cream to firm it up.
- If the crust crumbles, patch with a thin layer of melted butter and press firmly again.
- DUMPED in too much coffee? Rescue with extra cream cheese for balance.
- When the cheesecake cracks, shield with a dusting of cocoa powder or chocolate shavings.
- If it’s sticky or soft after chilling, give it an extra hour in the fridge to set fully.
Prep, store, and reheat tips
- Prepare the crust and press it into the pan a day ahead for added flavor and crunch, then chill until needed.
- Mix and assemble the filling up to 24 hours in advance; keep covered in the fridge to prevent odors from seeping in.
- The cheesecake can be stored in the fridge for up to 3 days; the flavors deepen and the texture firm up over time.
- Refrigerate leftovers tightly wrapped; for best texture, serve within 2 days, as the cream may soften and lose firmness.
- To reheat a slice, place it in the fridge for an hour, then serve cold or let it sit at room temperature for 10 minutes—sensory cue: smooth, creamy, with a hint of coffee aroma.
Top questions about no bake coffee cheesecake
1. Can I use instant coffee instead of brewed espresso?
Use freshly brewed, strong espresso for the best coffee flavor. Instant coffee can work but won’t be as rich.
2. Can I make this dairy-free?
Yes, you can substitute cream cheese with vegan cream cheese or cashew-based creams. Expect a slightly different texture and flavor.
3. How long should I chill it?
Chill the cheesecake for at least 4 hours or overnight for a firm, sliceable texture. Longer chilling deepens flavor.
4. My cheesecake is too soft or crumbly, what do I do?
If the filling is too runny, gently fold in additional whipped cream or chill longer. If crust crumbles, press it down again and refrigerate briefly.
5. Can I use low-fat cream cheese?
Use full-fat cream cheese for creaminess and the best texture. Light or reduced-fat versions may result in a less rich finish.
6. Can I add other flavors to the cheesecake?
You can add a splash of vanilla extract or a sprinkle of cinnamon for extra flavor. Adjust coffee to balance the sweetness.
7. How do I garnish the cheesecake?
For a smoother surface, lightly dust with cocoa powder or sprinkle chopped espresso beans on top just before serving.
8. How long can I keep leftovers?
Store leftovers covered in the fridge for up to 3 days. Bring to room temperature for a creamier taste before serving.
9. How do I get neat slices?
Use a hot, sharp knife to cut slices cleanly. Warming the knife in hot water helps prevent sticking and tearing.
10. When is the best time to make it?
This recipe is perfect for hot days when turning on the oven feels wrong, and you want a creamy, caffeine-kick dessert.
This no-bake coffee cheesecake is the kind of dessert that sneaks up on you with its simplicity and depth. A cool, creamy slice that captures that perfect punch of coffee, balanced by just enough sweetness to make every bite feel like a small indulgence. It’s a reminder that sometimes, you don’t need an oven to pull off something memorable.
Whenever I make this, I think about how easy it is to transform everyday ingredients into something special. It’s a no-fuss treat that suits both busy weekdays and lazy weekends, especially when coffee and dessert cravings collide. No matter the occasion, it feels like a little victory—simple, satisfying, and just a bit rebellious.
Welcome to Proud of This Mess – a place where food, creativity, and a little chaos come together on a plate!
I’m Emily Carter, the founder and heart behind this little corner of the internet. Born and raised in the United States, I’ve always had a passion for cooking, experimenting, and sharing the messy, delicious journey of creating food that brings people together. My philosophy is simple: good food doesn’t have to be perfect, and a little mess makes it memorable.
At Proud of This Mess, we believe that cooking is more than just following recipes—it’s about exploring flavors, discovering new techniques, and making every meal an experience worth savoring. From comforting weeknight dinners to indulgent desserts, our goal is to inspire home cooks of all levels to embrace the joy of food without fear of imperfection.