
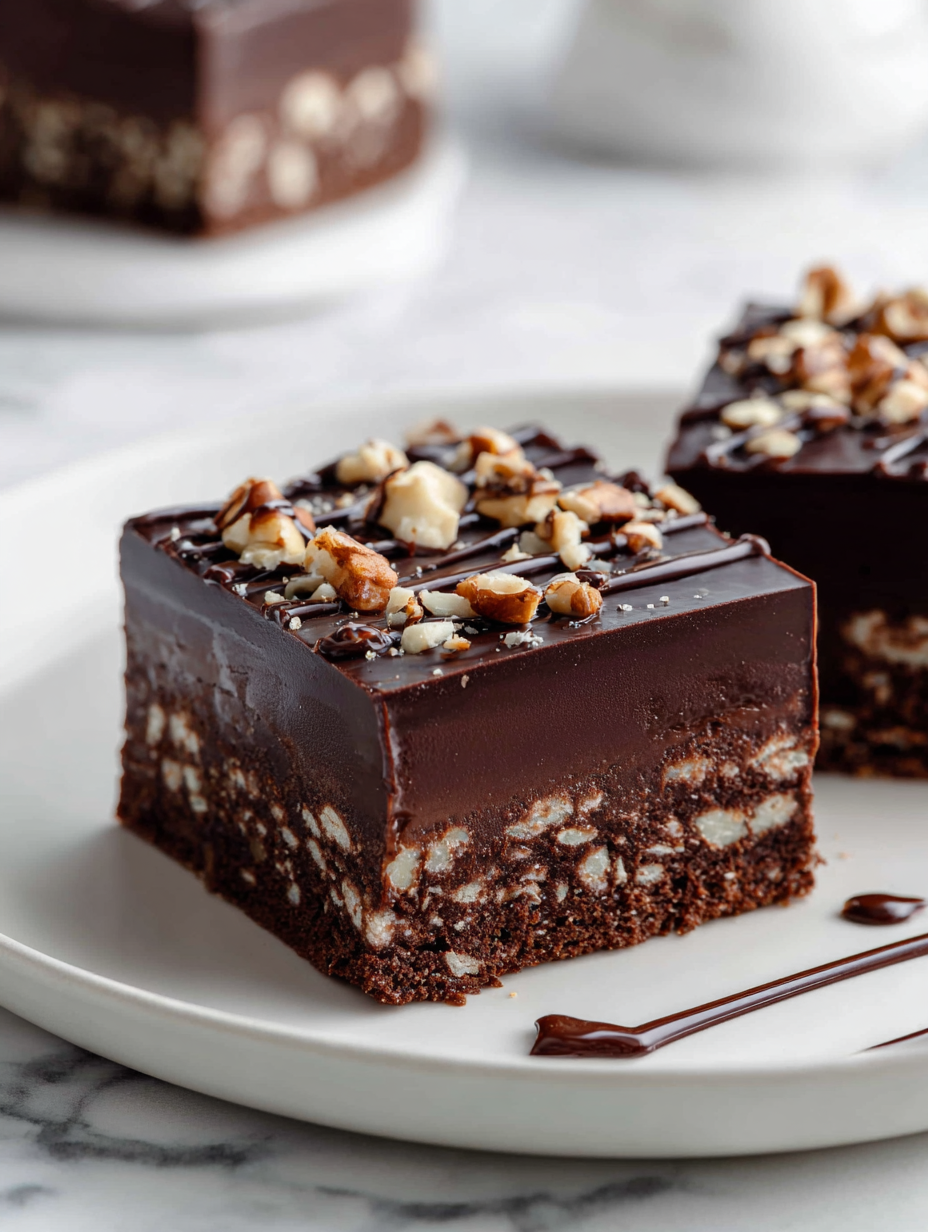
Sometimes, I just need a sweet fix that doesn’t require turning on the oven. This no bake chocolate slice has become my go-to for those moments—messy, honest, and ridiculously easy to put together. It’s like a little edible hug, especially when I’m craving something rich but quick to make.
What I love most is how forgiving it is—no fancy equipment, just good ingredients thrown together in a bowl, then left to set. It’s a recipe that feels more like a cozy secret shared with friends over coffee, a treat that’s as nostalgic as it is satisfying. Plus, it’s perfect for those last-minute gatherings or when the pantry’s low but chocolate cravings are high.
In a world that’s often rushing past, this slice offers a moment of calm—something sweet and familiar that you can whip up in no time. It’s honest, straightforward, and a little messy, just like the best recipes should be.
This recipe is my secret weapon for quick comfort, especially when I need something sweet but can’t wait for the oven. It’s a messy, honest process that feeds my need for instant gratification without sacrificing flavor.
The story behind this recipe
- This recipe came about one rainy afternoon when I needed something sweet, fast, and unfussy. I was tired of the usual baking routine and wanted to keep it simple but satisfying. It’s become my little secret for when cravings hit hard and I don’t want to wait.
- I remember experimenting late into the night, trying to get that perfect balance of rich chocolate and a firm, bite-sized texture. The first time I made it, the smell of melting chocolate in the kitchen was almost hypnotic. Now, it’s a staple for impromptu gatherings and quiet nights alike.
- Each batch feels like a small victory—no fuss, just good ingredients, and a little bit of chaos. It’s a recipe that’s as honest as it gets, perfect for those who want something homemade without the fuss of oven time.
Ingredient breakdown
- Dark chocolate: I love the richness of good dark chocolate, it melts smoothly and gives that deep, slightly bitter kick. If you prefer sweeter, swap half for milk chocolate—just watch the sweetness level.
- Butter: I use salted butter for a slightly savory note that balances the chocolate. Unsalted works fine too, just add a tiny pinch of salt if you want that savory depth.
- Sweetened condensed milk: It’s the glue that holds everything together—sweet, sticky, and creamy. For a dairy-free version, coconut condensed milk adds a tropical, smoky sweetness.
- Digestive biscuits: These add a gentle crunch and a hint of toasty wheat flavor. If you’re out, graham crackers or graham cracker crumbs are a good substitute, but they’ll change the texture slightly.
- Vanilla extract: Just a splash amplifies the chocolate and adds a subtle warmth. Skip it if you want a more intense chocolate punch, or add a dash of instant coffee for depth.
- Optional toppings: Nuts, dried fruit, or a drizzle of white chocolate—these make the slice more interesting. I keep it simple with just a sprinkle of sea salt on top for a salty contrast.
- Sea salt flakes: A pinch on top enhances the chocolate’s richness—think of it as a little flavor spark. Use flaky sea salt for that satisfying crunch and burst of salty goodness.
Spotlight on Key Ingredients
Dark chocolate:
- I love the richness of good dark chocolate, it melts smoothly and gives that deep, slightly bitter kick. If you prefer sweeter, swap half for milk chocolate—just watch the sweetness level.
- Butter: I use salted butter for a slightly savory note that balances the chocolate. Unsalted works fine too, just add a tiny pinch of salt if you want that savory depth.
- Sea salt flakes: A pinch on top enhances the chocolate’s richness—think of it as a little flavor spark. Use flaky sea salt for that satisfying crunch and burst of salty goodness.
Sweetened condensed milk:
- It’s the glue that holds everything together—sweet, sticky, and creamy. For a dairy-free version, coconut condensed milk adds a tropical, smoky sweetness.
- Digestive biscuits: These add a gentle crunch and a hint of toasty wheat flavor. If you’re out, graham crackers or graham cracker crumbs are a good substitute, but they’ll change the texture slightly.
- Vanilla extract: Just a splash amplifies the chocolate and adds a subtle warmth. Skip it if you want a more intense chocolate punch, or add a dash of instant coffee for depth.
Notes for ingredient swaps
- Dairy-Free: Use coconut butter instead of butter for a rich, tropical flavor that melts just as smoothly.
- Vegan Chocolate: Swap dark chocolate with vegan dark chocolate—expect a slightly different cocoa depth but still luscious.
- Gluten-Free: Choose gluten-free digestive biscuits or rice crackers for crunch without the wheat.
- Sweetener Swap: Replace condensed milk with sweetened condensed coconut milk for a dairy-free, smoky sweetness.
- Nut-Free: Omit nuts or substitute with toasted sunflower seeds for crunch and flavor without the nut allergy risk.
Equipment & Tools
- Baking dish: Holds the mixture and shapes the slice
- Heatproof bowl: Melts chocolate and butter gently
- Spatula: Stirs and spreads the mixture evenly
- Knife: Slices the set slice into portions
- Parchment paper: Prevents sticking and makes removal easy
Step-by-step guide to no bake slice
- Gather your equipment: a square baking dish (20x20cm or similar), a heatproof bowl, a spatula, and a knife for slicing. Line the dish with parchment paper for easy removal.
- Chop the dark chocolate into small, even pieces. This helps it melt smoothly and quickly, reducing the chance of burning.
- Melt the chocolate and butter together: place in the heatproof bowl over a pot of simmering water (bain-marie). Stir gently every minute, until glossy and smooth. This takes about 5 minutes. Keep the heat low to avoid scorching.
- Remove from heat and stir in the sweetened condensed milk and vanilla extract. Mix until fully combined, glossy, and thickened slightly. The smell should be rich and chocolatey.
- Crush the digestive biscuits into small chunks or fine crumbs, depending on your texture preference. Fold these into the chocolate mixture until evenly coated.
- Pour the mixture into your prepared dish. Use the spatula to spread it evenly, pressing down gently to compact and smooth the surface. This step is key for a firm slice.
- Add your optional toppings now—sea salt flakes, nuts, or dried fruits—pressing lightly to embed. This adds texture and visual appeal.
- Chill in the fridge: place the slice in the fridge for at least 3 hours, or overnight for best results. It should be firm and set, with a shiny top and clean edges when ready.
Once set, lift the slice from the dish using the parchment paper. Slice into squares with a sharp knife, wiping the blade between cuts. Serve directly or store in an airtight container.
How to Know It’s Done
- Chocolate is fully melted and glossy, with no lumps.
- Mixture is evenly combined, no streaks of butter or condensed milk.
- The slice feels firm and holds shape when gently pressed.
No Bake Chocolate Slice
Ingredients
Equipment
Method
- Line your baking dish with parchment paper, leaving some overhang for easy removal.
- Chop the dark chocolate into small pieces so it melts quickly and smoothly.
- Place the chopped chocolate and butter into a heatproof bowl.
- Gently melt the mixture over a pot of simmering water, stirring frequently, until the mixture is glossy and completely smooth.
- Remove the bowl from heat and stir in the sweetened condensed milk and vanilla extract until fully combined and glossy.
- Crush the digestive biscuits into small chunks or crumbs, then fold them into the chocolate mixture until evenly coated.
- Pour the mixture into the prepared dish, then use the spatula to spread it evenly and press down gently to compact.
- Sprinkle sea salt flakes or other toppings over the surface and press lightly to embed them.
- Place the dish in the fridge and chill for at least 3 hours or overnight until set and firm.
- Once set, lift the slice out of the dish using the overhanging parchment paper. Slice into squares with a sharp knife.
- Serve immediately or store in an airtight container in the fridge for up to 5 days.
Pro tips for perfect slice
- Bolded mini-head: Use residual heat → Melting chocolate gently prevents burning and ensures a glossy finish.
- Bolded mini-head: Chill in stages → Refrigerate for 30 minutes, then check firmness before slicing for cleaner edges.
- Bolded mini-head: Scrape down sides → Keep chocolate smooth and avoid streaks by stirring frequently during melting.
- Bolded mini-head: Add toppings last → Press toppings lightly into the surface before chilling to prevent sinking or sliding.
- Bolded mini-head: Use room temperature ingredients → Avoid lumps and ensure even melting by bringing butter and condensed milk to room temp before mixing.
- Bolded mini-head: Don’t rush cooling → Let the slice rest undisturbed in the fridge for the best set and shine.
- Bolded mini-head: Test with a toothpick → Insert in center; if it comes out with moist crumbs, it’s ready for chilling.
Common mistakes and how to fix them
- FORGOT to temper chocolate → Melt slowly over low heat, avoid scorching.
- DUMPED in all ingredients at once → Mix gradually, ensuring smooth, glossy texture.
- OVER-TORCHED chocolate → Remove from heat immediately, stir until smooth.
- MISSED chilling time → Allow at least 3 hours to set fully for clean slices.
Quick fixes and pantry swaps
- When chocolate seizes, splash in a teaspoon of hot milk and stir gently.
- If mixture is too thick, patch with a small drizzle of warm cream for smoothness.
- Splash a tiny bit of vanilla on top if the surface looks dull after setting.
- Dumped in ingredients too quickly? Restir to incorporate fully and prevent streaks.
- When slice cracks while cutting, chill it for 10 more minutes and try again with a sharp knife.
Prep, store, and reheat tips
- You can prepare the chocolate mixture a day ahead; keep it covered in the fridge to prevent it from drying out, and it will stay fresh for up to 24 hours. Expect the flavors to deepen slightly overnight.
- Once set, the slice can be stored in an airtight container in the fridge for up to 5 days. The chocolate firming will intensify, and it will maintain a glossy surface, ready for slicing at a moment’s notice.
- For longer storage, tightly wrap the slice in plastic wrap and freeze for up to 2 months. Thaw in the fridge for a few hours; the texture becomes slightly more fudge-like, with a rich, intense chocolate aroma.
- Reheating isn’t necessary—serve straight from the fridge for optimal firmness and flavor. If you prefer it slightly softer, let it sit at room temperature for 10 minutes, and the chocolate will soften just enough to melt on your tongue.
Top questions about no bake chocolate slice
1. How do I melt chocolate without burning it?
You can melt the chocolate gently over a double boiler or in short bursts in the microwave, stirring between. Make sure not to overheat to avoid burning or seizing.
2. Can I use different types of chocolate?
Yes, you can substitute with milk or white chocolate, but the flavor and texture will change slightly, becoming sweeter and creamier.
3. Can I use salted butter instead of unsalted?
Using unsalted butter works fine, but if you use salted butter, reduce or omit additional salt in the recipe. It adds a slight savory note that balances the sweetness.
4. Can I swap out digestives?
Yes, you can replace digestive biscuits with graham crackers, but expect a slightly different crunch and wheat flavor. For gluten-free, try gluten-free cookies or rice cereal.
5. How long should I chill the slice?
Chill the slice in the fridge for at least 3 hours, or overnight. The longer it firms up, the cleaner and neater your slices will be.
6. How should I store leftovers?
Yes, storing in an airtight container in the fridge keeps it fresh for up to 5 days. Freezing extends its life to about 2 months, just thaw in the fridge before serving.
7. What if the mixture is too thick or too runny?
If the mixture is too thick to spread, warm it slightly or add a teaspoon of hot milk to loosen it. If it’s too runny, refrigerate for 15 minutes and try again.
8. My slice cracked or looks dull after setting. What now?
When the chocolate crackles or looks dull after setting, give it a quick chill or a gentle reheat over low heat to restore shine and smoothness.
9. Can I add salt or toppings?
Adding a pinch of sea salt flakes on top enhances the chocolate’s richness and provides a delightful contrast in flavor and texture.
10. Is there a dairy-free option?
For a dairy-free version, replace butter with coconut oil or coconut butter, which melts easily and adds a tropical aroma without sacrificing texture.
This no bake chocolate slice feels like a little rebellion in the kitchen—quick, honest, and deeply satisfying. When I need something sweet without the fuss, it’s a recipe I keep close, especially for those last-minute cravings or busy afternoons.
Sharing it with friends or just keeping a slice in the fridge becomes a small act of kindness. It’s a reminder that sometimes, the simplest ingredients and a bit of chaos can turn into something genuinely comforting and unexpectedly indulgent.
Welcome to Proud of This Mess – a place where food, creativity, and a little chaos come together on a plate!
I’m Emily Carter, the founder and heart behind this little corner of the internet. Born and raised in the United States, I’ve always had a passion for cooking, experimenting, and sharing the messy, delicious journey of creating food that brings people together. My philosophy is simple: good food doesn’t have to be perfect, and a little mess makes it memorable.
At Proud of This Mess, we believe that cooking is more than just following recipes—it’s about exploring flavors, discovering new techniques, and making every meal an experience worth savoring. From comforting weeknight dinners to indulgent desserts, our goal is to inspire home cooks of all levels to embrace the joy of food without fear of imperfection.