
This no-bake cheesecake in jars idea started as a way to make dessert feel a little more personal, a bit more special without the fuss. There’s something about having your own little jar—it’s like a tiny, portable treat that makes every bite feel a bit more indulgent. Plus, it’s so easy to assemble, you can pull it together in minutes, even when the urge hits unexpectedly.
What really sold me on this idea was how flexible it is. You can layer in whatever fruit or chocolate you have on hand, making each jar a little unique. It’s perfect for spontaneous gatherings or just a quiet moment alone, enjoying a creamy, tangy bite that’s cool and refreshing. No oven, no fuss—just simple ingredients and a little bit of love in each jar.
Focusing on individual portions makes this cheesecake less intimidating and more versatile, perfect for spontaneous gatherings or solo indulgence. It’s about turning a traditionally big, shared dessert into charming, personal jars that feel special yet are utterly practical for busy lives.
Miniature Cheesecake Moments
- I love how these jars turn a simple dessert into something I can grab and go, especially after a long day.
- Biting into the creamy cheesecake layered with a hint of lemon always takes me back to family picnics and summer afternoons.
- There’s a little thrill in assembling each jar—seeing the layers come together feels almost like a tiny victory.
- I’ve made these for last-minute friends dropping by, and watching them get excited about dessert that’s both cute and satisfying makes me happy.
- Every time I pop open the fridge and see those little jars, I feel a quiet pride—dessert made simple, but still special.
Miniature Cheesecake Moments
- This recipe came from a night when I needed dessert, fast. I didn’t want to turn on the oven, and I was tired of the usual. So I started layering cream cheese and crushed cookies in small jars, and suddenly, it felt special—like a little treasure. Since then, I’ve kept a stash of these in the fridge for spontaneous moments, and they never disappoint.
- What keeps me coming back to this simple dessert is how it feels personal—each jar can be customized. I love mixing in fresh berries or a drizzle of chocolate, making each one a tiny, perfect indulgence. It’s funny how something so straightforward can make gatherings feel a bit more thoughtful, even last-minute ones. And honestly, it’s a relief knowing I can throw together a crowd-pleaser without extra chaos.
- heading
- story_type
Trivia and Historical Tidbits
- This recipe emerged during a busy holiday season when I needed a quick, elegant dessert that could be assembled ahead of time.
- It draws inspiration from traditional cheesecakes, but the jars make it feel more personal and portable, perfect for picnics or office treats.
- The concept of serving in individual jars has roots in rustic, vintage dessert presentations, now reimagined for modern, quick prep.
Key Ingredients Breakdown
- Cream cheese: I prefer it softened at room temp, it whips up smoothly without lumps—aim for a velvety texture. Swap with mascarpone for extra richness, but expect a slightly milder tang.
- Digestive biscuits: The crunch and buttery flavor set the base perfectly. If you’re out, graham crackers make a decent substitute, though they can be a bit sweeter and softer.
- Sugar: I use regular granulated, but a touch of honey or maple syrup can add a subtle flavor depth—just cut back slightly on liquid ingredients if you do.
- Lemon juice: Brightens everything up and cuts through richness. Fresh lemon zest adds a fragrant punch—skip if you want a milder, more neutral flavor.
- Heavy cream: Whipped until soft peaks, it gives the filling lift and fluffiness. Coconut cream can work for a dairy-free twist, but it’s denser and adds a coconut note.
- Vanilla extract: Adds warmth and depth, but a splash of almond or lemon extract can give a fun variation—use sparingly to avoid overpowering.
- Fruit toppings: Fresh berries or sliced stone fruit add vibrant color and juiciness. Canned fruit in syrup is convenient but can make the jars overly sweet if used excessively.
Spotlight on key ingredients
Cream cheese:
- I prefer it softened at room temp, it whips up smoothly without lumps—aim for a velvety texture. Swap with mascarpone for extra richness, but expect a slightly milder tang.
- Digestive biscuits: The crunch and buttery flavor set the base perfectly. If you’re out, graham crackers make a decent substitute, though they can be a bit sweeter and softer.
Lemon juice & Heavy cream:
- Lemon juice: Brightens everything up and cuts through richness. Fresh lemon zest adds a fragrant punch—skip if you want a milder, more neutral flavor.
- Heavy cream: Whipped until soft peaks, it gives the filling lift and fluffiness. Coconut cream can work for a dairy-free twist, but it’s denser and adds a coconut note.
Notes for ingredient swaps
- Dairy-Free: Swap cream cheese for blended silken tofu or dairy-free cream cheese. It’s milder and less tangy, but still creamy.
- Gluten-Free: Use crushed gluten-free cookies or graham crackers. Expect a slightly different crunch and flavor profile.
- Sweetener: Replace sugar with honey, maple syrup, or agave nectar. These add moisture and a richer flavor, so reduce other liquids slightly.
- Citrus: Lemon juice can be swapped with lime or orange juice for a different zing—just adjust the amount for brightness.
- Crust Base: Oats or toasted nuts mixed with a bit of butter or coconut oil make a hearty, nutty crust alternative.
- Flavor Boost: Add a splash of flavored liqueur or extract—like almond or coconut—to the filling for a personal twist.
- Fruit Topping: Use fresh or frozen fruit, but if you prefer a less juicy topping, opt for dried fruit or candied zest.
Equipment & Tools
- Small jars with lids: For individual portions and easy storage.
- Mixing bowl: To mix biscuit crumbs and filling ingredients.
- Whisk: To beat cream cheese and whip cream.
- Spoon or piping bag: For layering and smooth filling into jars.
- Measuring spoons & cups: To accurately portion ingredients.
Step-by-step guide to no-bake jars
- Gather your equipment: small jars (preferably with lids), a mixing bowl, a whisk, a spoon, and a piping bag or extra spoon for layering.
- Crush the biscuits: place about 150g of digestive biscuits in a zip-top bag and crush with a rolling pin until fine crumbs. Set aside.
- Make the crust: combine crushed biscuits with 50g melted butter and a teaspoon of sugar in a bowl. Mix until evenly coated.
- Press the crust: spoon about 2 tablespoons of the biscuit mixture into the bottom of each jar. Press down firmly with the back of a spoon or a small shot glass. Chill in the fridge for 10 minutes to set.
- Prepare the filling: in a mixing bowl, beat 200g softened cream cheese with 50g sugar until smooth and fluffy, about 2 minutes.
- Add flavor: mix in 2 teaspoons of vanilla extract and 1 tablespoon lemon juice for brightness. Keep mixing until well combined.
- Whip the cream: in a separate bowl, whip 150ml heavy cream until soft peaks form, about 2-3 minutes. Fold gently into the cream cheese mixture until smooth.
- Layer the filling: spoon or pipe the creamy mixture into the chilled jars, filling almost to the top. Smooth the surface with the back of a spoon.
- Add toppings: finish with fresh berries, fruit slices, or a drizzle of chocolate or caramel if desired. Cover and refrigerate for at least 2 hours, preferably overnight.
- Serve chilled: before serving, give the jars a gentle shake or stir to reblend if needed. Enjoy the cool, creamy texture and bright flavors.
Chill the jars for at least 2 hours, preferably overnight, to allow flavors to meld and the filling to set. Serve straight from the fridge, optionally garnished with fresh fruit or a dusting of cocoa powder. Keep covered if not served immediately.
How to Know It’s Done
- Crust is firm and holds shape when pressed.
- Filling is smooth, fluffy, and holds peaks when whipped.
- Jars are chilled and set, with a slight jiggle in the center when gently shaken.
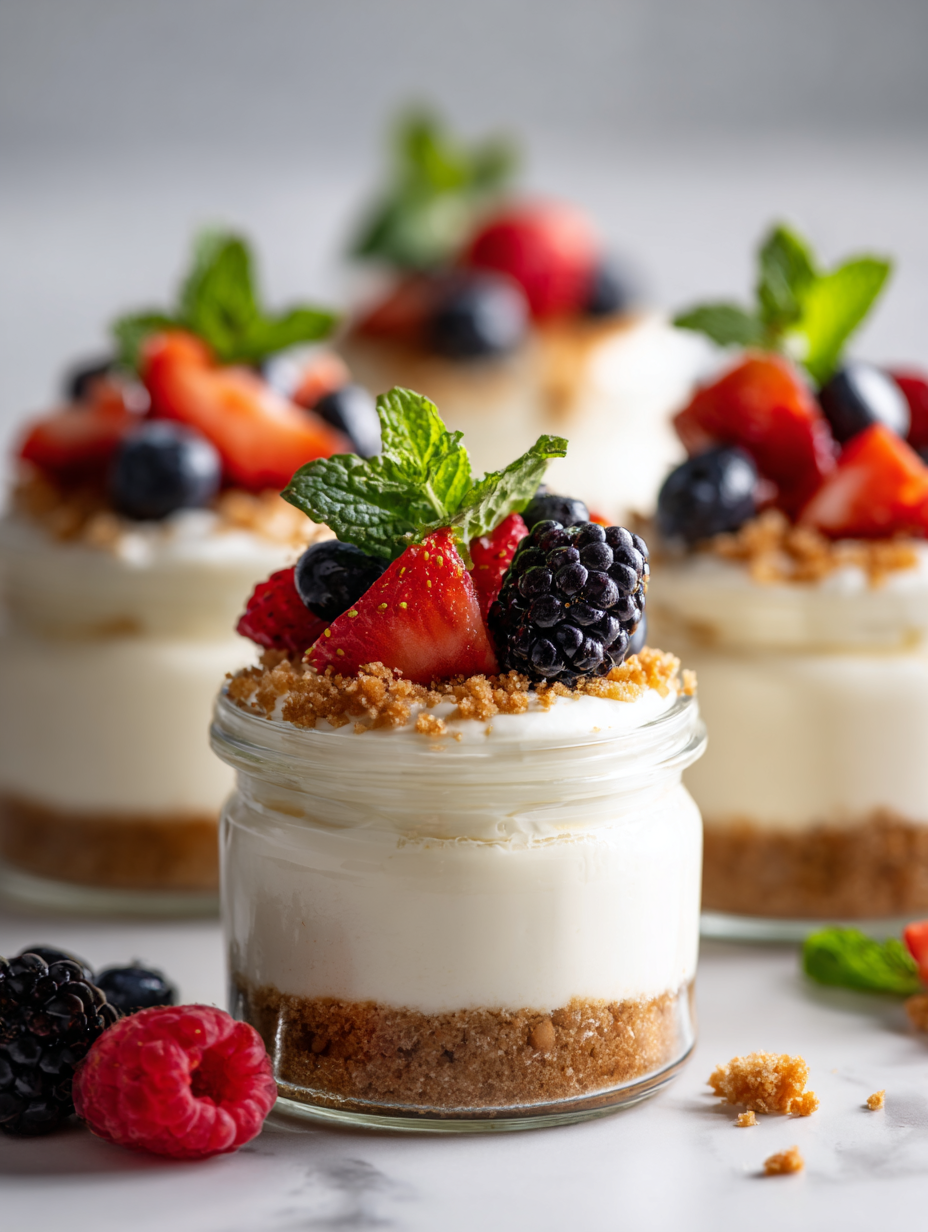
No-Bake Cheesecake in Jars
Ingredients
Equipment
Method
- Place the digestive biscuits in a zip-top bag and crush them with a rolling pin until fine crumbs form. This creates the base for your crust.
- Mix the crushed biscuits with melted butter and a teaspoon of sugar in a bowl until evenly coated and crumbly.
- Spoon about 2 tablespoons of the biscuit mixture into the bottom of each jar, pressing it down firmly to form an even crust. Chill in the fridge for 10 minutes to set.
- In a mixing bowl, beat the softened cream cheese and sugar with a whisk until smooth and fluffy, about 2 minutes. The mixture should be creamy and free of lumps.
- Add the lemon juice and vanilla extract to the cream cheese mixture, and mix until well combined. The filling will brighten and slightly thicken.
- In a separate bowl, whip the chilled heavy cream with a whisk or mixer until soft peaks form, about 2-3 minutes. You should see gentle ripples when you lift the whisk.
- Gently fold the whipped cream into the cream cheese mixture, using a spatula or spoon, until fully incorporated and smooth. The filling should be light and fluffy.
- Spoon or pipe the creamy filling into the chilled jars, filling almost to the top and smoothing the surface with the back of a spoon.
- Add your favorite fruit toppings—fresh berries, sliced stone fruit, or a drizzle of chocolate—on top of each jar for color and extra flavor.
- Cover the jars with lids or plastic wrap and refrigerate for at least 2 hours or overnight, allowing the flavors to meld and the filling to set.
- Before serving, gently shake or stir the jars if needed, then enjoy the cool, creamy, and tangy cheesecake—perfect for a quick, personal treat.
Pro tips for perfect jars
- Bolded mini-head: Chill your jars thoroughly before filling to help the cheesecake set faster and prevent melting.
- Bolded mini-head: When crushing biscuits, aim for uniform crumbs—this creates a stable, even crust that holds together.
- Bolded mini-head: Whip the cream cheese and sugar until completely smooth—lumps can throw off the creamy texture.
- Bolded mini-head: Fold whipped cream gently into the cheese mixture—this keeps the filling light and airy, not dense.
- Bolded mini-head: For a sleek top, smooth the filling with the back of a spoon or a small offset spatula before chilling.
- Bolded mini-head: If the filling cracks slightly when chilled, warm your spoon in hot water and smooth over the surface.
- Bolded mini-head: Use ripe, fragrant berries or fruit for toppings—freshness and aroma make all the difference.
Common mistakes and how to fix them
- FORGOT to chill jars before filling → Chill jars to prevent melting or shifting.
- DUMPED filling too quickly → Pour slowly to avoid disturbing layered textures.
- OVER-TORCHED crust → Bake at 180°C (350°F) for golden, not burnt, crumbs.
- MISSED mixing lemon zest thoroughly → Mix zest evenly for bright, aromatic flavor.
Quick fixes and pantry swaps
- When filling jars, splash a little hot water inside to melt any filling clumps quickly.
- If the filling cracks on top, patch with a dollop of leftover whipped cream and smooth gently.
- DUMPED crust too crumbly? Patch with a light drizzle of melted butter and press again.
- Splash a few drops of lemon juice if the filling tastes flat or dull, for an instant zing.
- Shield delicate toppings with a piece of parchment if crackling occurs during chilling.
Prep, store, and reheat tips
- Prepare the crust and filling up to 24 hours in advance; keep refrigerated to retain freshness and texture.
- Cover the jars tightly with lids or plastic wrap to prevent the cheesecake from absorbing fridge odors; store for up to 2 days.
- For best flavor, let the jars sit at room temperature for 10 minutes before serving to soften slightly and enhance aroma.
- Refrigerate leftovers for up to 2 days; avoid freezing, as the texture may become grainy and lose creaminess.
- When reheating, gently warm jars in a water bath or leave at room temperature; avoid microwave to prevent melting or cracking.
Top questions about no-bake jars
1. Can I use low-fat cream cheese?
Yes, using full-fat cream cheese gives the best creamy texture and tang. Lite versions tend to be less rich and may set less firmly.
2. Can I make these dairy-free?
Absolutely. You can swap graham crackers or gluten-free cookies for the biscuits, but the flavor and crunch might shift a bit.
3. How long should I chill the jars?
Chill the jars for at least 2 hours, but overnight is better. The filling firms up, making it easier to serve clean layers.
4. Can I make these in advance?
Yes, you can prepare the crust and filling a day ahead. Keep the assembled jars covered in the fridge overnight for optimal freshness.
5. My cheesecake is too runny, what do I do?
If your filling is runny, ensure you whip the cream to soft peaks and fold gently. Too much liquid can cause it to sink or separate.
6. Can I top these with frozen fruit?
Use fresh, ripe berries or fruit for toppings. Frozen works too but drain excess moisture to prevent sogginess.
7. Can I reheat these jars?
Yes, gently warming the jars in a water bath or letting them sit at room temperature for 10 minutes helps soften the filling slightly before serving.
8. My crust is crumbly, how to fix it?
If the crust is too crumbly, mix a little melted butter into the crumbs before pressing down. It helps the crust hold together better.
9. Why is my filling lumpy?
Always use room temperature cream cheese and whipped cream to ensure smooth mixing and fluffy texture in the filling.
10. How do I know when it’s set?
The jars should have a slight jiggle in the center when set. If it’s firm but still jiggles, it’s ready to serve.
These no-bake cheesecake jars are a small, satisfying way to indulge without the fuss. They feel a little more personal, a little more thoughtful, even when whipped up on a busy weeknight. It’s funny how something so simple can turn everyday ingredients into a moment of quiet celebration.
Whenever I stash a few in the fridge, I know I’ve got a quick treat ready to go—cool, creamy, just the right balance of tang and sweetness. No matter the occasion, they make dessert feel a little more special, even if it’s just for myself. Sometimes, that’s all you need on a hectic day.
Welcome to Proud of This Mess – a place where food, creativity, and a little chaos come together on a plate!
I’m Emily Carter, the founder and heart behind this little corner of the internet. Born and raised in the United States, I’ve always had a passion for cooking, experimenting, and sharing the messy, delicious journey of creating food that brings people together. My philosophy is simple: good food doesn’t have to be perfect, and a little mess makes it memorable.
At Proud of This Mess, we believe that cooking is more than just following recipes—it’s about exploring flavors, discovering new techniques, and making every meal an experience worth savoring. From comforting weeknight dinners to indulgent desserts, our goal is to inspire home cooks of all levels to embrace the joy of food without fear of imperfection.