
These no bake cheesecake cups are my go-to for busy days when I want something sweet but don’t have the energy to mess with a full cheesecake. They’re like tiny, portable bites of creamy bliss, perfect for grabbing on the go or serving at a casual gathering. Plus, they’re so easy to customize—swap in your favorite fruits or a splash of liqueur, and you’re set.
What I really love about these is how forgiving they are. No need to turn on the oven, no water bath fuss, just a quick mix and chill. They’re also great for making ahead—stack them in the fridge and forget about them until you’re ready to indulge. It’s a little baking hack that makes dessert feel less like a project and more like a treat you can toss together in minutes.
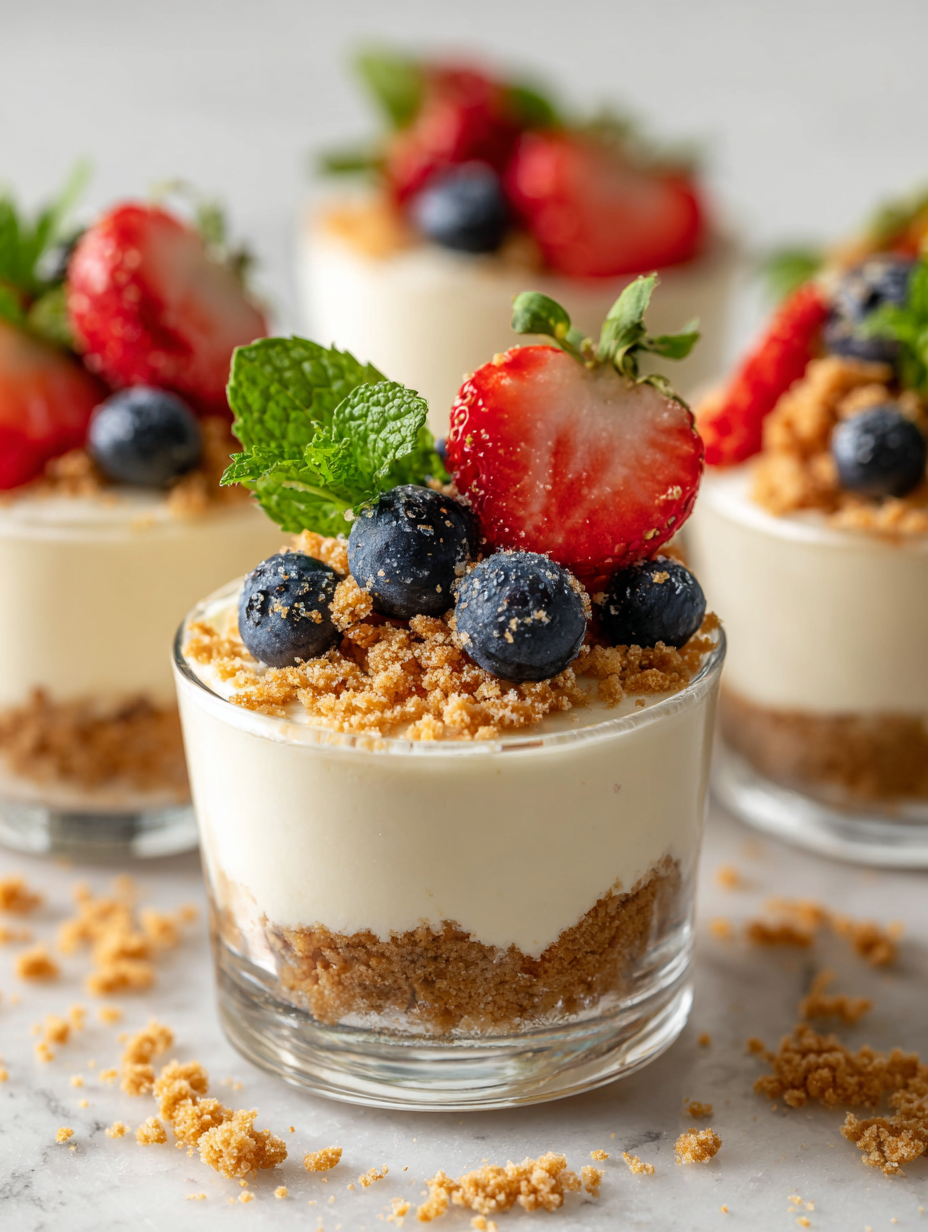
Focusing on how these individual cheesecake cups make for perfect, portable desserts that are easy to customize for any taste or occasion.
Individual Dessert Bliss
- These little cups remind me of lazy summer afternoons—simple, sweet, and just enough to satisfy that craving.
- I used to think making cheesecake was a whole ordeal, but these cups changed the game for me—quick, fuss-free, and still rich and creamy.
- There’s a quiet joy in customizing each cup—adding a sprinkle of chocolate, a dollop of fruit—and seeing how everyone’s eyes light up.
- I feel a bit nostalgic every time I make these; they take me back to my childhood desserts, just more grown-up and portable.
- Honestly, the best part is how they make hosting so much easier—no slicing, no mess, just individual bites of comfort.
The story behind this recipe
- I stumbled upon this recipe one rainy afternoon when I was desperately craving something sweet that wouldn’t take hours to prepare. It was a moment of pure practicality—no oven, no fuss, just creamy, cool satisfaction in tiny cups. That simple idea turned into a little tradition in my kitchen, especially for hot days or when I need a quick dessert fix.
- What started as a makeshift solution has become my go-to for unexpected guests or when I want to indulge without overthinking. I love how flexible it is—changing fruits, toppings, or even the base crust to keep things fresh and interesting. These cups remind me that sometimes, the simplest things are the most satisfying.
- heading: ‘My Inspiration for No Bake Cheesecake Cups’
Contextual origin, trivia, or history
- These cheesecake cups originated from a desire to enjoy dessert without the fuss of traditional baking, gaining popularity in the early 2000s with the rise of no-bake recipes.
- They trace back to classic New York-style cheesecake, simplified into individual portions that emphasize convenience and portability, perfect for picnics or picnics.
- In some regions, similar recipes were used as a way to make decadent desserts more accessible, using simple ingredients like cream cheese and graham crackers.
- The concept of mini, no-bake desserts aligns with modern trends toward personalized, smaller portions that reduce waste and allow for variety.
- These cups have become a symbol of casual, easy entertaining—highlighting how a simple idea can turn into a beloved dessert staple.
Ingredient breakdown: key components
- Cream cheese: I love how smooth and tangy this becomes when softened—use full-fat for richness, or low-fat if you’re watching calories, but don’t skimp on the creaminess.
- Graham cracker crumbs: They add a gentle, buttery crunch—consider swapping for digestive biscuits if you want a different flavor profile, but keep the texture crumbly and not too fine.
- Powdered sugar: It dissolves into the cream cheese easily, giving that delicate sweetness—if you prefer less sweet, cut back slightly, but don’t omit it entirely.
- Vanilla extract: A splash brightens everything—use vanilla bean paste for extra depth or skip if you want a more neutral flavor, but don’t forget the aroma it brings.
- Lemon juice: Brightens the cream cheese—freshly squeezed is best for zing, but bottled works in a pinch; avoid using too much to keep the balance gentle.
- Whipped cream: Lightens and aerates—chill your cream and beat just until soft peaks form, or use Greek yogurt for a tangy twist, but aim for a fluffy texture.
- Toppings: Fresh berries, chocolate shavings, or fruit compote—think about how each adds a burst of freshness or richness, and choose what suits your mood.
Spotlight on key ingredients
Cream cheese:
- I love how smooth and tangy this becomes when softened—use full-fat for richness, or low-fat if you’re watching calories, but don’t skimp on the creaminess.
- Graham cracker crumbs: They add a gentle, buttery crunch—consider swapping for digestive biscuits if you want a different flavor profile, but keep the texture crumbly and not too fine.
Lemon juice:
- Powdered sugar: It dissolves into the cream cheese easily, giving that delicate sweetness—if you prefer less sweet, cut back slightly, but don’t omit it entirely.
- Brightens the cream cheese—freshly squeezed is best for zing, but bottled works in a pinch; avoid using too much to keep the balance gentle.
Notes for ingredient swaps
- Dairy-Free: Swap cream cheese for coconut cream or dairy-free soft cheese. Expect a slightly different tang and creaminess.
- Gluten-Free: Use gluten-free digestive biscuits or almond flour instead of graham crackers. Keep the texture crumbly and rich.
- Sweetener Variations: Substitute powdered sugar with honey or maple syrup. Adjust quantity to taste, but it may alter the texture slightly.
- Flavor Boost: Add a splash of liqueur like Grand Marnier or Amaretto for extra depth—just a small amount, or it overpowers.
- Vegan Option: Use plant-based cream cheese and whipped coconut cream. Keep in mind it might be slightly less firm and more delicate.
- Fruity Toppings: Replace berries with chopped stone fruits or tropical fruits for a different fresh burst—consider their moisture content.
- Crust Base: Switch graham crackers for crushed cookies or nuts, which will add a different flavor and crunch.
Equipment & Tools
- Small cups or jars: To hold individual cheesecake servings for easy serving and portability.
- Mixing bowl: To combine and whip the filling ingredients smoothly.
- Spoon or small spatula: To fill and smooth the cheesecake mixture into cups neatly.
- Food processor or rolling pin: To crush graham crackers into fine crumbs efficiently.
- Refrigerator: To chill and set the cheesecakes thoroughly.
Step-by-step guide to no bake cheesecake cups
- Gather all your equipment: small cups or jars, a mixing bowl, a spoon, and a spatula. Having everything ready makes the process smoother.
- In a mixing bowl, soften 8 oz of cream cheese by leaving it at room temperature for about 15 minutes. It should be soft and spreadable, not oily or lumpy.
- Crush 1 cup of graham crackers into fine crumbs. You can do this in a zip-top bag with a rolling pin or use a food processor. Set aside.
- Add 2 tablespoons of melted butter and 1 tablespoon of sugar to the graham cracker crumbs. Mix until the crumbs look like wet sand and hold together when pressed.
- Divide the crumb mixture evenly among your cups or jars, pressing lightly to create a firm crust at the bottom. Chill briefly while you prepare the filling.
- In the same bowl with softened cream cheese, add 1/2 cup powdered sugar, 1 teaspoon vanilla extract, and 1 teaspoon lemon juice. Mix until smooth and creamy, about 2 minutes.
- Gently fold in 1 cup of whipped cream or whipped topping until fully incorporated. The mixture should be fluffy and light.
- Spoon the filling into each cup over the crust, smoothing the tops with the back of a spoon or small spatula. Leave a little space at the top for toppings.
- Chill the cups in the refrigerator for at least 4 hours, or preferably overnight. This allows the filling to set and flavors to meld.
- Just before serving, top with fresh berries, chocolate shavings, or a drizzle of fruit compote. Add a mint leaf for a fresh touch if desired.
Let the cheesecakes rest in the fridge for at least 4 hours or overnight. Just before serving, top with your favorite garnishes. Serve cold directly from the fridge for best texture and flavor.
How to Know It’s Done
- The filling should be firm yet creamy, with no liquid pooling on top.
- The crust should be set and crumbly, holding together when gently pressed.
- The cheesecake should jiggle slightly when shaken but not be runny or overly soft.
No Bake Cheesecake Cups
Ingredients
Equipment
Method
- Begin by crushing the graham crackers into fine crumbs using a food processor or by placing them in a zip-top bag and rolling over with a rolling pin. Set aside.
- Mix the crushed graham crackers with melted butter and sugar (if using) until the crumbs feel slightly moist and hold together when pressed.
- Divide the crumb mixture evenly among your small cups or jars, pressing down firmly with the back of a spoon to create a solid crust at the bottom. Chill in the fridge while you prepare the filling.
- In a mixing bowl, beat the softened cream cheese with powdered sugar, vanilla extract, and lemon juice until smooth and creamy. This should take about 2 minutes and will make the mixture light and fluffy.
- In a separate bowl, whip the chilled heavy cream until soft peaks form, then gently fold it into the cream cheese mixture, maintaining a fluffy texture.
- Spoon the creamy filling into each prepared cup over the crust, smoothing the tops with a small spatula or the back of a spoon. Leave some space at the top for toppings if desired.
- Refrigerate the cups for at least 4 hours, or ideally overnight, to allow the filling to set and flavors to meld beautifully.
- Just before serving, top each cheesecake cup with fresh berries, chocolate shavings, or your favorite toppings for a burst of flavor and color.
- Serve the chilled cheesecake cups straight from the fridge for a cool, creamy treat that’s perfect for any occasion.
Notes
Pro Tips for Perfect Cheesecake Cups
- Bolded mini-head: Chill the crust briefly before filling to help it set firmly and prevent sogginess.
- Bolded mini-head: Use softened cream cheese—leave it out at room temp for 15 minutes to avoid lumps and ensure smooth mixing.
- Bolded mini-head: Fold whipped cream gently into the filling—this preserves the airy texture and prevents deflation.
- Bolded mini-head: Mix lemon juice gradually—this brightens the flavor without curdling the cream cheese or thinning the mixture.
- Bolded mini-head: Press the crust mixture firmly into cups—this creates a solid base that won’t collapse when topped with filling.
- Bolded mini-head: Chill the assembled cups for at least 4 hours—this helps the filling set and flavors meld beautifully.
- Bolded mini-head: Top with fresh berries just before serving—this keeps them vibrant and juicy, adding fresh contrast.
Common mistakes and how to fix them
- FORGOT to chill the crust before filling? Chill it for 10 minutes to set properly.
- DUMPED the filling into warm cups? Wait until the filling is slightly chilled for easier handling.
- OVER-TORCHED the crust? Remove it once it turns golden-brown and smells toasted—don’t wait for dark edges.
- SKIPPED the sealing step? Cover tightly with plastic wrap to prevent fridge odors and drying out.
Quick fixes and pantry swaps
- When mixture is too runny, splash in a little more crushed graham cracker for firmness.
- If crust cracks when pressing in, patch with a tiny bit of melted butter and press again.
- Splash a few drops of lemon juice if filling tastes dull or flat.
- Patch a cracked cheesecake top by gently pressing on the crack and smoothing with a spoon.
- Shield the cups with plastic wrap if they develop condensation or if fridge smells interfere.
Prep, store, and reheat tips
- Preparing the crust and filling ahead of time allows flavors to meld; keep the crust dry and the filling covered tightly to prevent moisture absorption.
- Store assembled cheesecake cups in the fridge for up to 24 hours; the creamy texture stays firm, but avoid overlong storage which may cause separation or sogginess.
- For best freshness, add toppings like berries or chocolate just before serving; they can soften or bleed if stored too long on top.
- Refrigerate leftovers in an airtight container for up to 3 days; the texture remains good, but the filling may soften slightly over time.
- To reheat, gently warm in a low oven (about 90°C/194°F) for 5–7 minutes if you prefer a slightly softer, warmer dessert—watch for melting or separation.
Top questions about cheesecake cups
1. Can I use low-fat cream cheese?
Use full-fat cream cheese for the richest, smoothest texture. Low-fat can work but won’t be as creamy.
2. How long do I need to chill the cheesecake cups?
Chill the assembled cups for at least 4 hours, preferably overnight, to let the filling set properly.
3. Can I substitute graham crackers?
Yes, you can swap graham crackers for digestive biscuits or crushed cookies for different flavors and textures.
4. Can I add toppings ahead of time?
Adding fresh berries or fruit just before serving keeps them vibrant and prevents sogginess.
5. Should I use fresh lemon juice or bottled?
Use freshly squeezed lemon juice for a bright, zingy flavor. Bottled works, but may lack intensity.
6. What if my filling is too soft?
If the filling is too runny, fold in a bit more crushed graham cracker or let it chill longer.
7. How should I store leftovers?
Cover the cups tightly with plastic wrap to prevent fridge odors and drying out of the topping.
8. Can I reheat the cheesecake cups?
To reheat slightly, warm in a low oven for 5–7 minutes until just soft and fragrant, but not melted.
9. How do I fill the cups neatly?
Use a piping bag or a plastic bag with the tip cut off for neat, even filling.
10. When should I add toppings?
Add toppings like berries or chocolate just before serving to keep their texture and flavor fresh.
These cheesecake cups are a reminder that sometimes, the simplest ingredients and a little patience can deliver the most satisfying desserts. They’re perfect for spontaneous gatherings or just a quick treat after a long day. No matter the occasion, they bring a little cool, creamy joy that’s hard to beat.
And honestly, once you get the hang of customizing toppings and flavors, they become a little canvas for your creativity. It’s a no-fuss way to indulge without the fuss, and I find myself coming back to them whenever I need a quick, comforting sweet. No oven needed, just good ingredients and a moment to enjoy.
Welcome to Proud of This Mess – a place where food, creativity, and a little chaos come together on a plate!
I’m Emily Carter, the founder and heart behind this little corner of the internet. Born and raised in the United States, I’ve always had a passion for cooking, experimenting, and sharing the messy, delicious journey of creating food that brings people together. My philosophy is simple: good food doesn’t have to be perfect, and a little mess makes it memorable.
At Proud of This Mess, we believe that cooking is more than just following recipes—it’s about exploring flavors, discovering new techniques, and making every meal an experience worth savoring. From comforting weeknight dinners to indulgent desserts, our goal is to inspire home cooks of all levels to embrace the joy of food without fear of imperfection.