
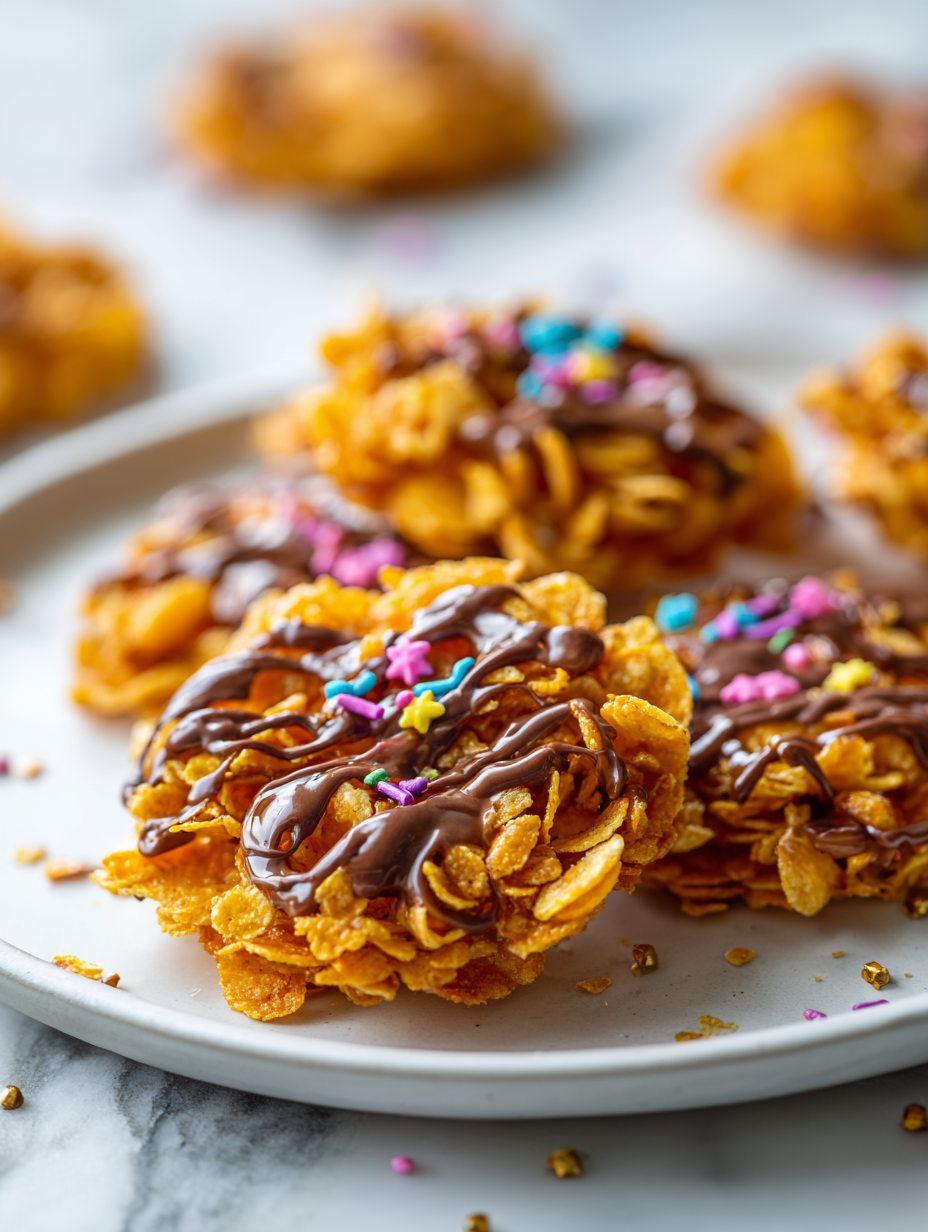
This no-bake cornflake cookies recipe is my go-to when I need a quick fix of nostalgia and sweetness. It’s the kind of treat that brings back lazy Sunday afternoons at my grandma’s house, where we’d mix, scoop, and wait for that satisfying crunch. No stove, no fuss—just pantry staples that turn into something special in minutes.
There’s something honest about these cookies. They’re imperfect, a little messy, and totally forgiving—perfect for days when I want to bake but don’t want to deal with the oven. Plus, the aroma of melted butter and vanilla filling the room feels like a warm hug from childhood, grounding me in simple pleasures amidst busy days.
This recipe is a nostalgic ode to my childhood, a simple treat I made with my grandma on lazy Sunday afternoons, learning the magic of turning basic pantry staples into something sweet and crunchy without ever turning on the stove.
A Childhood Treat Revisited
- Making these cookies always takes me back to lazy Sunday afternoons at my grandma’s, the smell of vanilla filling the kitchen.
- I love how forgiving this recipe is—mess up, and it still turns out sweet and crunchy, no fuss.
- There’s a quiet pride in turning simple pantry staples into something everyone reaches for.
A Childhood Treat Revisited
- This recipe is a nostalgic ode to my childhood, a simple treat I made with my grandma on lazy Sunday afternoons, learning the magic of turning basic pantry staples into something sweet and crunchy without ever turning on the stove.
- There’s something honest about these cookies. They’re imperfect, a little messy, and totally forgiving—perfect for days when I want to bake but don’t want to deal with the oven. Plus, the aroma of melted butter and vanilla filling the room feels like a warm hug from childhood, grounding me in simple pleasures amidst busy days.
- heading: ‘A Childhood Treat Revisited’
Historical Roots of No-Bake Cookies
- These cookies likely originated during the Great Depression, as a way to make simple ingredients stretch into a sweet treat.
- Cornflakes were invented in 1894 by John Harvey Kellogg, originally as a healthy breakfast, but soon became a popular base for no-bake desserts.
- The combination of sugar, butter, and cereal dates back to early 20th-century American kitchens, evolving into many no-bake variations over the decades.
Ingredient breakdown: key components
- Cornflakes: I love the crispy snap they give—make sure to crush them coarsely, so each bite is crunchy and satisfying.
- Butter: It’s the rich backbone of these cookies, melting into everything with a warm, oozing aroma—use good quality for depth.
- Sugar: I prefer a mix of brown and white sugar for complexity—if you want it less sweet, cut back slightly, but don’t skip the brown for that caramel note.
- Vanilla extract: It’s the secret to that nostalgic aroma—don’t skimp, or the flavor will feel flat and dull.
- Honey or corn syrup: Adds chewiness and gloss—if you skip, the cookies might be too crumbly and less shiny, so consider a splash of golden syrup if you like.
- Optional add-ins (peanuts, chocolate chips): I toss these in last—adds texture and surprise—skip if you want pure simplicity, but they bring a little joy.
- Cooking spray or parchment: I always line my pan—makes cleanup a breeze and prevents sticking, so your cookies come out perfect without fuss.
Spotlight on key ingredients
Cornflakes:
- I love the crispy snap they give—make sure to crush them coarsely, so each bite is crunchy and satisfying.
- Make sure not to break them into too fine a powder, or the cookies will lose their crunch.
Butter:
- It’s the rich backbone of these cookies, melting into everything with a warm, oozing aroma—use good quality for depth.
- Watch out for melting it over too high heat; it can brown quickly and develop a burnt smell.
Notes for ingredient swaps
- Dairy-Free: Swap butter for coconut oil or margarine. Expect a slightly different richness and a subtle coconut aroma.
- Sugar Alternatives: Use maple syrup or agave instead of refined sugar. These add unique flavors but may alter the crunch slightly.
- Gluten-Free: Choose gluten-free cornflakes or crispy rice cereal. Keep an eye on texture, as some substitutes can be softer.
- Sweetener Boost: Add a touch of molasses or honey for a deeper, more complex sweetness and richer color.
- Flavoring Variations: Incorporate a pinch of cinnamon or a splash of almond extract instead of vanilla for a different aromatic profile.
- Add-ins: Substitute chocolate chips or chopped nuts for optional inclusions. They add texture and flavor surprises.
- Cereal Choice: Try toasted oats or rice puffs to vary the crunch and flavor experience.
Equipment & Tools
- Parchment paper: Prevents sticking and makes cleanup easier.
- Large mixing bowl: Holds the cereal and mixture for easy folding.
- Saucepan: Melts butter and cooks sugar mixture.
- Spatula: Folds ingredients and scoops cookies.
- Teaspoon or small scoop: Forms evenly sized cookies.
Step-by-step guide to no-bake cookies
- Equipment & Tools: Line a baking sheet with parchment paper, use a large mixing bowl, and have a spatula ready for mixing and scooping.
- Measure ingredients: Pour 3 cups of cornflakes into a large bowl. Keep nearby for quick addition.
- Melt butter: In a small saucepan over low heat (about 90°C/194°F), melt 1/2 cup of butter slowly. Watch for a gentle bubbling; smell that rich, buttery aroma.
- Add sugar and syrup: Stir in 1 cup of sugar and 1/4 cup honey or corn syrup into the melted butter. Increase heat slightly to medium-low (about 130°C/266°F). When the mixture begins to simmer, cook for 2 minutes, stirring constantly. It should be glossy and thick.
- Flavor it up: Remove from heat. Stir in 1 teaspoon vanilla extract until fragrant. If it smells too faint, add an extra splash for that vanilla warmth.
- Combine: Pour the hot butter mixture over the cornflakes. Gently fold with a spatula to coat evenly, being careful not to crush the cereal. The mixture should be sticky and glossy.
- Scoop and shape: Using a spoon or small ice cream scoop, drop spoonfuls onto the prepared parchment. Slightly press down to compact each cookie. Work quickly before the mixture cools and hardens.
- Rest & set: Leave the cookies undisturbed at room temperature for about 30 minutes. They should firm up and become crunchy.
- Check for doneness: Cookies should be golden and firm when gently pressed, with a shiny exterior. If they feel soggy or crumbly, give them a few more minutes to cool and set.
- Final touches: Once set, transfer to a wire rack or serve directly. Store in an airtight container, layered with parchment if stacking, for up to a week.
Allow cookies to cool and set at room temperature for 30 minutes. Transfer to a plate or store in an airtight container. They’re best enjoyed once fully firm and crunchy.
How to Know It’s Done
- Color: Cookies turn golden and glossy when ready.
- Texture: They should be firm and crunchy when cooled.
- Appearance: Should hold shape without crumbling when pressed gently.
No-Bake Cornflake Cookies
Ingredients
Equipment
Method
- Line a baking sheet with parchment paper and set aside. Measure out three cups of cornflakes and crush them coarsely, aiming for a satisfying crunch in each bite.
- In a saucepan over low heat, melt the butter slowly until it just shimmers, filling the kitchen with a warm, nutty aroma.
- Add the sugar and honey (or corn syrup) to the melted butter, stirring constantly as the mixture begins to bubble and turn glossy. Continue cooking for about 2 minutes, maintaining a gentle simmer.
- Remove the saucepan from heat and stir in the vanilla extract until fragrant, making sure it’s well incorporated into the glossy mixture.
- Pour the hot butter mixture over the crushed cornflakes in the large bowl, gently folding with a spatula to coat each flake evenly without crushing them further. The mixture should be sticky and glossy.
- Using a teaspoon or small scoop, drop spoonfuls of the mixture onto the prepared parchment paper, pressing down slightly to shape the cookies and ensure they stick together.
- Leave the cookies at room temperature for about 30 minutes, allowing them to firm up and develop a crunchy exterior with a shiny, golden appearance.
- Once set and firm to the touch, transfer the cookies to a plate or keep them on the parchment. Store in an airtight container for up to a week, enjoying their nostalgic crunch whenever you like.
Notes
Pro tips for perfect cookies
- Bolded Mini-Head: Use fresh, crispy cornflakes for maximum crunch and a bright flavor in every bite.
- Bolded Mini-Head: Melt butter gently over low heat; it should just shimmer and smell nutty, not brown or burn.
- Bolded Mini-Head: When adding sugar, stir constantly until mixture is glossy and just begins to simmer—timing is everything.
- Bolded Mini-Head: Quickly fold in cereal to coat evenly but avoid crushing the flakes; they need to stay crunchy.
- Bolded Mini-Head: Scoop cookies onto parchment while mixture is still warm; it’s easier to shape and they set better.
- Bolded Mini-Head: Let the cookies cool completely at room temperature; they’ll become firm and crunch with a shiny finish.
- Bolded Mini-Head: If mixture starts to stiffen before scooping, warm it slightly over low heat for a few seconds to loosen.
Common mistakes and how to fix them
- FORGOT to stir: Always keep the sugar mixture moving to prevent burning or uneven cooking.
- DUMPED in too much: Measure carefully; too much sugar makes cookies overly sweet and crumbly.
- OVER-TORCHED mixture: Remove from heat immediately if it starts to turn dark or smell burnt.
- MISSED cooling time: Let the cookies sit at room temperature until fully firm before handling.
Quick fixes and pantry swaps
- When mixture is too stiff, splash a little hot water and stir until smooth.
- If cookies lack shine, gently brush with a bit of melted butter before cooling.
- Splash a pinch of salt into the sugar mixture to enhance sweetness and balance flavors.
- Patch cracked cookies by pressing small pieces into gaps before they set.
- Shield burnt mixture with a splash of cold water and stir quickly to recover.
Prep, store, and reheat tips
- You can prepare the cookie mixture a day in advance; keep it covered in the fridge to prevent drying out, and it will be easy to scoop later with a glossy sheen.
- Cookies store well in an airtight container at room temperature for up to a week. Expect them to remain crunchy and retain their vanilla aroma.
- For longer storage, freeze the cookies in a single layer, then transfer to a zip-top bag. They’ll keep for up to a month with minimal flavor loss.
- Reheat or refresh cookies by letting them sit at room temperature for 10 minutes; if they seem a bit soft, pop them in a 150°C/300°F oven for 3–5 minutes until crisp and fragrant again.
Top questions about no-bake cookies
1. Can I use different cereals?
Use crispy cornflakes for that perfect crunch and avoid overly crushed cereal, which can make the cookies soggy.
2. Can I substitute cornflakes with something else?
Yes, but expect a slightly different texture. Rice puffs or toasted oats work well for variation.
3. How do I know when the sugar mixture is ready?
Stir the mixture constantly over low heat until it just begins to simmer and turns glossy, about 2 minutes.
4. My mixture is too stiff to scoop, what now?
If the mixture cools and becomes too stiff to scoop, warm it gently over low heat for a few seconds.
5. How do I know when the cookies are ready?
Cookies are done when they are golden, firm, and shiny, with a crunchy exterior after cooling.
6. How should I store these cookies?
Store in an airtight container at room temperature for up to a week, layering with parchment to prevent sticking.
7. Can I freeze these cookies?
Yes, you can freeze them for up to a month. Thaw at room temperature for a few minutes before serving.
8. They become soft, how do I fix that?
If they turn soggy, re-crisp by placing them in a 150°C/300°F oven for 3–5 minutes until fragrant and crunchy.
9. Can I omit vanilla?
Yes, adding a splash of vanilla extract gives the cookies a warm, nostalgic aroma, but you can skip or substitute with almond extract.
10. Can I add other ingredients?
For a richer flavor, try adding chopped nuts or chocolate chips into the mixture before scooping.
These cookies are a quick reminder that sometimes the simplest ingredients, combined with a little patience, create something memorable. They’re perfect for those moments when you need a sweet fix without the fuss of baking or waiting. Plus, they bring back a comforting sense of childhood, no matter how busy life gets.
Next time you’re craving a nostalgic treat, grab the pantry staples and give these a try—you might find yourself reaching for them long after the first bite.
Welcome to Proud of This Mess – a place where food, creativity, and a little chaos come together on a plate!
I’m Emily Carter, the founder and heart behind this little corner of the internet. Born and raised in the United States, I’ve always had a passion for cooking, experimenting, and sharing the messy, delicious journey of creating food that brings people together. My philosophy is simple: good food doesn’t have to be perfect, and a little mess makes it memorable.
At Proud of This Mess, we believe that cooking is more than just following recipes—it’s about exploring flavors, discovering new techniques, and making every meal an experience worth savoring. From comforting weeknight dinners to indulgent desserts, our goal is to inspire home cooks of all levels to embrace the joy of food without fear of imperfection.