
These no-bake chocolate honey bars are like a warm hug from childhood, simple and honest. I love how they come together with just a handful of pantry staples, no oven needed. There’s something satisfying about mixing rich cocoa with sweet honey and pressing it all into a pan—no fuss, just pure, gooey goodness.
They’re perfect for when you want a treat but don’t want to mess around with complicated recipes or heating up the kitchen. Plus, they hold onto a nostalgic charm—reminding me of lazy afternoons and spontaneous sweet cravings. It’s a recipe that feels like a little secret, quick to make but deeply satisfying in flavor and texture.
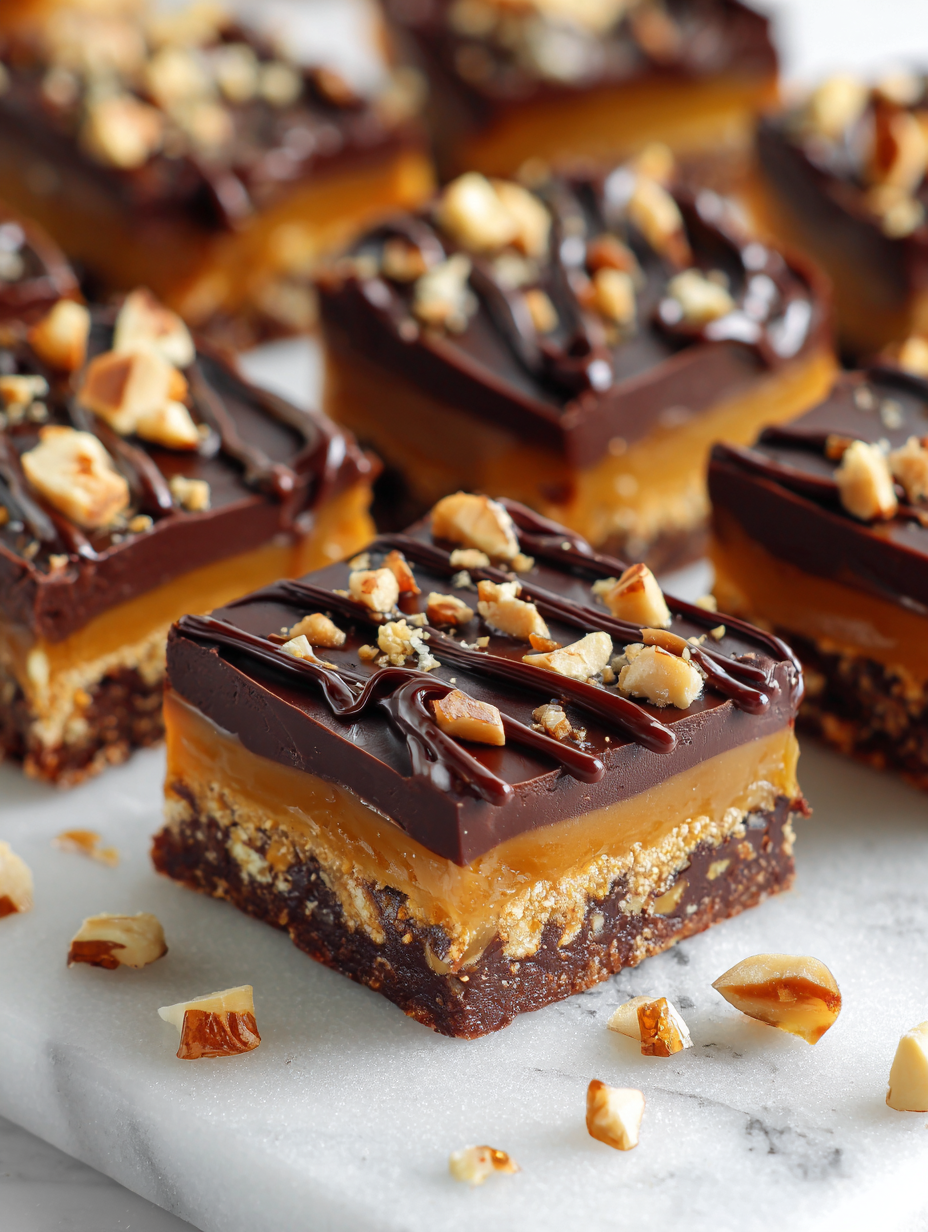
Focusing on how these bars serve as a nostalgic, no-fuss treat that bridges childhood memories with adult cravings, emphasizing the simple joy of combining rich chocolate and honey into a no-bake delight.
The story behind this recipe
- This recipe was born out of late-night cravings and a messy kitchen. I was looking for something quick, satisfying, and not requiring any oven time. The idea of mixing honey and chocolate stirred memories of simpler times—when treats were made with what you had on hand, no fuss, no waiting.
- Once, I accidentally dropped a spoonful of honey into my melting chocolate, and it created this beautiful swirl of amber and dark. That accidental moment made me realize how imperfect but delicious homemade treats can be. Now, I keep that messy, sweet memory alive with these bars—no bake, just pure, honest comfort.
- 3–4 bullets:
Ingredient breakdown: key components
- Chocolate: I prefer a good quality dark chocolate, it melts smoothly and gives a rich, deep flavor. If yours is too bitter, a touch of milk chocolate can mellow it out.
- Honey: It’s what binds these bars together with a glossy, sticky sweetness. Use raw honey for more floral notes, or a milder one if you want a subtler finish.
- Butter: I stick with unsalted, but if you only have salted, just cut back a pinch. The butter makes the texture velvety and helps the chocolate set firm.
- Oats: Rolled oats add crunch and substance. For a gluten-free version, opt for certified gluten-free oats—they still give that satisfying chew.
- Vanilla Extract: A splash enhances the chocolate-honey combo—think of it as the warm whisper that pulls everything together. Skip if you’re after a more intense honey flavor.
- Salt: Just a pinch, really. It heightens the chocolate’s richness and balances the sweetness—don’t skip this tiny magic touch.
- Optional Add-ins: Nuts or dried fruit—they add texture and surprise. Toast nuts first for extra aroma, or keep them raw for a softer crunch.
Spotlight on key ingredients
Chocolate, Honey, Butter:
- Chocolate: I prefer a good quality dark chocolate, it melts smoothly and gives a rich, deep flavor. If yours is too bitter, a touch of milk chocolate can mellow it out.
- Honey: It’s what binds these bars together with a glossy, sticky sweetness. Use raw honey for more floral notes, or a milder one if you want a subtler finish.
- Butter: I stick with unsalted, but if you only have salted, just cut back a pinch. The butter makes the texture velvety and helps the chocolate set firm.
Notes for ingredient swaps
- Dairy-Free: Swap butter for coconut oil or vegan butter. It’ll add a hint of coconut aroma, but still keep the texture rich.
- Sugar-Free: Use a sugar substitute like erythritol or honey alternative. Expect a slightly different sweetness profile and maybe less gooeyness.
- Chocolate: Dark chocolate can be replaced with semi-sweet or even milk chocolate for a sweeter, creamier bite. White chocolate adds a different, mellow sweetness.
- Oats: Replace rolled oats with crushed graham crackers for a buttery crunch or use shredded coconut for a chewy, tropical vibe.
- Honey: Maple syrup or agave nectar can work, but expect a slightly different flavor—more floral or caramel-y, with less sticky texture.
- Nuts: Use toasted or raw almonds, walnuts, or pecans; each brings a distinct crunch and aroma. For nut allergies, try seeds like pumpkin or sunflower.
- Add-ins: Dried fruit, coconut flakes, or mini marshmallows can be mixed in for variety. Toast nuts first for extra aroma and crunch.
Equipment & Tools
- 20x20cm (8×8 inch) baking dish: Holds the mixture and shapes the bars.
- Saucepan: Melts honey, butter, and chocolate evenly.
- Spatula: Stirs the mixture and spreads it smoothly.
- Parchment paper: Prevents sticking and makes removal easy.
- Sharp knife: Slices the set bars cleanly.
Step-by-step guide to no bake bars
- Gather your equipment: a 20x20cm (8×8 inch) baking dish, a saucepan, a spatula, and a parchment paper liner.
- Line the baking dish with parchment paper, leaving some overhang for easy removal later.
- In the saucepan, combine 1 cup (240ml) honey and 1/2 cup (115g) unsalted butter. Heat over low heat until melted, about 3-4 minutes, stirring gently.
- Add 2 cups (150g) of chopped dark chocolate to the warm honey-butter mixture. Stir continuously until smooth and glossy, about 2-3 minutes. Keep the heat low to prevent burning.
- Remove from heat. Stir in 1 teaspoon vanilla extract and a pinch of salt. Optionally, fold in 1 cup rolled oats or chopped nuts for texture.
- Pour the chocolate mixture into the prepared dish. Use a spatula to spread evenly, pressing down gently to fill all corners.
- Tap the dish on the counter a few times to settle the mixture and remove air bubbles.
- Place in the fridge for at least 2 hours, or until firm. The bars should be solid, shiny, and slightly crack when pressed.
- Once set, lift the bars out using the parchment overhang. Slice into squares or rectangles with a sharp knife.
- Serve immediately or store in an airtight container in the fridge for up to a week. For softer texture, let sit at room temperature for 10-15 minutes before serving.
Chill the bars in the fridge for at least 2 hours until firm. Lift out using the parchment paper, then cut into squares. Serve directly or store in an airtight container in the fridge for up to a week.
How to Know It’s Done
- Chocolate mixture is glossy and smooth, no lumps or graininess.
- Bars are firm and hold shape when cut, not sticky or overly soft.
- Edges are slightly crackled and shiny, indicating proper setting.
No-Bake Chocolate Honey Bars
Ingredients
Equipment
Method
- Line your baking dish with parchment paper, leaving some overhang for easy lifting later.
- In a saucepan over low heat, combine honey and butter, stirring gently until the mixture is smooth and fragrant, about 3-4 minutes.
- Add the chopped dark chocolate to the warm honey-butter mixture, stirring constantly until the chocolate is fully melted and glossy, about 2-3 minutes.
- Remove the saucepan from heat and stir in vanilla extract and a pinch of salt, blending until evenly incorporated.
- Pour the mixture into the prepared dish, then sprinkle in the oats. Use a spatula to gently fold and spread everything until evenly distributed.
- Press the mixture down firmly with the back of a spatula or your fingers to ensure it's compacted and level.
- Tap the dish gently on the counter to release any air bubbles and help the mixture settle evenly.
- Transfer the dish to the fridge and chill for at least 2 hours, or until the mixture is firm and set with a shiny, crackly surface.
- Once set, lift the bars out of the dish using the parchment overhang, then use a sharp knife to cut into squares or rectangles.
- Serve immediately or store in an airtight container in the fridge for up to a week. For a softer bite, let sit at room temperature for 10-15 minutes before enjoying.
Notes
Pro tips for perfect bars
- Bolded Mini-Head: Use a low, gentle heat → prevents chocolate from seizing or burning, keep it smooth and shiny.
- Bolded Mini-Head: Stir continuously → creates a silky, even melt and avoids lumps or scorched spots.
- Bolded Mini-Head: Test for glossiness → the mixture should be shiny and smooth before pouring, indicating perfect melting.
- Bolded Mini-Head: Tap the dish firmly → releases air bubbles and evens out the surface for a clean cut.
- Bolded Mini-Head: Chill thoroughly → allows the bars to set completely, ensuring clean slices and firm texture.
- Bolded Mini-Head: Use parchment overhang → makes removal and slicing easier, reduces mess and sticking.
Common mistakes and how to fix them
- FORGOT to watch the melting process → keep heat low and stir constantly.
- DUMPED too much honey → measure carefully to prevent overly sticky bars.
- OVER-TORCHED the chocolate → remove from heat once just melted to avoid bitterness.
- MISSED the parchment lining → use it for easy removal and clean slicing.
Quick fixes and pantry swaps
- When mixture is too thick → splash in a tiny bit of hot water and stir until smooth.
- If bars are too soft → patch with an additional layer of melted chocolate and chill again.
- Splash melted chocolate on the counter → shield with a damp cloth to prevent cracking as it cools.
- When honey is sticky and hard to measure → substitute with warm maple syrup, keeping the sweetness balanced.
- Dumped too much salt → rescue by rinsing briefly under cold water, then pat dry and add a pinch more chocolate to balance.
Prep, store, and reheat tips
- Prepare the chocolate mixture and line the pan ahead of time; it’s easiest to do the melting and pouring in advance, then chill later. The bars benefit from a few hours’ rest for the flavors to meld.
- Store the finished bars in an airtight container in the fridge for up to a week. The cool environment keeps them firm and glossy, with a rich, chocolate-honey aroma that deepens over time.
- Refrigerated bars will stay freshest for 4-5 days. For softer texture, let them sit at room temperature for about 10-15 minutes before serving—smell the cocoa and honey warm up nicely.
- To reheat or soften, briefly warm slices in the microwave at low power (20 seconds), watching for a glossy, oozy texture. Avoid overheating, or the chocolate may seize and turn dull.
Top questions about no bake bars
1. Can I use milk chocolate instead of dark?
Use a good quality dark chocolate for the best melt and flavor. Cheaper chocolates may seize or be grainy.
2. Can I substitute the honey with another sweetener?
Yes, but it will be sweeter and softer. Adjust the honey slightly if you prefer less sweetness.
3. How do I know when the bars are fully set?
Chill the mixture for at least 2 hours until firm and shiny. It should crack slightly when you press it.
4. Do I need to line the pan with parchment?
Use parchment paper to line your dish. It prevents sticking and makes slicing easier without cracking the bars.
5. How do I melt the chocolate without burning it?
Stir constantly over low heat to prevent burning. Remove from heat as soon as the chocolate is just melted for a glossy finish.
6. How long do these bars last in the fridge?
Store in an airtight container in the fridge for up to a week. Let sit at room temp for 10-15 minutes before serving for softer texture.
7. Can I add other ingredients like nuts or dried fruit?
Yes, you can add nuts, dried fruit, or shredded coconut for extra texture and flavor. Toast nuts first for aroma.
8. My mixture is too thick or too soft—what now?
If mixture is too thick to pour, splash in a teaspoon of hot water and stir until smooth. If too soft, chill longer.
9. How do I slice the bars neatly?
Use a sharp knife to cut the set bars, warming it slightly with hot water for cleaner slices.
10. How do I get a smooth, even surface?
When mixture is uneven or bubbly, tap the dish firmly on the counter to settle and remove air pockets.
These bars are a reminder that sometimes, the simplest ingredients can create the most satisfying treats. They’re perfect for spontaneous cravings or when you need a quick gift idea that feels personal and homemade. The rich chocolate and sweet honey meld into something that’s both nostalgic and just a little indulgent.
In times when the kitchen feels too busy or uninspired, these no-bake bars come through with their easy charm. Once you get the hang of the melting and mixing, they become a go-to for a little comfort—no oven required, just good, honest flavors.
Welcome to Proud of This Mess – a place where food, creativity, and a little chaos come together on a plate!
I’m Emily Carter, the founder and heart behind this little corner of the internet. Born and raised in the United States, I’ve always had a passion for cooking, experimenting, and sharing the messy, delicious journey of creating food that brings people together. My philosophy is simple: good food doesn’t have to be perfect, and a little mess makes it memorable.
At Proud of This Mess, we believe that cooking is more than just following recipes—it’s about exploring flavors, discovering new techniques, and making every meal an experience worth savoring. From comforting weeknight dinners to indulgent desserts, our goal is to inspire home cooks of all levels to embrace the joy of food without fear of imperfection.