
This no-bake chocolate peanut bar recipe is my go-to when I need a sweet fix that doesn’t require turning on the oven. It’s the kind of treat I stash in the freezer for those hectic days when dessert feels like a luxury I can’t afford. The best part? It’s simple enough that I can whip it up with whatever ingredients I have lingering in the pantry.
I remember the first time I made these bars after a long, chaotic day. The smell of melting chocolate and toasted peanuts filled my kitchen, instantly shifting my mood. It’s funny how something so straightforward can bring a sense of calm and satisfaction, especially when life feels a little off balance. These bars remind me that sometimes, the easiest recipes are the most rewarding.
This recipe is inspired by the chaos of a busy weeknight, where I need something sweet, satisfying, and quick. It’s about harnessing the comfort of childhood treats while embracing the imperfect, spontaneous moments in my kitchen.
The story behind this recipe
- This recipe came together on a rainy afternoon when I was craving something sweet but wanted to avoid the oven. I remembered a batch of peanut butter I had in the fridge and thought, why not make a quick bar? The first attempt was a mess—cracked, sticky, but still delicious—so I kept tweaking until it felt just right. Now, it’s my secret weapon for when I need a quick, satisfying fix that feels like a small victory.
- There’s something about the combination of salty peanuts and rich chocolate that feels like a warm hug, especially in the middle of a hectic day. I love how these bars are both nostalgic and practical—reminding me of childhood treats but with a grown-up twist that works in my busy life. They’re imperfect, spontaneous, and utterly addictive, a little chaos in every bite.
- heading
- story_type
Ingredient breakdown: key components
- Chocolate: I prefer a good quality semi-sweet, it melts smoothly and gives that rich, deep cocoa flavor. You can swap for dark or milk chocolate depending on your taste—just keep an eye on the sweetness level.
- Peanut Butter: Creamy peanut butter is my go-to—it blends easily and creates a silky, sticky base. If you like a bit of crunch, toss in some chopped roasted peanuts or use chunky peanut butter.
- Honey or Maple Syrup: I add a touch of honey for sweetness and a hint of floral aroma, but maple syrup works just as well—adds a smoky sweetness that pairs beautifully with chocolate.
- Butter: A splash of butter helps everything meld together smoothly and adds richness. If you’re dairy-free, coconut oil is a good substitute—just keep it cold until you melt it, to avoid greasing up your hands.
- Oats: I use old-fashioned oats—they give a satisfying chew and help hold the bars together. For gluten-free, make sure to select certified gluten-free oats to keep it safe.
- Salt: A pinch of sea salt enhances the chocolate and peanut flavors. Don’t skip it; it’s what makes everything pop and balances the sweetness.
- Optional Add-ins: Chopped pretzels, crushed graham crackers, or shredded coconut can be stirred in for extra texture and flavor—think of them as little surprises in each bite.
Spotlight on key ingredients
Chocolate & Peanut Butter:
- Chocolate: I prefer a good quality semi-sweet, it melts smoothly and gives that rich, deep cocoa flavor. You can swap for dark or milk chocolate depending on your taste—just keep an eye on the sweetness level.
- Peanut Butter: Creamy peanut butter is my go-to—it blends easily and creates a silky, sticky base. If you like a bit of crunch, toss in some chopped roasted peanuts or use chunky peanut butter.
Notes for ingredient swaps
- Dairy-Free: Swap butter for coconut oil—adds richness but a subtle coconut aroma. Keep in mind, it melts faster.
- Nut Butter: Use almond or cashew butter if peanut allergies are a concern—flavors are milder, textures slightly creamier.
- Sweetener: Maple syrup can replace honey for a smoky sweetness; it’s a bit thinner, so adjust quantities slightly.
- Chocolate: Dark chocolate can be substituted for semi-sweet—brings a deeper cocoa flavor, less sweet, more intense.
- Oats: Gluten-free oats work perfectly if you need a gluten-free version—just ensure they’re labeled gluten-free for safety.
- Add-ins: Crushed pretzels or shredded coconut can be stirred in—each adds a different crunch or chew, so choose based on texture preference.
- Peanut Butter: If unavailable, use sunflower seed butter—creamy and slightly earthier, but still sticky and satisfying.
Equipment & Tools
- Parchment paper: Line the dish for easy removal and cleanup.
- Microwave-safe bowl: Melt the chocolate evenly without overcooking.
- Saucepan: Toast oats and control heat for even roasting.
- Spatula: Mix ingredients thoroughly and smooth the top.
- Sharp knife: Slice the set bars cleanly.
Step-by-step guide to no bake bars
- Line a 20x20cm (8×8 inch) square baking dish with parchment paper, leaving some overhang for easy lifting.
- Gather your equipment: a microwave-safe bowl, a spatula, a small saucepan, and a mixing spoon.
- In the microwave-safe bowl, combine 200g (7 oz) of good-quality semi-sweet chocolate and 2 tablespoons of butter. Microwave in 30-second bursts, stirring each time, until smooth and melted (about 1-1.5 minutes).
- While the chocolate melts, toast 1 cup of oats in a dry skillet over medium heat until fragrant and lightly golden, about 3-5 minutes, stirring frequently. Let cool slightly.
- In a mixing bowl, stir together 1/2 cup of peanut butter, 1/4 cup of honey, and a pinch of salt until well combined and slightly runny.
- Add the toasted oats and 1/2 cup of chopped roasted peanuts to the peanut butter mixture. Mix until everything is evenly coated and sticky.
- Pour the melted chocolate into the peanut butter and oats mixture. Fold gently until fully incorporated and no streaks of chocolate remain.
- Transfer the mixture into your prepared dish. Use a spatula or the back of a spoon to press it evenly into the corners and smooth the top.
- Place the dish in the fridge for at least 2 hours, or until the bars are firm and set. For quicker setting, you can freeze for about 1 hour.
- Once set, lift the entire block out of the dish using the parchment overhang. Slice into 12 even squares with a sharp knife.
- Serve immediately or store in an airtight container in the fridge for up to a week. For longer storage, freeze the bars wrapped tightly in foil or plastic wrap.
Chill the bars until fully set, about 2 hours in the fridge or 1 hour in the freezer. Slice carefully and serve directly from the fridge for best texture. Keep leftovers in an airtight container in the fridge or freezer, depending on your preferred softness.
How to Know It’s Done
- Chocolate is smooth, glossy, and fully melted without lumps.
- The mixture feels sticky but manageable, holding together when pressed.
- Bars hold their shape and feel firm to the touch after chilling.
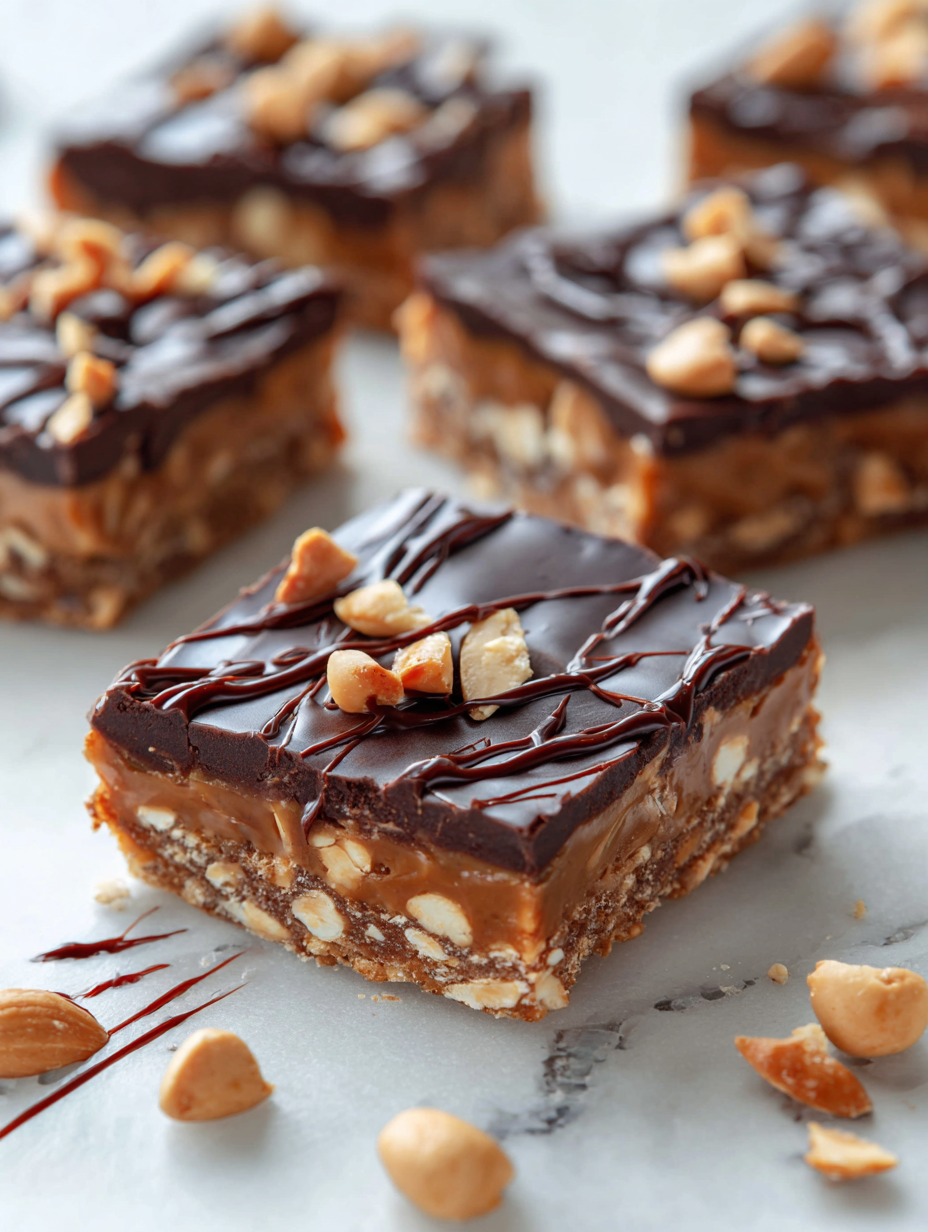
No-Bake Chocolate Peanut Bars
Ingredients
Equipment
Method
- Line an 8x8 inch dish with parchment paper, leaving some overhang for easy removal.
- Combine the chocolate and butter in a microwave-safe bowl. Microwave in 30-second bursts, stirring each time, until the mixture is smooth and glossy, about 1 to 1.5 minutes.
- Toast the oats in a dry skillet over medium heat until fragrant and lightly golden, about 3-5 minutes. Let them cool slightly.
- Stir together the peanut butter, honey, and a pinch of sea salt in a mixing bowl until smooth and slightly runny.
- Add the toasted oats and chopped peanuts to the peanut butter mixture. Fold gently until everything is coated and sticky.
- Pour the melted chocolate into the mixture. Fold until all ingredients are evenly combined and coated in chocolate.
- Transfer the mixture into your prepared dish. Use a spatula to press it firmly into the pan and smooth the top.
- Place the dish in the fridge for at least 2 hours, or freeze for about 1 hour, until the bars are firm and set.
- Once set, lift the entire block out of the dish using the parchment overhang. Slice into 12 even squares with a sharp knife.
- Serve immediately or store in an airtight container in the fridge or freezer. Enjoy these crunchy, chewy treats whenever you crave something sweet and satisfying!
Pro tips for perfect bars
- Use high-quality chocolate for a glossy, smooth melt that coats your palate with rich cocoa aroma.
- Toast oats until fragrant and golden; they develop a nutty aroma that adds depth and crunch.
- Melt chocolate in short bursts to avoid seizing; stir thoroughly for a silky, shiny finish.
- Chill the bars thoroughly—at least 2 hours—so they hold shape and melt-in-your-mouth texture.
- Press mixture firmly into the pan to eliminate air pockets and ensure even slicing.
- Add a pinch of salt to enhance sweetness and deepen chocolate and peanut flavors.
- Incorporate optional add-ins like crushed pretzels or shredded coconut for surprising bites and textures.
Common mistakes and how to fix them
- FORGOT to line the dish → Use parchment for easy removal and clean-up.
- DUMPED too much chocolate → Melt gradually, stir often, avoid overheating to prevent seizing.
- OVER-TORCHED the chocolate → Remove from heat once smooth; residual heat finishes melting.
- MISSED chilling time → Chill until bars are firm; under-chilled bars can be crumbly or too soft.
Quick fixes and pantry swaps
- If chocolate seizes, splash in a teaspoon of hot water and stir briskly.
- When bars are too crumbly, press them firmly back into the pan and chill again.
- Splash a little more honey or peanut butter if mixture feels too dry and crumbly.
- Patch cracks by gently pressing broken pieces together and chilling for 15 minutes.
- Shield melting chocolate from drafts or humidity to prevent blooming or dull sheen.
Prep, store, and reheat tips
- You can prepare the mixture a day ahead; keep it covered in the fridge to meld flavors and keep it from drying out.
- Store the finished bars in an airtight container in the fridge for up to a week; the cool keeps the chocolate firm and prevents melting.
- For longer storage, wrap bars tightly in plastic wrap and freeze for up to a month. Thaw in the fridge before serving for best texture.
- Refrigerate or freeze the bars to maintain firmness. Let sit at room temperature for 5-10 minutes before slicing if they feel too hard.
- Chilled bars develop a satisfying snap when bitten into, while at room temp they’re softer and more melt-in-your-mouth.
Top questions about no bake bars
1. Can I make these bars dairy-free?
Yes, you can substitute melted coconut oil for butter, which adds a subtle coconut aroma but keeps the bars rich and smooth.
2. Can I use natural or crunchy peanut butter?
Absolutely! Use natural peanut butter without added sugar for a more authentic, less sticky result.
3. What if my melted chocolate seizes?
Yes, melting chocolate can sometimes seize if it gets too hot. Stir in a teaspoon of hot water to smooth it out.
4. My bars are crumbly, what went wrong?
To avoid crumbly bars, make sure to press the mixture firmly into the pan and chill until set.
5. How do I get neat slices?
Use a sharp knife warmed slightly in hot water for clean, smooth slices without cracking or crumbling.
6. How long should I chill the bars?
Refrigerate the bars for at least 2 hours, or freeze for 1 hour for quicker setting and firmer texture.
7. Can I use maple syrup instead of honey?
You can swap honey for maple syrup, but expect a slightly different flavor and a bit more runny texture.
8. Should I add salt to the recipe?
Adding a pinch of sea salt enhances the chocolate and peanut flavors, balancing sweetness and richness.
9. What if I forget to line the pan?
If you forget to line your pan, use non-stick spray and a silicone mat to help remove the bars easily.
10. Can I add other ingredients?
For a crunchier texture, stir in chopped pretzels or shredded coconut before pouring into the pan.
These no-bake chocolate peanut bars are a little bit messy, a little bit nostalgic, and honestly, a relief to make when time is tight. They remind me that sometimes, the best treats come from spontaneous moments in the kitchen, not perfect techniques. Sharing them feels like passing around a secret—something small but satisfying, especially right now.
In the end, it’s about those quick bites of comfort, the kind that melt smoothly and leave a lingering peanut butter richness on your tongue. They’re imperfectly perfect, a little chaotic, and exactly what I need when life’s moving too fast. Sometimes, all you want is a simple, honest treat—these bars deliver that in every crumb.
Welcome to Proud of This Mess – a place where food, creativity, and a little chaos come together on a plate!
I’m Emily Carter, the founder and heart behind this little corner of the internet. Born and raised in the United States, I’ve always had a passion for cooking, experimenting, and sharing the messy, delicious journey of creating food that brings people together. My philosophy is simple: good food doesn’t have to be perfect, and a little mess makes it memorable.
At Proud of This Mess, we believe that cooking is more than just following recipes—it’s about exploring flavors, discovering new techniques, and making every meal an experience worth savoring. From comforting weeknight dinners to indulgent desserts, our goal is to inspire home cooks of all levels to embrace the joy of food without fear of imperfection.