Blog

  • Spidey Snacks: The Halloween Cheese Ball That Steals the Show

    Spidey Snacks: The Halloween Cheese Ball That Steals the Show

    Few treats bring the perfect blend of spooky fun and cheesy goodness like this Halloween Spider Cheese Ball. Its daring design sparks immediate giggles in kids and adults alike, making it the centerpiece of any haunted gathering. Crafting it is an act of playful chaos that transforms simple ingredients into a creeping, crawly delight.

    The secret lies in the surprise of each bite—creamy cheese coated in crunchy arachnid legs, ready to be gobbled up. As the aromas of garlic, herbs, and toasted cheese mingle, the holiday spirit ignites. This recipe isn’t just food; it’s a little creature living on your platter that invites giggles and glee.

    **WHY I LOVE THIS RECIPE?**

    • I adore how it sparks kids’ fascination with food, turning snack time into playtime.
    • The combination of textures—smooth cheese and crispy pretzels—feels insanely satisfying.
    • Seeing everyone’s reactions when they see the spider—priceless chaos!
    • It’s surprisingly easy to assemble, a quick costume for cheese that walks right onto the platter.
    • Perfect for Halloween parties—quirky, charming, and utterly delicious.

    **AVOID MY DISASTER (You’re Welcome)**

    • FORGOT to chill the cheese—ended up with a sticky, unshapely spider. Chill before shaping!
    • DUMPED too much paprika—made it look muddy. Start small, build up colour.
    • OVER-TORCHED the pretzel legs—bitter taste. Keep an eye, toast lightly and evenly.
    • MISSED the glue—poorly stuck legs kept falling. Use cream cheese as the perfect adhesive.

    **QUICK FIXES THAT SAVE YOUR DAY**

    • WHEN legs fall off—use a drop of warm cream cheese to reattach and tighten.
    • SPLASH extra herbs—fresh thyme or rosemary add a vibrant aroma and fresh flavor.
    • PATCH any cracks—smear with more cheese mixture, smoothing with a spatula.
    • SHIELD with plastic wrap—keep your cheese ball cool and prevent drying out.
    • When cheese feels too soft—pop into the fridge for 10 minutes to firm up.

    Halloween Spider Cheese Ball

    This Halloween Spider Cheese Ball is a creamy, cheesy mixture shaped into a round spider, with crunchy pretzel legs attached to mimic a creepy arachnid. The cheese ball is decorated with additional herbs and spices, creating a playful, textured centerpiece that combines smooth, soft cheese with crispy legs for a fun and flavorful appetizer.
    Prep Time 20 minutes
    Cook Time 10 minutes
    Total Time 30 minutes
    Servings: 8
    Course: Main Course
    Cuisine: Halloween
    Calories: 150

    Ingredients
      

    • 8 oz cream cheese, softened not cold from the fridge, to make mixing easier
    • 1 cup shredded cheddar cheese
    • 2 cloves garlic, minced
    • 1 teaspoon dried herbs (thyme or rosemary) optional, for flavor and decoration
    • to taste paprika for color and flavor
    • 20 pretzels pretzel rods or knots to be used as spider legs
    • Additional herbs fresh thyme or rosemary for garnish and aroma

    Equipment

    • Mixing bowl
    • Spatula

    Method
     

    1. Combine the softened cream cheese and shredded cheddar in a mixing bowl, stirring with a spatula until smooth and well incorporated.
    2. Add the minced garlic and herbs, then mix again until fragrant and evenly distributed throughout the cheese mixture.
    3. Sprinkle a tiny bit of paprika over the mixture for a light orange tint, then fold it in gently to incorporate the color.
    4. Shape the cheese mixture into a round ball and place it on a serving plate. Chill in the refrigerator for about 10 minutes to help it firm up.
    5. Once chilled, take the cheese ball out of the fridge, and to assemble the spider, insert pretzel rods into the sides of the cheese ball to resemble legs. Use a dab of extra cheese or cream cheese as glue if any legs need extra support.
    6. Arrange the pretzel legs evenly around the cheese ball, pressing gently so they stay secure.
    7. Add a few sprigs of fresh thyme or rosemary on top for a creepy, festive look and fresh aroma.
    8. Optional: sprinkle additional paprika or herbs over the top for more color and flavor.
    9. Serve the Halloween Spider Cheese Ball chilled with plenty of chips, crackers, or veggie sticks around for grabbing.

    This Halloween, having a playful centerpiece like this spider cheese ball can turn a simple party into a memorable event. Its friendly, creepy appearance hides a rich, tangy flavor that can’t be ignored. Plus, the process of making it adds a touch of chaos and joy to the holiday prep.

    As the night settles, slices of this creepy crawler will vanish quickly, leaving behind smiles and satisfied tummies. Beyond the scare factor, it’s a reminder that food can be as fun and unexpected as a Halloween costume. Enjoy crafting this creature, and let the good times crawl along!

  • The Unusual Charm of Spiced Pumpkin Muffins with a Surprise Twist

    The Unusual Charm of Spiced Pumpkin Muffins with a Surprise Twist

    As the leaves turn golden and the air takes on a chill, pumpkin recipes surge in popularity. But today, I want to take pumpkin muffins beyond the usual cinnamon sweetness. Imagine a hint of smoky paprika intertwined with warm spices, adding a whisper of sophistication to a cozy classic.

    This recipe is about embracing imperfect mornings. The aroma of toasted pumpkin seeds mingling with nutty undertones creates a sensory journey before you even take a bite. Sweet, spicy, with an unexpected savory edge — it’s a new way to appreciate fall’s most iconic squash.

    Whether you’re baking for a brunch spread or craving a snack that sparks conversation, this muffin offers something different. It’s easy enough to whip up in under thirty minutes, yet impressive enough to make you feel like a kitchen wizard. Fall in love with pumpkin all over again, with a twist you won’t see coming.

    Smoky Pumpkin Muffins with Toasted Seeds

    These pumpkin muffins are baked with warm spices and a hint of smoky paprika, creating a balanced blend of sweet, spicy, and savory flavors. Topped with toasted pumpkin seeds, they have a moist, tender crumb and a nutty aroma, making them a cozy fall treat.
    Prep Time 20 minutes
    Cook Time 15 minutes
    Total Time 35 minutes
    Servings: 12
    Course: Main Course
    Cuisine: American
    Calories: 210

    Ingredients
      

    • 1 1/2 cups all-purpose flour
    • 1/2 cup brown sugar
    • 1 teaspoon baking soda
    • 1/2 teaspoon ground cinnamon
    • 1/2 teaspoon ground nutmeg
    • 1/4 teaspoon smoked paprika
    • 1/4 teaspoon salt
    • 1 cup pure pumpkin puree
    • 1/3 cup vegetable oil
    • 2 large eggs
    • 1 teaspoon vanilla extract
    • 1/4 cup pumpkin seeds for topping, toasted until golden

    Equipment

    • Mixing bowls
    • Whisk
    • Muffin tin
    • Silicone spatula
    • Toaster or oven for toasting pumpkin seeds

    Method
     

    1. Preheat your oven to 375°F (190°C) and line a muffin tin with paper liners or grease it lightly.
    2. In a large mixing bowl, whisk together the flour, brown sugar, baking soda, cinnamon, nutmeg, smoked paprika, and salt. This ensures the dry ingredients are well combined and free of lumps.
    3. In a separate bowl, stir together the pumpkin puree, vegetable oil, eggs, and vanilla extract until the mixture is smooth and slightly frothy.
    4. Pour the wet ingredients into the dry mixture and gently fold everything together with a silicone spatula until just combined. Be careful not to overmix to keep the muffins tender.
    5. Divide the batter evenly among the muffin cups, filling each about three-quarters full. This helps the muffins rise evenly.
    6. Top each muffin with a few pumpkin seeds, lightly pressing them into the batter for a toasted, nutty crunch.
    7. Bake in the preheated oven for about 15 minutes, or until the muffins are golden brown and a toothpick inserted in the center comes out clean.
    8. Once baked, remove the muffins from the oven and allow them to cool in the tin for a few minutes. Then transfer to a wire rack to cool completely.
    9. Enjoy the muffins warm or at room temperature, with the toasted pumpkin seeds adding a delightful crunchy contrast.

    Notes

    For extra flavor, sprinkle a pinch of smoked paprika on top before baking. Muffins can be stored in an airtight container for up to two days or frozen for longer storage.

    These muffins are a testament to the charm of unexpected flavor combinations. They turn what could be just another fall snack into a memorable treat that sparks curiosity and joy.

    Today’s pumpkins do more than just adorn porch steps; they inspire new baking adventures. As the season shifts, I find comfort in experimenting with familiar ingredients that, with a twist, open up a world of flavors.

  • The Art of Chilling: Oreo Slushie Secrets You Never Knew

    The Art of Chilling: Oreo Slushie Secrets You Never Knew

    Imagine holding a glass of deep, icy blackness, the sweet aroma of Oreo cookies wafting up with each chilled sip. My obsession with this Oreo slushie started during a sticky summer, when I craved something both nostalgic and shockingly refreshing. It’s the kind of treat that feels like a secret weapon against relentless heat.

    This recipe isn’t just about blending cookies and ice—it’s about capturing a moment of pure, frosty delight that awakens childhood memories. Every sip gives you that satisfying crunch of crushed Oreos combined with smooth, cold creaminess, a perfect harmony of flavor and texture. It’s funny how such simple ingredients can turn into a magic potion in no time.

    Oreo Slushie

    The Oreo slushie is a cold, frosty blended beverage made with crushed Oreo cookies, ice, and milk, resulting in a smooth and creamy texture with crunchy cookie bits. It is prepared by combining ingredients in a blender until thick and icy, then serving chilled. The final appearance features a dark, speckled drink with a rich, indulgent aroma.
    Prep Time 10 minutes
    Total Time 10 minutes
    Servings: 2
    Course: Main Course
    Cuisine: global
    Calories: 250

    Ingredients
      

    • 8 cookies Oreo cookies preferably chilled
    • 2 cups ice cubes adjust for desired thickness
    • 1 cup milk cold, preferably whole or 2%
    • 2 tbsp sugar optional, for added sweetness

    Equipment

    • Blender
    • Measuring cups and spoons

    Method
     

    1. Place the Oreo cookies into the blender and pulse a few times until finely crushed, releasing their chocolatey aroma.
    2. Add the ice cubes to the crushed Oreos, then pour in the cold milk. Drizzle in sugar if you want extra sweetness.
    3. Secure the lid on the blender and blend on high speed until the mixture is thick, creamy, and well combined, about 30-45 seconds. You should see a frosty, slightly chunky texture with tiny cookie bits visible.
    4. Stop the blender and check the consistency; blend a few seconds more if you prefer it smoother, or less if you’d like more cookie crunch.
    5. Pour the Oreo slushie into glasses, feeling the cold frost on the outside as you do so. The dark, speckled drink should be thick and icy, with bits of Oreo visible throughout.
    6. Serve immediately, garnished with a whole Oreo or a drizzle of chocolate syrup if desired. Enjoy the rich, crunchy, and creamy treat right away.

    Notes

    For a creamier texture, use less ice or blend for a longer time. Adjust sweetness by varying sugar or adding flavored syrups.
    The beauty of this Oreo slushie lies in its simplicity. It’s perfect for quick gatherings or solo indulgence on a hot afternoon. Plus, it’s a breeze to customize—add a shot of milk for extra creaminess or a dash of cocoa powder for a richer flavor.

    Whether you’re reminiscing about carefree summer days or just need a quick weekend pick-me-up, this recipe fits right in. It’s all about celebrating the little joys that keep us cool and smiling through everyday chaos.

  • Hidden Gem Stuffed Peppers: A Comfort Food Reimagined

    Hidden Gem Stuffed Peppers: A Comfort Food Reimagined

    Imagine biting into a roasted pepper that’s bursting with a symphony of flavors—cheddar, herbs, and a hint of smoky paprika. These stuffed peppers are my unconventional take on a childhood favorite, elevated with unexpected ingredients that add a touch of sophistication. They’re perfect for when you want a nutritious, satisfying meal with a surprising twist.

    What makes these peppers special isn’t just the taste but the method—stuffing them with a savory mixture that feels like a warm hug. The vibrant colors and the roasted aroma make it feel like a festive occasion, even on an ordinary weeknight. They’re a canvas for creativity and a reminder that comfort food can be both elegant and easy.

    Stuffed Roasted Peppers with Cheddar and Herbs

    These roasted peppers are filled with a savory mixture of cheddar cheese, fresh herbs, and smoky paprika, then baked until tender and golden. The dish features vibrant, caramelized peppers with a warm, cheesy interior that offers a comforting yet flavorful experience.
    Prep Time 20 minutes
    Cook Time 30 minutes
    Total Time 50 minutes
    Servings: 4
    Course: Main Course
    Cuisine: fusion
    Calories: 250

    Ingredients
      

    • 4 large bell peppers preferably red, yellow, or orange
    • 1 cup cheddar cheese shredded
    • 1/4 cup fresh herbs such as parsley, basil, or chives, chopped
    • 1 tsp smoked paprika
    • 2 cloves garlic minced
    • 1 tbsp olive oil
    • to taste salt and pepper

    Equipment

    • Baking sheet
    • Mixing bowl

    Method
     

    1. Preheat your oven to 400°F (200°C). Rinse the peppers, then slice the tops off and remove seeds and membranes carefully to create a hollow cavity in each.
    2. In a mixing bowl, combine the shredded cheddar, chopped herbs, minced garlic, smoked paprika, and a drizzle of olive oil. Mix until well blended and the ingredients are evenly distributed.
    3. Stuff each pepper cavity generously with the cheese and herb mixture, pressing down gently to pack the filling in evenly.
    4. Place the stuffed peppers upright on a baking sheet lined with parchment paper or a silicone mat. Drizzle the outside of the peppers with a bit of olive oil and season with salt and pepper.
    5. Bake in the preheated oven for about 25-30 minutes, until the peppers are softened and lightly caramelized, and the cheese is bubbling and golden.
    6. Remove the peppers from the oven and let them cool slightly for a few minutes. The peppers will be tender with a crispy top layer of cheese and fragrant herbs.

    Notes

    For extra flavor, add a splash of balsamic glaze before serving or sprinkle with additional fresh herbs.

    As the peppers come out of the oven, their skin glistens with melted cheese and a fragrant that invites lingering. This dish truly speaks to those who savor simple ingredients transformed with a touch of magic. It’s a reminder that sometimes, the best recipes are the ones that inspire you to think differently about familiar flavors.

    Whether you’re a seasoned cook or a curious beginner, these stuffed peppers are a treat to prepare and enjoy. They fit perfectly into any season or occasion, bringing comfort and color to the table. Sometimes, food that surprises us is the most memorable of all.

  • The Secret Spark of a Sprite Slushie: A Nostalgic Frozen Fiesta

    The Secret Spark of a Sprite Slushie: A Nostalgic Frozen Fiesta

    Imagine a scorching summer day when all you crave is a burst of citrusy sweetness. Now, picture transforming that craving into a playful, frosty treat that dances on your tongue. The sprite slushie offers more than just cold refreshment; it’s a nostalgic swirl of childhood memories and a modern twist perfect for hot afternoons.

    This quirky recipe turns everyday soda into a sparkling snowstorm of flavor. The secret lies in how the simple ingredients come together—frozen, fizzy, and fantastic. Whether you’re looking to surprise guests or just enjoy a quiet moment of chill, this slushie is your new best friend.

    Sprite Slushie

    The Sprite Slushie is a cold, fizzy dessert made by blending frozen Sprite with ice to create a slushy, icy texture. It features a bright citrus flavor with a sparkling finish, resulting in a vibrant, snow-like beverage. Its fluffy, icy appearance makes it perfect for hot days or as a fun, refreshing treat.
    Prep Time 10 minutes
    Total Time 10 minutes
    Servings: 2
    Course: Main Course
    Cuisine: Modern
    Calories: 120

    Ingredients
      

    • 2 cups Frozen Sprite Pour the Sprite into a freezer-safe container and freeze until solid
    • 1 cup Ice cubes Keeps the slushie icy and thick

    Equipment

    • Blender
    • Measuring cups and spoons

    Method
     

    1. Place the frozen Sprite and ice cubes in a blender.
    2. Blend on high speed until the mixture is smooth, thick, and slushy, with a frosty appearance.
    3. Check the texture; if it’s too thick, add a splash of Sprite to loosen, then blend briefly to combine.
    4. Pour the slushie into glasses, using a spoon to help fill the cups if needed.
    5. Serve immediately with a straw or spoon, enjoying the icy, bubbly texture.

    Notes

    For best results, freeze the Sprite in a shallow container to allow for quick, even freezing. Adjust the amount of ice for a thicker or thinner slushie depending on preference.
    As the ice crystals melt into your mouth, you’ll realize this isn’t just a frozen beverage—it’s a celebration of the little moments of joy in everyday life. The fizz, the sweet-tart punch, and that slushy texture remind us that sometimes, happiness is just a spoonful away.

    So next time you want an escape from the heat or a throwback to simpler days, reach for this sprite slushie. It’s perfect for spontaneous gatherings or solo refreshment. Keep the ice ready, the soda chilled, and enjoy the chaos and calm it brings.

  • Unveil the Secret Spice in My Fall Roasted Pumpkin Soup

    Unveil the Secret Spice in My Fall Roasted Pumpkin Soup

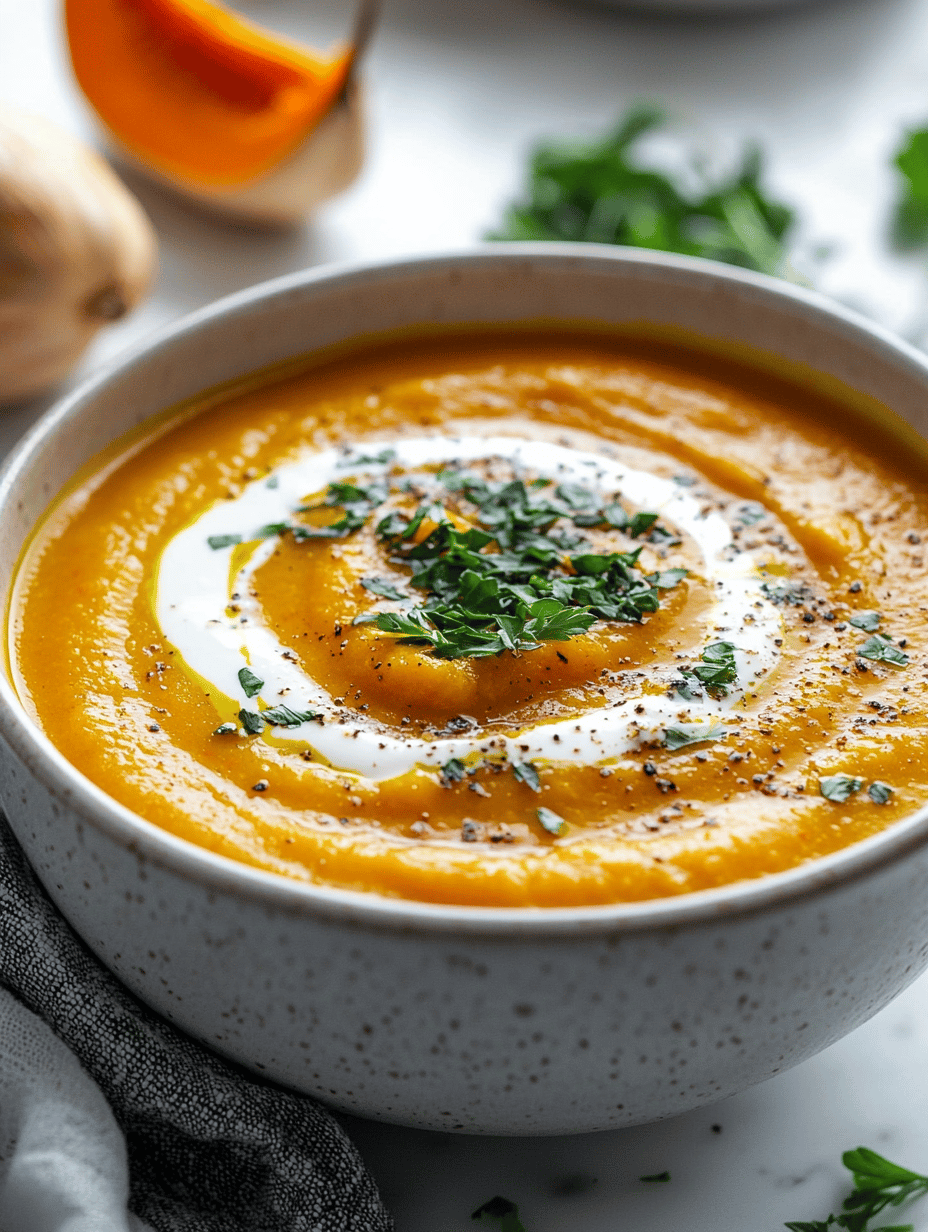
    As the leaves turn crisp and the air takes on a cozy chill, I find myself craving a bowl that offers more than just warmth. This isn’t your usual pumpkin soup; I sprinkle in a pinch of smoked paprika that gives it a subtle smoky kiss, reminiscent of autumn campfires. The aroma alone can teleport you to a forest filled with fallen leaves and crackling flames.

    Every spoonful is a reminder of late afternoons spent in the kitchen, experimenting with spices that tell their own story. Roasting the pumpkin enhances its natural sweetness, creating a velvety base that’s deeply comforting. I love how the simple act of roasting transforms a humble vegetable into a rich, flavorful experience.

    Roasted Pumpkin Soup with Smoked Paprika

    This pumpkin soup is made by roasting chunks of pumpkin until tender to bring out their natural sweetness, then blending them into a smooth, velvety puree. It is seasoned with smoked paprika, which adds a subtle smoky flavor that enhances its cozy, autumnal character. The final dish has a creamy texture and rich, warm aroma, perfect for cooler days.
    Prep Time 15 minutes
    Cook Time 40 minutes
    Total Time 55 minutes
    Servings: 4
    Course: Main Course
    Cuisine: Seasonal
    Calories: 150

    Ingredients
      

    • 1 kg pumpkin preferably sugar pumpkin or butternut squash
    • 2 tablespoons olive oil for tossing pumpkin pieces
    • pinch smoked paprika adds smoky flavor
    • 1 medium onion diced
    • 2 cloves garlic minced
    • 4 cups vegetable broth or chicken broth
    • 1/2 cup heavy cream optional for richness
    • to taste salt and pepper

    Equipment

    • Baking sheet
    • Blender or immersion blender
    • Large pot

    Method
     

    1. Preheat your oven to 400°F (200°C). Toss the pumpkin chunks with olive oil and spread them evenly on a baking sheet. Roast for about 30-40 minutes until they’re tender and slightly caramelized, filling the kitchen with a sweet roasted aroma.
    2. While the pumpkin roasts, chop the onion and mince the garlic. In a large pot, sauté the onion in a little olive oil over medium heat until it becomes translucent and soft, about 5 minutes. Add the minced garlic and cook for another minute until fragrant.
    3. Once the pumpkin is roasted and cool enough to handle, add it to the pot with the sautéed onions and garlic. Pour in the vegetable broth, which will help blend everything smoothly.
    4. Bring the mixture to a gentle boil, then reduce the heat and let it simmer for about 10 minutes to allow flavors to meld. Use an immersion blender or transfer to a regular blender to blend the soup until smooth and creamy. Be cautious with hot liquids—blend in batches if needed.
    5. Return the blended soup to the pot if you’ve used a stand blender. Stir in the heavy cream for added richness and sprinkle in smoked paprika for that signature smoky flavor. Season with salt and pepper to taste.
    6. Warm the soup gently over low heat until heated through, about 5 minutes. Give it a final taste and adjust seasoning if necessary.
    7. Serve the soup hot, garnished with a drizzle of cream or a sprinkle of extra smoked paprika if desired. Pair with crusty bread for a complete autumn-inspired meal.

    When the first bowl is empty, I already start thinking about the next. It’s perfect for casual family dinners or a cozy weekend brunch with friends. The best part? It comes together quickly, allowing me to indulge in the season’s bounty without the fuss.

    This roasted pumpkin soup isn’t just a meal; it’s a small celebration of fall’s beauty and comfort. Every simmer fills my home with warm, enticing smells that linger long after the bowl is finished. And as the cool evenings settle in, I know I have a pot of this magic ready to go.

  • Chill with a Twist: The Blueberry Slushie Secret

    Chill with a Twist: The Blueberry Slushie Secret

    In the heat of summer, I stumbled upon an unexpected way to enjoy blueberries that’s both refreshing and slightly chaotic. This blueberry slushie isn’t your average frozen fruit treat; it’s a whirlwind of cold-sweetness with a zing of citrus and a whisper of mint. The secret? A touch of vinegar that amplifies the berries’ natural warmth and makes each sip a surprising delight.

    What sets this recipe apart is its playful simplicity and the chance to experiment with basic ingredients lurking in your pantry. I’ve spun this at lazy brunches and spontaneous backyard gatherings, and it always earns a few giggles. It’s not just a drink; it’s your new summer sidekick that’s as unpredictable as a sudden breeze on a hot day.

    Blueberry Citrus Slushie with Mint and Vinegar

    This blueberry slushie is a cold, refreshing drink made by blending fresh blueberries with citrus juice, mint leaves, and a splash of vinegar to enhance the fruit’s natural warmth. The mixture is frozen until slushy and smooth, resulting in a vibrant, icy beverage with a slightly tangy kick and a hint of mint. Its final appearance is a vivid, frosty purple with tiny flecks of mint and citrus zest throughout.
    Prep Time 10 minutes
    Total Time 10 minutes
    Servings: 2
    Course: Main Course
    Cuisine: fusion
    Calories: 110

    Ingredients
      

    • 2 cups fresh blueberries
    • 1 cup fresh citrus juice (lemon or lime)
    • 1 tablespoon white vinegar apple cider vinegar can also be used
    • 2 fresh mint leaves mint leaves
    • 2 teaspoons honey or sugar optional, for sweetening
    • 1 cup water or ice cubes to adjust consistency

    Equipment

    • Blender
    • Measuring cups and spoons

    Method
     

    1. Combine the blueberries, citrus juice, vinegar, mint leaves, and honey in the blender.
    2. Blend on high until the blueberries are fully broken down and the mixture is bright purple and slightly frothy.
    3. Add water or ice cubes to the blender to reach your desired slushiness and blend again until smooth and icy.
    4. Taste the slushie and adjust sweetness with more honey or sugar if needed, then briefly pulse to combine.
    5. Pour the mixture into glasses and immediately serve with a sprig of mint for garnish.
    6. Enjoy this chilled, refreshing blueberry slushie with a hint of citrus and mint, perfect for hot summer days.

    Notes

    For a smoother texture, strain the mixture before freezing. You can also add a splash of soda water for extra fizz.

    As the days stretch long and the sun blazes, having a cool, zingy drink like this blueberry slushie is pure relief. It’s the kind of refreshment that makes the summer feels even more vibrant, with every frosty sip reminding you to take a moment for yourself.

    Now that you know how to whip up this playful beverage, it’s ready for your next warm-weather reprieve. Whether you’re chillaxing alone or hosting friends, this slushie is sure to spark smiles and sparkles in every glass. Cheers to turning simple blueberries into a burst of frozen happiness.

  • Spooky-Sweet Halloween Pumpkin Cheesecake Bars

    Spooky-Sweet Halloween Pumpkin Cheesecake Bars

    Halloween nights often bring a mix of chaos and charm, but this year I wanted to create something that combines the festive spirit with unexpected elegance: Pumpkin Cheesecake Bars with a twist of spiced nostalgia.

    The smell of cinnamon, nutmeg, and pumpkin baking fills the air, creating a cozy yet eerie vibe. These bars aren’t just treats; they’re a conversation starter at every ghoulish gathering, blending creamy texture with a crispy crust that echoes fall’s crisp air.

    What makes this recipe stand out is its subtle sophistication hiding behind a playful Halloween facade. It’s perfect for those who crave familiar flavors but want a treat that’s unique enough to surprise—even delight—your guests.

    Pumpkin Cheesecake Bars

    Pumpkin Cheesecake Bars with a spiced crust feature a creamy pumpkin filling infused with cinnamon and nutmeg atop a crispy, buttery crust. The bars are baked until set and have a smooth, dense texture with a slightly firm crust for easy slicing and serving. Their appearance showcases a vibrant orange filling contrasted by the golden crust, perfect for autumnal occasions.
    Prep Time 20 minutes
    Cook Time 40 minutes
    Total Time 1 hour
    Servings: 12
    Course: Main Course
    Cuisine: American
    Calories: 320

    Ingredients
      

    • 1 cup graham cracker crumbs
    • 1/4 cup granulated sugar
    • 6 tablespoons unsalted butter, melted
    • 16 oz cream cheese, softened
    • 1 cup canned pumpkin pure pumpkin puree
    • 3/4 cup granulated sugar
    • 2 large eggs
    • 1 1/2 te teaspoons ground cinnamon
    • 1/2 teaspoon ground nutmeg
    • 1/2 teaspoon salt

    Equipment

    • Mixing bowls
    • 9×13 inch baking pan
    • Electric mixer or whisk
    • Measuring cups and spoons
    • Rubber spatula
    • Oven

    Method
     

    1. Preheat the oven to 350°F (175°C). In a mixing bowl, combine graham cracker crumbs and sugar, then stir in melted butter until the mixture resembles wet sand. Press this mixture evenly into the bottom of a lined 9×13 inch baking pan to form a crust, then bake for 10 minutes to set it.
    2. In a large bowl, beat the softened cream cheese with an electric mixer until smooth and creamy, about 2 minutes. Add canned pumpkin, sugar, cinnamon, nutmeg, and salt, mixing well after each addition until the mixture is fully combined and silky.
    3. Crack in the eggs one at a time, beating on low speed after each addition to incorporate fully. The filling should become thick and slightly fluffy, with a fragrant spice aroma filling the air.
    4. Pour the pumpkin mixture over the baked crust, spreading it evenly with a spatula to ensure a flat, smooth surface. Tap the pan gently on the counter to remove any air bubbles and settle the filling.
    5. Bake in the preheated oven for about 35-40 minutes, or until the filling is set around the edges but still slightly soft in the center. The top should be lightly golden and fragrant.
    6. Remove from the oven and let the bars cool completely in the pan on a wire rack. Once cooled, refrigerate for at least 2 hours or overnight to allow the filling to firm up for clean cutting.
    7. Slice the chilled pumpkin cheesecake into squares or bars. Serve chilled or at room temperature, revealing a creamy interior with a hint of spice and a crispy crust.

    Notes

    For a more festive look, garnish with whipped cream or caramel drizzle before serving.

    Sharing these Halloween Pumpkin Cheesecake Bars feels like passing along a secret—delicious and delightfully spooky. The depth of flavors paired with their festive look makes them a perfect seasonal treat. Every bite carries a touch of fall’s crisp air and childhood’s thrill.

    As the season spins into full swing, this recipe offers a chance to slow down and savor the little moments—together with loved ones or in quiet reflection. They’re more than just dessert; they’re a sweet little celebration of everything autumn represents.

  • Spooky Sweetness: Halloween Pumpkin Rice Krispie Treats with a Witchy Twist

    Spooky Sweetness: Halloween Pumpkin Rice Krispie Treats with a Witchy Twist

    Halloween is the only night where I feel permission to mix chaos and charm in the kitchen. This year, I decided to transform my usual Rice Krispie treats into pumpkin-shaped delights that carry a little bit of mischief and a splash of fall magic. The scent of caramelized pumpkin melds with toasted marshmallows, creating an irresistible aroma that dances through my home.

    These treats aren’t just for making monsters happy; they also bring a nostalgic sparkle to my annual Halloween gatherings. With just a handful of ingredients and a sprinkle of creativity, you can turn a simple snack into a conversation-starting centerpiece. Plus, they’re perfect for ‘mummy’ snack bags or spooky party tables.

    Pumpkin-Shaped Rice Krispie Treats

    These rice Krispie treats are transformed into cute pumpkin shapes, combining toasted marshmallows and caramelized pumpkin to create a fall-inspired snack. They develop a crispy exterior with a soft, chewy center, resembling miniature pumpkins in appearance and texture.
    Prep Time 15 minutes
    Cook Time 10 minutes
    Total Time 25 minutes
    Servings: 8
    Course: Main Course
    Cuisine: American
    Calories: 150

    Ingredients
      

    • 4 cups mini marshmallows preferably fresh
    • 6 cups rice cereal (like Rice Krispies) store-bought
    • 1/2 cup caramelized pumpkin puree see note for preparation
    • 2 tablespoons unsalted butter
    • 1 teaspoon vanilla extract

    Equipment

    • Large pot
    • Spatula
    • Silicone mold or parchment-lined tray
    • Cooking thermometer
    • Kitchen scale or measuring cups

    Method
     

    1. Start by preparing the caramelized pumpkin puree: cook pumpkin puree in a skillet over medium heat until it thickens and turns a deep orange color, about 8-10 minutes, stirring frequently. Let it cool slightly before using.
      2 tablespoons unsalted butter
    2. In a large pot, melt the unsalted butter over low heat, letting it melt slowly and smell fragrant.
      2 tablespoons unsalted butter
    3. Add the mini marshmallows to the melted butter and stir gently until completely melted and glossy, creating a sticky, smooth mixture and releasing a sweet aroma.
      4 cups mini marshmallows
    4. Remove the pot from heat and quickly fold in the caramelized pumpkin puree, stirring until well combined and smooth.
      1/2 cup caramelized pumpkin puree
    5. Gradually add the rice cereal to the mixture, folding gently with a spatula to evenly coat the cereal without crushing it.
      6 cups rice cereal (like Rice Krispies)
    6. Scoop the mixture into a silicone mold or onto a parchment-lined tray, then press firmly to compact it and shape into small pumpkin-like mounds.
    7. Use your fingers or a small tool to add a small, star-shaped stem on top of each treat, resembling a pumpkin’s stalk.
    8. Let the treats set at room temperature for about 10-15 minutes until firm and easily removable from the mold or tray.
    9. Once cooled and set, carefully remove the treats from the mold or tray and display them on a serving platter.
    10. Enjoy these colorful, festive pumpkin treats—they’re perfect for a spooky party or Halloween celebration.
    As the evening winds down, these pumpkin Rice Krispie treats remind us that the sweetest moments often come from a little bit of chaos and a lot of imagination. They’re easy to make, but the smiles they inspire are unforgettable.

    This recipe is a gentle nudge to embrace your inner kid and enjoy the thrill of turning familiar treats into festive fun. Whatever your Halloween plans, these treats are sure to add a splash of color and a dash of joy to your spooky night.

  • Harvest Elegance: A Cozy Fall Turkey Chili with Sweet Potatoes

    Harvest Elegance: A Cozy Fall Turkey Chili with Sweet Potatoes

    As autumn leaves tumble and the air turns crisp, I seek a dish that captures the essence of the season without the usual winter heaviness. This Fall Turkey Chili with Sweet Potatoes is my answer—a hearty yet bright bowl that balances rich flavors with a touch of sweetness. It’s perfect for those busy weeknights when comfort and simplicity are the top priorities.

    The aroma of simmering turkey mingling with cinnamon, cumin, and roasted sweet potatoes fills my kitchen with nostalgia. I love how this chili invites a slow, savoring bite while offering a burst of seasonal flavors. It’s a dish that warms the soul and celebrates the brief, beautiful window of fall harvests.

    Fall Turkey Chili with Sweet Potatoes

    This fall-inspired turkey chili uses ground turkey and roasted sweet potatoes simmered with cinnamon, cumin, and seasonal spices. The chili develops a rich, hearty texture with tender pieces of sweet potatoes and seasoned ground meat, creating a vibrant, comforting bowl with a slightly thick consistency.
    Prep Time 15 minutes
    Cook Time 40 minutes
    Total Time 55 minutes
    Servings: 4
    Course: Main Course
    Cuisine: American
    Calories: 350

    Ingredients
      

    • 2 large sweet potatoes peeled and cubed
    • 1 lb ground turkey lean
    • 1 small onion diced
    • 3 cloves garlic minced
    • 1 tsp ground cinnamon
    • 1 tsp ground cumin
    • 1 can (14 oz) diced tomatoes with juice
    • 1 cup chicken broth
    • 1 tbsp olive oil
    • to taste salt and pepper

    Equipment

    • Baking sheet
    • Large Pot or Dutch Oven
    • Cutting board
    • Chef’s knife
    • Cooking spoon

    Method
     

    1. Preheat your oven to 400°F (200°C) and spread the cubed sweet potatoes on a baking sheet. Toss with a little olive oil and a pinch of salt, then roast for about 25-30 minutes until golden and tender.
    2. While the sweet potatoes are roasting, heat olive oil in a large pot over medium heat. Add the diced onion and sauté until translucent and fragrant, about 5 minutes.
    3. Add the minced garlic to the pot and cook for another minute until it becomes aromatic.
    4. Increase the heat to medium-high and add the ground turkey to the pot. Cook, breaking it apart with a spoon, until browned and cooked through, about 8 minutes.
    5. Stir in the cinnamon and cumin, cooking for about 1 minute to toast the spices and bring out their aroma.
    6. Add the canned diced tomatoes with their juice, cooking for another 5 minutes to meld the flavors.
    7. Pour in the chicken broth and bring the mixture to a gentle simmer. Reduce the heat to low and cook for about 10 minutes, allowing the chili to thicken slightly.
    8. Once the sweet potatoes are finished roasting, fold them into the chili. Stir gently to combine, and let the flavors meld for another 5 minutes on low heat.
    9. Season with salt and pepper to taste, giving the chili a final stir to distribute the seasoning evenly.
    10. Serve the hearty fall chili hot, garnished with your favorite herbs or a dollop of sour cream, if desired. Enjoy the cozy, flavorsome bowl that celebrates seasonal ingredients.
    This chili is more than just a meal; it’s a tribute to the fleeting magic of fall. Every spoonful reminds me to enjoy the simple pleasures—crisp air, colorful leaves, and a bowl full of comforting goodness.

    Making this dish is my way of holding onto the season just a little longer. It’s easy to prepare, satisfying, and flexible enough to adapt with your favorite add-ins. A cozy, nourishing end to busy autumn days.