
Sometimes, the simplest recipes carry the most weight. No bake oatmeal cookies are one of those treasures—easy to toss together, with no need for heat, yet they pack a chewy, chocolatey punch that feels like a warm memory. I’ve turned to this recipe on chaotic afternoons when I need a sweet fix that’s quick, honest, and doesn’t demand a full kitchen show.
What I love most is how flexible this treat is—no fancy ingredients required, just pantry staples that come together effortlessly. It’s a messy, honest kind of kitchen project, perfect for when you’re craving nostalgia but want to keep things straightforward. These cookies remind me that sometimes, the best things in life are the simplest—and that’s exactly what makes them worth making, again and again.
This recipe is a perfect example of how simplicity and nostalgia can come together without any fuss, especially during busy days or when you need a sweet fix that doesn’t require turning on the stove. I love how these cookies just come together in one bowl, no bake, no heat, yet deliver that chewy, chocolatey satisfaction. It’s the kind of treat that feels like a hug from childhood, but with a little twist of my own messy, honest kitchen style.
Sweet simplicity from my kitchen
- Baking these cookies reminds me of lazy weekend afternoons at my grandma’s, the smell of cocoa filling the air.
- I love how a simple handful of ingredients can turn into something so indulgent and satisfying, even on hectic days.
- There’s a weird joy in the messy, no-fuss process—just spooning and waiting, no oven needed, pure comfort.
- Every time I make these, I feel a little nostalgic, like a secret treat from childhood I can still enjoy today.
- Sharing these with friends always sparks a laugh—because no matter how rough your day, they’re just that good.
The story behind this recipe
- This recipe actually came from a kitchen experiment after a messy baking day. I was craving something sweet but didn’t want to turn on the oven, and somehow, these cookies just appeared—messy, quick, and oddly satisfying. I recall the first batch being more of a ‘what if’ moment, but they turned out better than I expected, chewy and rich with that chocolatey punch.
- Over time, I kept tweaking the ingredient ratios, chasing that perfect balance of chewiness and flavor, especially when I needed a no-fuss treat. It’s funny how something so simple can carry so many memories—those afternoons when I’d toss ingredients together, no measuring, just feeling my way through. Now, they’ve become a kind of kitchen secret, a quick fix for sweet cravings that’s honest and straightforward.
- heading: The story behind this recipe
Historical & Cultural Tidbits
- During wartime rationing, resourceful home cooks created no bake cookies as a way to make do with limited ingredients.
- These cookies gained popularity in the 1950s, thanks to the rise of convenience foods and simpler dessert options.
- The concept of skipping baking was revolutionary at the time, offering a quick fix for sweet cravings without heating the kitchen.
- In some regions, variations with peanut butter or shredded coconut emerged, adding local twists to the classic recipe.
- Today, these cookies are a nostalgic favorite, often making a comeback during busy seasons or when quick treats are needed.
Key ingredients and their quirks
- Rolled oats: I love how their nutty aroma intensifies as they toast slightly, giving a chewy texture. Feel free to try steel-cut oats for extra crunch, but they need longer to soften.
- Butter: I stick with unsalted butter for control, but margarine can work in a pinch. Just expect a slightly different melt and richness in flavor.
- Sugar: Brown sugar adds a caramel note and moisture that keeps these cookies soft. White sugar makes them crisper—swap based on your texture preference.
- Cocoa powder: I prefer natural, unsweetened cocoa for a bright, chocolatey punch. Dutch-processed gives a smoother, mellower taste—use what you like or have on hand.
- Vanilla extract: A splash brightens everything up with a warm, fragrant note. Skipping it makes the flavor more straightforward but still sweet and chocolatey.
- Optional add-ins: Chopped nuts or dried fruits can be tossed in. The nuts add crunch and depth, while dried fruit offers bursts of sweetness—go wild with what you love.
- Parchment paper: I swear by it to prevent sticking and make cleanup a breeze. Silicone mats are great too—just make sure they’re oven-safe if you decide to bake a batch.
Spotlight on key ingredients
Rolled oats:
- I love how their nutty aroma intensifies as they toast slightly, giving a chewy texture. Feel free to try steel-cut oats for extra crunch, but they need longer to soften.
- Butter: I stick with unsalted butter for control, but margarine can work in a pinch. Just expect a slightly different melt and richness in flavor.
Cocoa powder:
- I prefer natural, unsweetened cocoa for a bright, chocolatey punch. Dutch-processed gives a smoother, mellower taste—use what you like or have on hand.
- Vanilla extract: A splash brightens everything up with a warm, fragrant note. Skipping it makes the flavor more straightforward but still sweet and chocolatey.
Notes for ingredient swaps
- Dairy-Free: Swap butter for coconut oil or vegan margarine. Expect a slightly different melt and a hint of coconut aroma.
- Sweetener Options: Use honey or maple syrup instead of sugar for a richer, more complex sweetness, but reduce the liquid slightly.
- Oats: Steel-cut oats can add crunch if you toast them lightly first, but they need longer to soften and may alter texture.
- Cocoa Powder: Dutch-processed cocoa offers a smoother flavor, while natural cocoa gives a brighter, more acidic chocolate note—choose based on your preference.
- Add-ins: Chopped nuts or dried fruits can be customized; walnuts add crunch, dried cranberries bring tartness—mix it up to suit your mood.
- Milk: Almond or oat milk can replace regular milk for a nutty or oat-y flavor, but reduce quantity slightly to prevent sogginess.
- Optional Flavors: A pinch of sea salt or a dash of cinnamon can enhance the chocolate, or try a splash of espresso for depth.
Equipment & Tools
- medium saucepan: to melt and boil the ingredients.
- large mixing spoon: to stir the mixture thoroughly.
- parchment paper: to prevent sticking and make cleanup easier.
- baking sheet or flat surface: to set the cookies as they cool.
Step-by-step guide to no bake cookies
- Gather your equipment: a medium saucepan, a large mixing spoon, parchment paper, and a baking sheet or flat surface for setting the cookies.
- In the saucepan, combine 1 cup (240 ml) unsalted butter, 2 cups (400 g) brown sugar, and 1/2 cup (120 ml) milk. Bring to a gentle boil over medium heat, stirring constantly.
- Once boiling, let it crackle and bubble for 1 minute, then remove from heat. This timing ensures the sugar dissolves properly without overcooking.
- Stir in 3 cups (240 g) rolled oats, 1/2 cup (45 g) unsweetened cocoa powder, and 1 teaspoon (5 ml) vanilla extract. Mix until everything is well combined and oats are evenly coated.
- If you’re adding extras like nuts or dried fruits, fold them in now. This is the moment to customize your batch.
- Using a spoon or small cookie scoop, drop dollops of the mixture onto the prepared parchment paper. Space them about 2 inches apart to give room for spreading.
- Let the cookies set at room temperature for about 30 minutes to an hour, or until they’re firm and glossy on the surface. No oven needed here—just patience.
- For a quicker set, place the tray in the fridge for 15–20 minutes. The cookies will firm up faster, especially in warm weather.
- Once hardened, peel them off gently. If they stick, use a thin spatula or gently lift with parchment paper.
- Enjoy these chewy, chocolatey bites as is, or store in an airtight container for up to a week. They also freeze well—just thaw at room temp for 10 minutes before serving.
Allow the cookies to rest at room temperature until firm, about 30–60 minutes. For quicker setting, refrigerate for 15–20 minutes. Once set, gently lift and transfer to a plate or container. Serve or store for later enjoyment.
How to Know It’s Done
- Color: cookies should be glossy and slightly firm on the outside.
- Texture: when cooled, they should be chewy yet hold their shape.
- Appearance: uniform dollops with no runny edges or overly shiny surface.
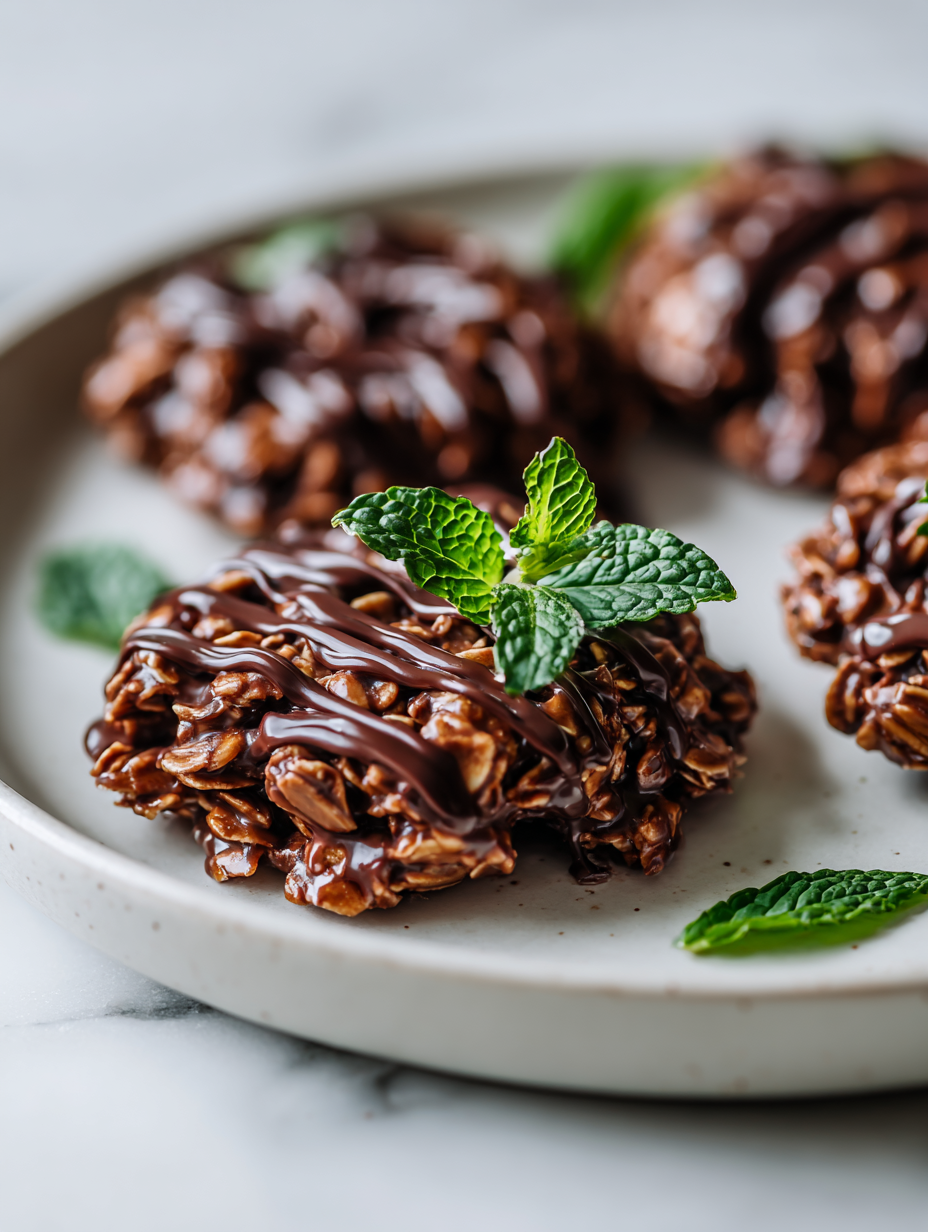
No Bake Chocolate Oatmeal Cookies
Ingredients
Equipment
Method
- Start by lining your baking sheet with parchment paper to prevent sticking. Set it aside for later.
- Combine the butter, brown sugar, and milk in a medium saucepan. Turn the heat to medium and stir constantly as the mixture begins to melt and come to a gentle boil.
- Once the mixture reaches a full, bubbling boil, let it cook for exactly 1 minute while stirring gently. This helps dissolve the sugar evenly and activates the flavors.
- Remove the saucepan from the heat and immediately stir in the rolled oats, cocoa powder, and vanilla extract. Mix vigorously until all ingredients are well coated and the mixture is thick and glossy.
- If you're adding chopped nuts or dried fruits, fold them in now for extra texture and flavor.
- Using a spoon or small cookie scoop, drop spoonfuls of the mixture onto the prepared parchment paper, spacing them about 2 inches apart as they will spread slightly.
- Allow the cookies to set at room temperature for about 30 minutes to an hour, until they firm up with a shiny, chewy surface. For faster setting, place the tray in the fridge for 15–20 minutes.
- Once the cookies are firm and glossy, gently peel them off the parchment paper and transfer to a plate or container.
- Enjoy these chewy, chocolatey bites immediately or store them in an airtight container at room temperature for up to a week. They also freeze beautifully—just thaw for a few minutes at room temperature before serving.
Notes
Tips and tricks for best results
- Bolded mini-head: Use a gentle boil → Ensures the sugar dissolves smoothly without overcooking the mixture.
- Bolded mini-head: Toast your oats lightly → Enhances their nutty aroma and chewy texture in the final cookie.
- Bolded mini-head: Mix quickly after boiling → Prevents setting too early and ensures even distribution of ingredients.
- Bolded mini-head: Chill the mixture briefly before scooping → Makes handling easier and cookies hold their shape better.
- Bolded mini-head: Use parchment paper → Keeps cookies from sticking and makes cleanup a breeze.
- Bolded mini-head: Don’t overmix once oats are added → Keeps the cookies tender and avoids tough textures.
- Bolded mini-head: Let cookies set fully at room temp → Achieves the best chewy texture without melting or spreading.
Common mistakes and how to fix them
- FORGOT to measure sugar: It can make cookies too crumbly or too sticky. Use a scale for accuracy.
- DUMPED in all ingredients at once: Mix gradually to avoid lumps and ensure even coating of oats.
- OVER-TORCHED the mixture: Remove from heat as soon as it bubbles for perfect texture and flavor.
- MISSED the setting time: Let cookies cool completely to avoid melting or misshapen cookies.
Quick fixes and pantry swaps
- If mixture is too sticky, splash a little more oats to dry it out.
- When cookies spread too much, patch with a thicker dollop for uniform shape.
- Splash cold water if mixture is too runny, then stir quickly to firm up.
- When chocolate shimmers and crackles, rescue with a quick stir and lower heat.
- Pan too dry? Swap in a handful of shredded coconut for texture and flavor.
Prep, store, and reheat tips
- You can prep the mixture a day in advance; keep it covered in the fridge. The flavors meld and the mixture firms up slightly, making scooping easier.
- Store the finished cookies in an airtight container at room temperature for up to a week. They develop a richer chocolate aroma over time, but may lose some chewiness.
- Refrigerate if you want them to set faster or if your kitchen is warm. Chilled cookies are firmer and slightly denser—perfect for stacking.
- To reheat or soften, give the cookies a quick 10-second zap in the microwave. The chocolate will shimmer and become gooey, just enough for a warm bite.
Top questions about no bake cookies
1. Can I use quick oats instead of rolled oats?
Yes, you can use quick oats for a softer texture, but the cookies may be less chewy.
2. What if the mixture is too stiff to scoop?
If the mixture is too thick, add a splash of milk to loosen it up before scooping.
3. How long do no bake cookies last?
Storing in an airtight container at room temperature keeps them chewy for up to a week.
4. Can I substitute butter with oil?
Yes, using coconut oil instead of butter gives a different flavor but still works well.
5. How can I speed up the setting process?
Refrigerate for 15-20 minutes to set them faster and keep them firm.
6. Should I add salt or other flavorings?
Adding a pinch of sea salt enhances the chocolate flavor and balances sweetness.
7. What kind of cocoa powder should I use?
Using dark cocoa powder gives a richer, more intense chocolate flavor compared to natural cocoa.
8. Why are my cookies too soft or sticky?
If cookies are too soft, refrigerate them to firm up before serving.
9. Can I freeze these cookies?
You can freeze the cookies for up to a month, then thaw at room temperature before eating.
10. Can I customize the mix-ins?
Yes, you can add chopped nuts or dried fruits for extra texture and flavor variation.
These no bake oatmeal cookies are a simple reminder that the most satisfying treats often come from honest, unpolished moments in the kitchen. They’re perfect for when time is tight but comfort is needed in every chewy bite. Sharing them, or even just having a stash, feels like a small act of kindness that’s easy to do.
In a world full of complex recipes, these cookies prove that sometimes, less really is more. They carry a whisper of childhood, a whiff of chocolate, and that unmistakable satisfaction of a homemade, fuss-free dessert. No matter the season or mood, they’re a humble little reminder that good things don’t have to be complicated.
Welcome to Proud of This Mess – a place where food, creativity, and a little chaos come together on a plate!
I’m Emily Carter, the founder and heart behind this little corner of the internet. Born and raised in the United States, I’ve always had a passion for cooking, experimenting, and sharing the messy, delicious journey of creating food that brings people together. My philosophy is simple: good food doesn’t have to be perfect, and a little mess makes it memorable.
At Proud of This Mess, we believe that cooking is more than just following recipes—it’s about exploring flavors, discovering new techniques, and making every meal an experience worth savoring. From comforting weeknight dinners to indulgent desserts, our goal is to inspire home cooks of all levels to embrace the joy of food without fear of imperfection.