
These no-bake date nut bites are like a warm hug from childhood, wrapped in a simple, honest package. There’s something about the chewiness of dates combined with the crunch of nuts that just takes me back to my grandma’s kitchen, where no fancy ingredients were needed to make something special. It’s the kind of treat that feels both wholesome and indulgent, and I love how quick it is to throw together when I want something sweet without the fuss of baking.
What I really appreciate about this recipe is its versatility—it’s a blank slate for whatever nuts or seeds you have lying around. Plus, it’s perfect for those moments when you need a snack that’s satisfying and naturally sweet, all while feeling like a little nostalgic escape. It’s honest, straightforward, and honestly, pretty addictive—once you start, you’ll reach for seconds without even thinking.
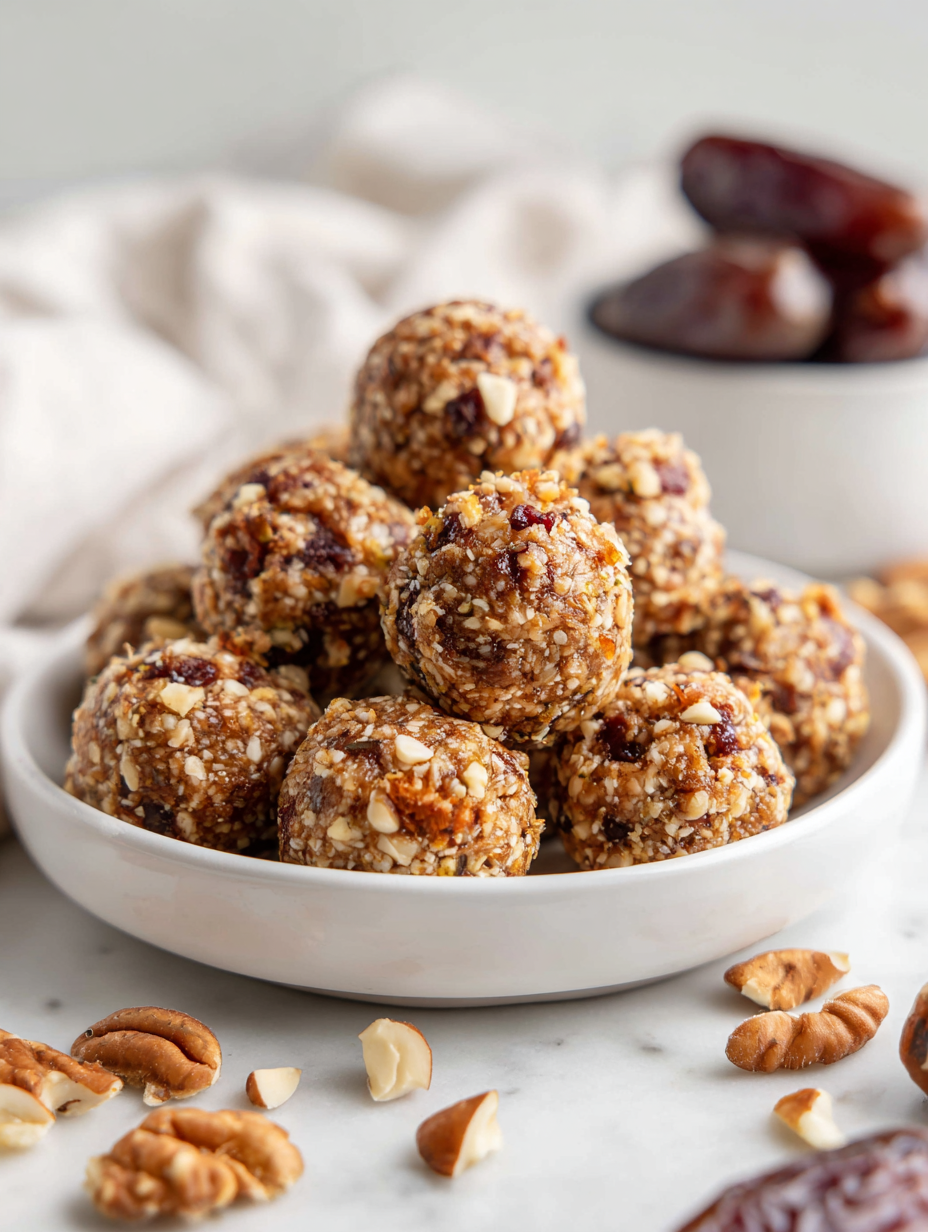
Focusing on the nostalgic comfort of childhood treat memories, this recipe emphasizes the simplicity and pure pleasure of combining dates and nuts into a no-bake bite that’s both wholesome and irresistibly chewy.
Nostalgic bites for busy days
- Making these bites always sparks a rush of childhood nostalgia, reminding me of simpler, sweeter times.
- I love how flexible this recipe is—whatever nuts I have on hand, it’s almost always a hit.
- There’s a quiet satisfaction in pressing these into the pan and watching them set—like creating a tiny, edible sculpture.
- Whenever I need a quick, wholesome treat, these bites are my go-to—no fuss, just good, honest ingredients.
- The rich, caramel-like aroma of dates melting into nuts never fails to make me smile, even on tough days.
Nostalgic bites for busy days
This recipe sprouted from a lazy weekend craving for something sweet and filling, but without the fuss of turning on the oven. I was rummaging through my pantry and found a stash of dates and a handful of nuts—simple ingredients, but together they sparked a memory of childhood treats that my grandma used to make. That nostalgic pull, combined with a desire for quick, wholesome snacks, pushed me to experiment until I got these bites just right. Now, they’re my go-to when I need a little sweet, chewy fix that I can whip up in minutes.
Historical and cultural roots
- These bites draw inspiration from traditional no-bake energy balls, but with a focus on natural sweetness from dates.
- Historically, date-based confections date back centuries in Middle Eastern cultures, where dates were prized for their energy-boosting qualities.
- This recipe is a modern twist on ancient no-cook treats, emphasizing simplicity and minimal ingredients in a hectic world.
- Using dates as a base was a clever way to naturally sweeten and bind ingredients without added sugars or preservatives.
Ingredient breakdown: key components
- Dates: I love how their sticky, caramel richness makes every bite sweet and chewy, almost like a natural caramel candy. Feel free to swap in figs if you want a milder sweetness.
- Nuts: I prefer crunchy almonds for a clean, nutty flavor that contrasts the soft dates. Walnuts work too, bringing a slightly bitter, smoky edge—go with what you like.
- Coconut: Toasted coconut flakes add a nutty aroma and a crackly texture that makes these bites more interesting. Unsweetened is best to keep control over sweetness.
- Seeds: Chia or hemp seeds boost nutrition and add tiny crunchy bites—mix them in for a subtle nutty flavor and a bit of visual interest.
- Optional flavorings: A splash of vanilla or a pinch of cinnamon can elevate these bites. I sometimes add a tiny pinch of sea salt for a surprising, savory balance.
- Binding agent: Sometimes I add a drizzle of honey or a splash of water if the mixture feels too dry. It helps everything stick together without making it overly sweet.
Spotlight on key ingredients
Dates:
- Their sticky, caramel-like texture makes every bite irresistibly chewy and sweet, almost like a natural caramel candy. If you prefer a milder sweetener, figs can be a good swap.
- ingredient
Nuts:
- Crunchy almonds bring a clean, nutty flavor that contrasts the soft, sticky dates. Walnuts add a smoky bitterness that makes the bites more complex.
- ingredient
Notes for ingredient swaps
- Dates: I love how their sticky, caramel richness makes every bite sweet and chewy, almost like a natural caramel candy. Feel free to swap in figs if you want a milder sweetness.
- Nuts: I prefer crunchy almonds for a clean, nutty flavor that contrasts the soft dates. Walnuts work too, bringing a slightly bitter, smoky edge—go with what you like.
- Coconut: Toasted coconut flakes add a nutty aroma and a crackly texture that makes these bites more interesting. Unsweetened is best to keep control over sweetness.
- Seeds: Chia or hemp seeds boost nutrition and add tiny crunchy bites—mix them in for a subtle nutty flavor and a bit of visual interest.
- Optional flavorings: A splash of vanilla or a pinch of cinnamon can elevate these bites. I sometimes add a tiny pinch of sea salt for a surprising, savory balance.
- Binding agent: Sometimes I add a drizzle of honey or a splash of water if the mixture feels too dry. It helps everything stick together without making it overly sweet.
Equipment & Tools
- Food processor: Blend dates and nuts into a sticky mixture.
- Mixing bowl: Combine ingredients and fold optional add-ins.
- Parchment-lined tray: Shape and set the bites in the fridge.
- Knife: Cut the set mixture into bite-sized pieces.
Step-by-step guide to no bake bites
- Gather your equipment: a food processor for blending, a mixing bowl, and a baking dish or tray lined with parchment paper.
- Pit the dates if they have pits. Measure out about 1 1/2 cups of pitted dates.
- In the food processor, pulse the dates until they form a sticky, cohesive paste, about 30 seconds. Scrape down sides as needed.
- Add 1 cup of mixed nuts (almonds, walnuts, or cashews), roughly chopped. Pulse several times until nuts are broken down but still retain some crunch, about 10 pulses.
- Transfer the mixture to a bowl. If it feels too dry or crumbly, add a teaspoon of water or honey and mix well until it sticks together.
- Fold in any optional ingredients like shredded coconut, seeds, or flavorings if using. Mix to distribute evenly.
- Using your hands or a spatula, press the mixture evenly into the prepared baking dish, about 1-inch thick.
- Place the dish in the fridge for at least 30 minutes, or until firm enough to cut. The cooler it is, the cleaner your cuts will be.
- Once set, lift the mixture out of the dish using the parchment paper. Slice into small, bite-sized squares or rectangles.
- Arrange the bites on a plate or tray. Optional: drizzle with melted chocolate or sprinkle with sea salt for extra flair.
- Let the bites rest at room temperature for a few minutes before serving to soften slightly, if needed.
Chill the bites in the fridge for at least 30 minutes before cutting. Serve directly from the fridge or at room temperature. Store leftovers in an airtight container in the fridge for up to a week.
How to Know It’s Done
- Mixture should be sticky enough to hold together when pressed.
- Nuts should be broken down but still have some crunch.
- Bites should feel firm and hold their shape after refrigeration.
No-Bake Date Nut Bites
Ingredients
Equipment
Method
- Place the pitted dates into the bowl of your food processor. Pulse until they break down into a sticky, cohesive paste, about 30 seconds, scraping down the sides as needed.
- Add the chopped mixed nuts to the food processor. Pulse several times, about 10 pulses, until the nuts are broken down but still retain some crunch.
- Transfer the mixture to a mixing bowl. If it feels too dry or crumbly, stir in a teaspoon of water or honey to help everything stick together.
- Fold in the toasted coconut flakes, seeds, vanilla extract, and a pinch of sea salt. Mix until evenly combined, ensuring the flavors are well distributed.
- Press the mixture firmly into a parchment-lined tray, spreading it out evenly to about 1 inch thick. Use your hands or the back of a spatula to smooth the surface.
- Place the tray in the fridge and chill for at least 30 minutes until the mixture is firm and set.
- Once chilled, lift the set mixture out of the tray using the parchment paper. Use a sharp knife to cut into small squares or rectangles, about 1 inch each.
- Arrange the bites on a serving plate. For an extra touch, drizzle with melted chocolate or sprinkle a tiny pinch of sea salt.
- Serve immediately or store in an airtight container in the fridge for up to a week. Enjoy these chewy, wholesome treats whenever you’re craving something sweet.
Tips & Tricks for Perfect Bites
- Bolded mini-head: Use cold, slightly damp hands to press mixture into the pan—keeps it from sticking.
- Bolded mini-head: Chill the mixture thoroughly—at least 30 minutes—so it firms up and cuts cleanly.
- Bolded mini-head: Pulse nuts in short bursts—about 10 pulses—to keep some crunch and prevent over-processed nut butter.
- Bolded mini-head: Toast coconut lightly before adding—brings out aroma and enhances crunch without burning.
- Bolded mini-head: If mixture feels too crumbly, add a tiny splash of water or honey—just enough to bring it together.
- Bolded mini-head: Watch nuts during processing—over-torched nuts turn bitter, so keep pulse times short and steady.
- Bolded mini-head: For a glossy finish, drizzle melted chocolate over bites after they’ve set—adds richness and shine.
Common mistakes and how to fix them
- TOO DRY MIXTURE: Add a teaspoon of water or honey to help ingredients stick.
- OVER-TORCHED: Keep an eye on nuts during processing to prevent burning or excessive browning.
- UNDERSET BITES: Chill for at least 30 minutes until firm before cutting.
- NOT ENOUGH PRESSURE: Press mixture firmly into the pan to avoid crumbly bites.
Quick fixes and pantry swaps
- When mixture feels too crumbly, splash in water and blend briefly.
- If bites are too soft, freeze for 10 minutes to firm up quickly.
- Splash some lemon juice on dates if they’re too sticky to process smoothly.
- When nuts turn bitter, toast them lightly or swap for milder seeds.
- Splash with vanilla or a pinch of salt to rescue flat-tasting bites.
Prep, store, and reheat tips
- Prep the mixture ahead by pulsing dates and nuts; it can be kept in the fridge for up to 24 hours before pressing into the tray.
- You can assemble and press the bites a day in advance, then store them covered in the fridge for best texture and flavor.
- Store the finished bites in an airtight container in the fridge for up to one week; they stay chewy and fragrant, with a slightly intensified date aroma over time.
- Reheat is unnecessary; serve straight from the fridge or at room temperature. If needed, let sit for 10 minutes to soften slightly—look for a warm scent and pliable texture.
Top questions about no bake bites
1. Can I use other dried fruits instead of dates?
Dates are naturally sticky and sweet, making them perfect for binding the bites without added sugar.
2. What if the mixture doesn’t stick together?
Yes, figs or dried apricots can work, but they may alter the texture and sweetness slightly.
3. How long do I need to chill the bites?
Add a teaspoon of water or honey, then pulse again until it clumps together better.
4. Can I freeze these bites for longer storage?
At least 30 minutes in the fridge helps them set firm enough to cut cleanly.
5. What nuts are best for texture and flavor?
Yes, store in an airtight container in the freezer for up to a month. Thaw slightly before eating.
6. Can I add chocolate or other flavorings?
Almonds, walnuts, or cashews work well—choose based on your flavor preference or what’s in your pantry.
7. Are these bites suitable for vegans?
Absolutely, drizzle melted chocolate over the bites after they set for extra richness.
8. How do I prevent the bites from being too dry?
Yes, just ensure your sweeteners and ingredients are plant-based. Honey can be replaced with maple syrup.
9. What’s the best way to cut these neatly?
Add a tiny splash of water or honey to the mixture to enhance moisture and stickiness.
10. Can I make these bites gluten-free?
Chill until firm, then use a sharp knife dipped in hot water for clean cuts.
These bites are a simple reminder that good, honest ingredients can create something deeply comforting. They’re perfect for a quick snack or a little treat that doesn’t require any fuss or oven time. Once you get the hang of pressing them into the tray, you’ll find yourself making these on repeat, especially when you crave a nostalgic, chewy sweetness.
In a world that often feels rushed, taking a moment to enjoy these bites offers a small pause—a chance to savor something wholesome and familiar. Plus, they’re endlessly adaptable, so you can tweak the ingredients to match what’s in your pantry or your mood. No matter how you customize them, they’ll always bring a touch of that homemade, no-fuss goodness.
Welcome to Proud of This Mess – a place where food, creativity, and a little chaos come together on a plate!
I’m Emily Carter, the founder and heart behind this little corner of the internet. Born and raised in the United States, I’ve always had a passion for cooking, experimenting, and sharing the messy, delicious journey of creating food that brings people together. My philosophy is simple: good food doesn’t have to be perfect, and a little mess makes it memorable.
At Proud of This Mess, we believe that cooking is more than just following recipes—it’s about exploring flavors, discovering new techniques, and making every meal an experience worth savoring. From comforting weeknight dinners to indulgent desserts, our goal is to inspire home cooks of all levels to embrace the joy of food without fear of imperfection.