
Making no-bake date bars is like hitting a reset button in the kitchen. It’s a simple ritual that calms my mind and grounds me, especially after a hectic day. As I press the sticky mixture into the pan, I feel a quiet sense of accomplishment without the fuss of oven timers or complicated techniques.
There’s something almost meditative about these bars—the way the dates soften and stick together, the gentle crunch of nuts, and the aroma of honey and toasted oats. It’s a perfect, mindful moment that transforms busy hands into a soothing act of creation. Plus, the reward is a sweet, chewy treat that feels both nourishing and satisfying, no oven required.
Focusing on how making these bars is a calming, almost meditative act—turning a busy kitchen into a moment of mindful simplicity.
The story behind this recipe
- This recipe came from a lazy afternoon spent rummaging through my pantry, hunting for something sweet and satisfying without turning on the oven. I remember the first time I pressed the date mixture into a pan, feeling the sticky, caramel aroma fill the kitchen—it was oddly calming, like a little ritual. Over the years, these bars have become my go-to for quick bites and a reminder that simple ingredients can turn into something unexpectedly comforting.
- There’s something about the combination of dates and nuts that feels nostalgic—like childhood snacks but with a grown-up, chewy richness. I love how they’re forgiving; you can swap ingredients, tweak sweetness, or add a pinch of sea salt, and it still works. It’s that unpolished, honest process that makes these bars feel like a tiny victory every time I make them, especially when I need a moment of calm.
- heading
- story_type
Key ingredients and tips
- Dates: They’re the sticky backbone of these bars, bringing sweetness and chew. Look for plump, moist dates, and if yours are dry, soak them for 10 minutes to soften—trust me, it makes blending way easier.
- Oats: Toasted oats add crunch and a toasty aroma that makes these bars feel cozy. If you’re out, shredded coconut works well, giving a slightly different but still delicious texture.
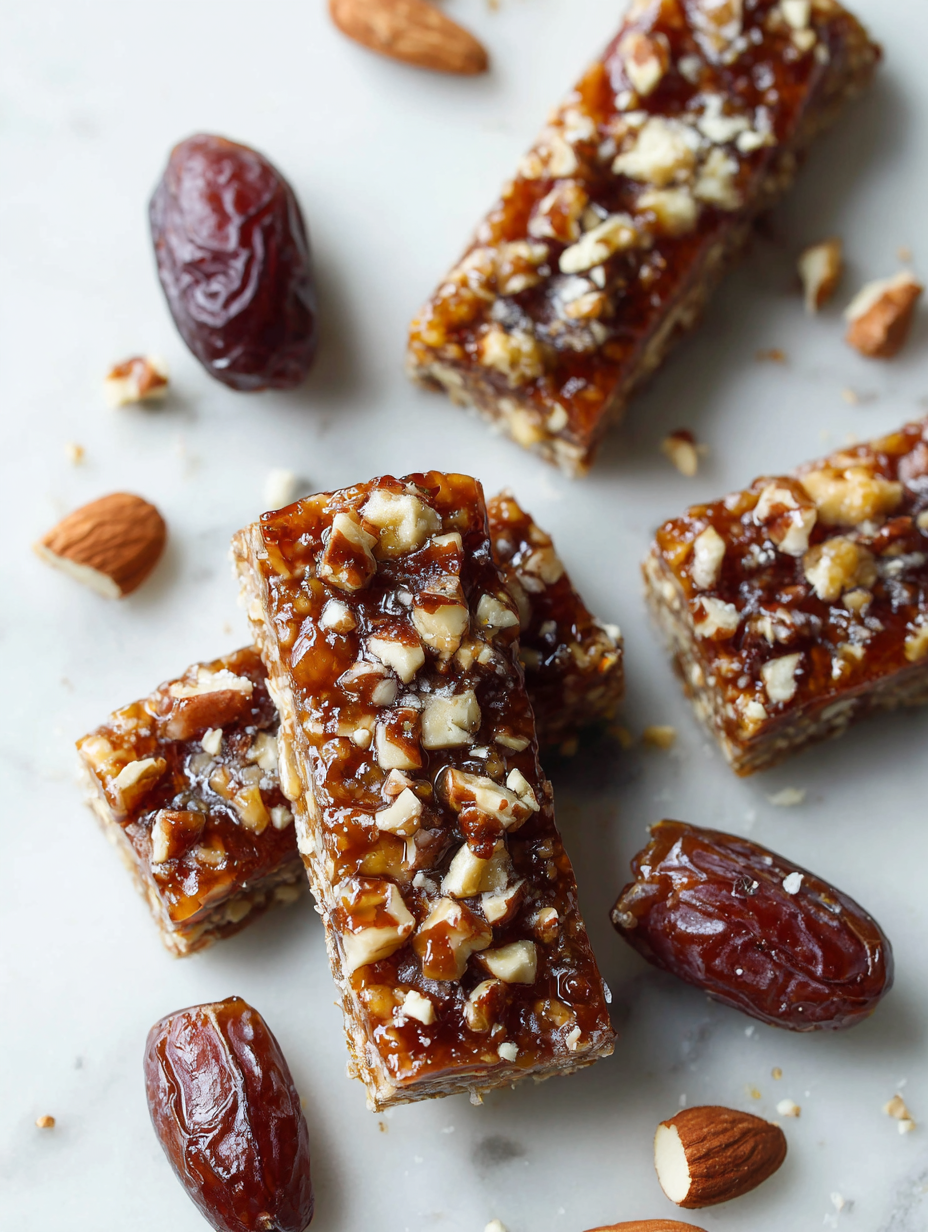
- Nuts: I prefer almonds or walnuts, their rich, earthy flavor complements the sweet dates. Chop them roughly—big enough to crunch on but not so fine they turn to dust.
- Honey: It’s the glue that binds everything and adds a floral sweetness. If you want a milder flavor, maple syrup is a good swap, though it’s a bit thinner, so you might need a touch more.
- Salt: Just a pinch, it highlights all the flavors and keeps the sweetness from feeling cloying. Sea salt flakes on top before chilling add a nice salty crunch that’s irresistible.
- Vanilla extract: A splash deepens the sweetness and adds warmth. Skip it if you want a more neutral, date-forward flavor—sometimes simple is best.
- Optional add-ins: Seeds, dried fruit, or a sprinkle of cacao nibs can turn these bars into your personal snack mix—play around and find your favorite combo.
Spotlight on key ingredients
Dates:
- They’re the sticky backbone of these bars, bringing sweetness and chew. Look for plump, moist dates, and if yours are dry, soak them for 10 minutes to soften—trust me, it makes blending way easier.
- Oats: Toasted oats add crunch and a toasty aroma that makes these bars feel cozy. If you’re out, shredded coconut works well, giving a slightly different but still delicious texture.
Nuts and Honey:
- Nuts: I prefer almonds or walnuts, their rich, earthy flavor complements the sweet dates. Chop them roughly—big enough to crunch on but not so fine they turn to dust.
- Honey: It’s the glue that binds everything and adds a floral sweetness. If you want a milder flavor, maple syrup is a good swap, though it’s a bit thinner, so you might need a touch more.
Notes for ingredient swaps
- Dairy-Free: Maple syrup instead of honey gives a milder, less floral sweetness, but may alter the sticky texture slightly.
- Nut-Free: Sunflower or pumpkin seeds can replace nuts for crunch, though they may be less rich and slightly softer.
- Gluten-Free: Use certified gluten-free oats to keep the bars safe for gluten-sensitive eaters, maintaining the chewy texture.
- Vegan: Agave syrup or brown rice syrup can be used in place of honey for a plant-based version, with a slightly different flavor profile.
- Extra Chewy: Adding a spoonful of nut butter (like almond or peanut) can boost chewiness and add richness—stir it in with the honey.
- Flavor Boost: A pinch of cinnamon or a splash of lemon zest can add a new layer of aroma and brightness, if desired.
- Sweetener: Coconut sugar or agave syrup can replace honey, but expect a subtler sweetness and slightly different consistency.
Equipment & Tools
- Baking pan: Holds the mixture and shapes the bars.
- Spatula or pressing tool: Presses and flattens the mixture into the pan.
- Sharp knife: Slices the set bars cleanly.
- Parchment paper: Prevents sticking and makes removal easier.
- Small saucepan: Heats honey and vanilla to combine smoothly.
Step-by-step guide to no bake date bars
- Gather your equipment: a 20×20 cm (8×8 inch) baking pan, a spatula or pressing tool, a sharp knife, and parchment paper. Line the pan with parchment for easy removal.
- In a food processor, pulse 1 cup of pitted dates until they form a sticky, slightly chunky paste. If dates are dry, soak them in warm water for 10 minutes, then drain thoroughly.
- In a large mixing bowl, combine 1 1/2 cups rolled oats, 1/2 cup chopped nuts (almonds or walnuts), and 1/4 teaspoon sea salt. Mix well.
- In a small saucepan over low heat, melt 1/4 cup honey and 1 teaspoon vanilla extract. Stir until smooth and warm, about 2 minutes. Do not let it boil.
- Pour the honey mixture into the dry ingredients. Add the date paste. Mix thoroughly with a spatula until everything is evenly coated and sticky.
- Transfer the mixture into the prepared pan. Using the back of a spatula or your fingers, press firmly and evenly into the pan, about 1 inch thick. Ensure the surface is smooth and compact.
- Place the pan in the fridge to chill for at least 2 hours, or until firm. This helps the bars set and makes slicing easier.
- Once chilled, lift out the entire block using the parchment paper. Place on a cutting board and slice into 8-10 bars or squares with a sharp knife.
- Store the bars in an airtight container in the fridge for up to a week. For longer storage, freeze and thaw as needed.
- For serving, let the bars sit at room temperature for 5 minutes if chilled, to soften slightly and enhance flavor.
Chill the pressed mixture in the fridge for at least 2 hours until firm. Slice into bars with a sharp knife. Wrap individually if storing long-term, or serve straight from the fridge for a chewy bite.
How to Know It’s Done
- The mixture is sticky and holds together when pressed.
- The pressed mixture is evenly compacted and smooth on top.
- Bars are firm and hold shape after chilling, with a chewy texture and slightly glossy surface.
No-Bake Date Bars
Ingredients
Equipment
Method
- Line your baking pan with parchment paper, leaving some overhang for easy removal.
- In a food processor, pulse the soaked dates until they form a sticky, slightly chunky paste. This may take about 30 seconds to a minute, and you’ll hear a faint scraping sound as the dates blend.
- In a large mixing bowl, combine the toasted oats, chopped nuts, and sea salt. Stir with a spoon to evenly distribute the ingredients and enhance the toasty aroma.
- In a small saucepan over low heat, warm the honey and vanilla extract, gently stirring until the mixture is smooth and fragrant, about 2 minutes. You’ll notice a slight bubbling and a sweet aroma filling the kitchen.
- Pour the warm honey mixture over the dry ingredients, then add the date paste. Use a spatula to mix everything thoroughly, ensuring the sticky mixture coats all the dry ingredients evenly. It should become thick and sticky, with a rich aroma of honey and toasted oats.
- Transfer the mixture into the prepared pan. Using the back of a spatula or your fingers, press firmly and evenly into the pan, about 1 inch thick. The surface should be smooth and compact, with a satisfying resistance when pressed.
- Place the pan in the fridge and chill for at least 2 hours until the mixture is firm and set. You’ll hear a slight crackling as it cools and the mixture tightens.
- Once cooled and firm, lift the entire block out of the pan using the parchment overhang. Place it on a cutting board and slice into 8 to 10 bars or squares with a sharp knife. Wipe the knife clean between cuts for neat edges.
- Serve the bars immediately or store them in an airtight container in the fridge. They will keep fresh for up to a week, with a chewy, moist texture and a deliciously nutty aroma.
Notes
Pro tips for perfect date bars
- Sticky enough: Use warm, soaked dates for easier blending and a more cohesive mixture.
- Toast your oats: Lightly toast oats before mixing to enhance flavor and add a nutty aroma.
- Press firmly: Use the back of a spatula or your fingers to press the mixture evenly into the pan.
- Chill thoroughly: Let the bars set in the fridge for at least 2 hours for clean cuts and chewy texture.
- Avoid over-torquing: Keep honey warm but not hot; high heat can cause burning, ruining the flavor.
- Add texture: Incorporate chopped nuts or seeds last to maintain crunch and visual appeal.
- Slice with care: Use a sharp knife and wipe clean between cuts for clean, precise edges.
Common mistakes and how to fix them
- FORGOT to measure ingredients precisely? Use a scale for accuracy and consistent texture.
- DUMPED the mixture into the pan haphazardly? Press firmly and evenly for uniform bars.
- OVER-TORCHED the honey or nuts? Keep heat low and watch closely to prevent burning.
- FAILED to chill long enough? Patience helps the bars set properly and slice cleanly.
Quick fixes and pantry swaps
- If mixture is too dry, splash in a teaspoon of warm water and mix until sticky.
- When bars crumble while slicing, chill them longer or briefly warm the knife for clean cuts.
- Splash a little more honey if the mixture isn’t holding together well.
- Patch over cracks by pressing extra mixture into gaps before chilling again.
- Shield delicate nuts by adding them last to prevent over-crushing during mixing.
Prep, store, and reheat tips
- Prepare the date mixture and chop nuts ahead of time; store in airtight containers in the fridge for up to 24 hours. The sticky dates become easier to blend when slightly chilled.
- Once the bars are pressed and set, wrap each in parchment or store in an airtight container. They stay fresh in the fridge for up to a week, keeping their chewy texture and rich aroma.
- For longer storage, freeze the bars for up to 3 months. Wrap them tightly to prevent freezer burn. Thaw at room temperature for 10-15 minutes before serving to regain softness.
- Refrigerated bars are best enjoyed within a week, but if you want to reheat, let them sit at room temp for 5 minutes and enjoy the softer, more pliable texture. No microwave needed.
FAQs about No Bake Date Bars
1. Can I use dried dates that are a bit hard?
Use soft, moist dates for easier blending and better texture. Drier dates need soaking in warm water for 10 minutes.
2. Can I replace honey with another sweetener?
Yes, you can swap honey with maple syrup or agave. Expect a slightly thinner, less floral sweetness.
3. How do I know when the bars are ready to cut?
Chill the mixture for at least 2 hours until firm. The texture should be chewy, and bars should hold their shape.
4. How long can I keep these bars in the fridge?
Store in an airtight container in the fridge for up to a week. For longer, freeze for up to 3 months.
5. My mixture is too sticky/ dry, what do I do?
If the mixture feels too sticky, add a bit more oats or nuts. If too dry, splash with a tiny bit of warm water.
6. How do I get the mixture to press evenly into the pan?
Press firmly with the back of a spatula or your fingers to ensure even, compact bars. Use parchment for easy removal.
7. Can I add other ingredients like chocolate or dried fruit?
Add chopped nuts or seeds last to maintain crunch. Toast oats beforehand for a richer, nutty aroma.
8. Do I need to refrigerate the bars after pressing?
Chill the pressed mixture in the fridge for at least 2 hours for best setting. Slice with a sharp knife for clean cuts.
9. Can I freeze these date bars?
Yes, you can freeze the bars for up to 3 months. Wrap individually and thaw at room temperature for 10 minutes before serving.
10. How can I customize the flavor of these bars?
Yes, you can customize flavors by adding cinnamon, lemon zest, or vanilla for more aroma and complexity.
Making these no-bake date bars is a small act of mindfulness that sticks with me long after the last crumb is gone. They’re a reminder that simple ingredients, handled with care, can turn into something unexpectedly comforting. In a busy moment, they offer a quiet pleasure, a grounding ritual I keep coming back to.
Plus, there’s a gentle satisfaction in knowing I can whip up something nourishing and sweet with just a handful of pantry staples. No matter the season, these bars seem to fit right into the rhythm of my days—easy to make, hard to resist, and always a little bit special.
Welcome to Proud of This Mess – a place where food, creativity, and a little chaos come together on a plate!
I’m Emily Carter, the founder and heart behind this little corner of the internet. Born and raised in the United States, I’ve always had a passion for cooking, experimenting, and sharing the messy, delicious journey of creating food that brings people together. My philosophy is simple: good food doesn’t have to be perfect, and a little mess makes it memorable.
At Proud of This Mess, we believe that cooking is more than just following recipes—it’s about exploring flavors, discovering new techniques, and making every meal an experience worth savoring. From comforting weeknight dinners to indulgent desserts, our goal is to inspire home cooks of all levels to embrace the joy of food without fear of imperfection.