
These no bake date balls are my go-to when I need a quick, nostalgic treat that feels like a warm hug. They’re simple, honest, and packed with the kind of sweetness that takes you right back to childhood afternoons. No fuss, no oven, just good ingredients and a little bit of love stirred in.
There’s something comforting about that chewy, caramel-y bite of dates paired with crunchy bits of nuts and a hint of cocoa. It’s the kind of snack that’s perfect for busy days, when you want something sweet but don’t want to mess with complicated recipes or clean-up. Just roll, chill, and enjoy.
Focusing on how these no-bake date balls serve as a nostalgic, no-fuss treat that comforts during hectic days, blending simplicity with a touch of childhood sweetness.
Nostalgic No-Bake Comfort
- Making these takes me back to childhood afternoons in my grandma’s kitchen, where simplicity reigned supreme.
- I love how forgiving and adaptable this recipe is — a perfect canvas for whatever nuts or cocoa I have on hand.
- There’s a surprising sense of pride in rolling these out quickly, feeling like I’ve crafted something wholesome without the fuss.
- These bites are my secret weapon for turning around a hectic day with just a handful of ingredients and a little patience.
- Every time I make them, I’m reminded that sometimes, the simplest treats bring the most comfort.
The story behind this recipe
- This recipe came together on a hectic afternoon when I needed something quick and satisfying. I was rummaging through my pantry, craving that familiar sweetness that I could make without turning on the stove. It reminded me of childhood treats—simple, honest, and downright comforting.
- I started experimenting with dates and nuts, trying to recreate that chewy, caramel-like texture I loved as a kid. The process became almost meditative—rolling these little bites felt like a quiet rebellion against busy days. Now, they’re a staple in my snack drawer, a quick fix that never fails to lift my spirits.
- Making these takes me back to childhood afternoons in my grandma’s kitchen, where simplicity reigned supreme.
- I love how forgiving and adaptable this recipe is — a perfect canvas for whatever nuts or cocoa I have on hand.
Historical and Cultural Tidbits
- These no bake date balls have roots in ancient Middle Eastern sweet treats, where dates were prized for their natural sweetness.
- Historically, similar energy bites were made by nomadic tribes, using what they had—dates, nuts, and sometimes spices—to sustain long journeys.
- In the early 20th century, homemade snack balls like these gained popularity as a simple, no-fuss way to pack energy without cooking.
Breakdown of Key Ingredients
- Dates: They’re the sweet, sticky backbone of these bites, offering natural caramel flavor. If yours are dry, soak them briefly in warm water to soften.
- Nuts: I prefer almonds or walnuts for crunch, but pecans work too. Toast them lightly to boost flavor and add a smoky note.
- Cocoa Powder: Unsweetened is my go-to for that deep, rich chocolate hit. If you want more sweetness, sprinkle in a little powdered sugar.
- Shredded Coconut: Adds chewiness and a tropical aroma. Skip if you dislike coconut or try chopped dried apricots for a different twist.
- Vanilla Extract: Just a splash for warmth and depth. If you’re out, a tiny bit of almond extract adds a lovely nutty aroma.
- Salt: A pinch enhances all the flavors. If you’re avoiding salt, a dusting of sea salt on the outside adds an appealing crunch.
- Optional Extras: Chia seeds or flaxseed can add texture and nutrition. Mix them in for a little extra bite and health boost.
Spotlight on key ingredients
Dates:
- They’re the sticky, sweet core of these bites, offering a caramel-like richness. If yours are dry, soak briefly in warm water to soften.
- Nuts: I lean towards almonds or walnuts for crunch, but pecans work just as well. Toast them lightly to bring out a smoky aroma and deepen flavor.
Nuts:
- Cocoa Powder: Unsweetened for that deep, intense chocolate flavor. If you want a sweeter bite, dust with powdered sugar after rolling.
- Shredded Coconut: Adds chewy texture and a tropical aroma. Skip if you dislike coconut or try chopped dried apricots for a fruity twist.
Notes for ingredient swaps
- Dairy-Free: Use coconut oil or nut butters instead of butter for a richer, dairy-free option that still adds depth.
- Sugar-Free: Swap out honey or maple syrup for a sugar-free syrup or a mashed banana, which adds moisture and natural sweetness.
- Nut-Free: Replace nuts with sunflower or pumpkin seeds for crunch without the allergy concern.
- Vegan: Ensure your chocolate and sweeteners are plant-based. Dark chocolate with no dairy works well.
- Coconut-Free: Skip shredded coconut or substitute with crushed graham crackers for a different texture and flavor.
- Extra Flavor: Add a pinch of cinnamon or a splash of espresso for a flavor twist that enhances the natural sweetness.
- Textural Boost: Mix in chia seeds or hemp seeds for added nutrition and a little extra crunch.
Equipment & Tools
- Food processor: To finely chop nuts and blend ingredients into a sticky dough.
- Sharp knife: To chop dates into small, manageable pieces.
- Cutting board: To provide a stable surface for chopping dates.
- Mixing spoon or spatula: To help scoop and mix ingredients before rolling.
- Parchment paper: To prevent sticking and make cleanup easier on the tray.
- Refrigerator: To set the balls and enhance their chewy texture.
Step-by-step guide to no bake date balls
- Gather all your ingredients: pitted dates, your choice of nuts, cocoa powder, shredded coconut, vanilla extract, and a pinch of salt.
- Chop the dates into small pieces—this helps them blend easier and ensures smooth bites. Use a sharp knife and a sturdy cutting board.
- In a food processor, pulse the nuts until finely chopped but not turned into nut butter. You want some texture—about 10 seconds.
- Add the chopped dates, cocoa powder, vanilla, and salt to the processor. Blend until the mixture is sticky and begins to clump together—about 30 seconds.
- If the mixture feels too dry or crumbly, add a teaspoon of water or a splash of maple syrup. If it’s too sticky, sprinkle in a little more cocoa or chopped nuts.
- Scoop out small portions—about a tablespoon each—and roll between your palms into tight balls. Keep them uniform for even chill time.
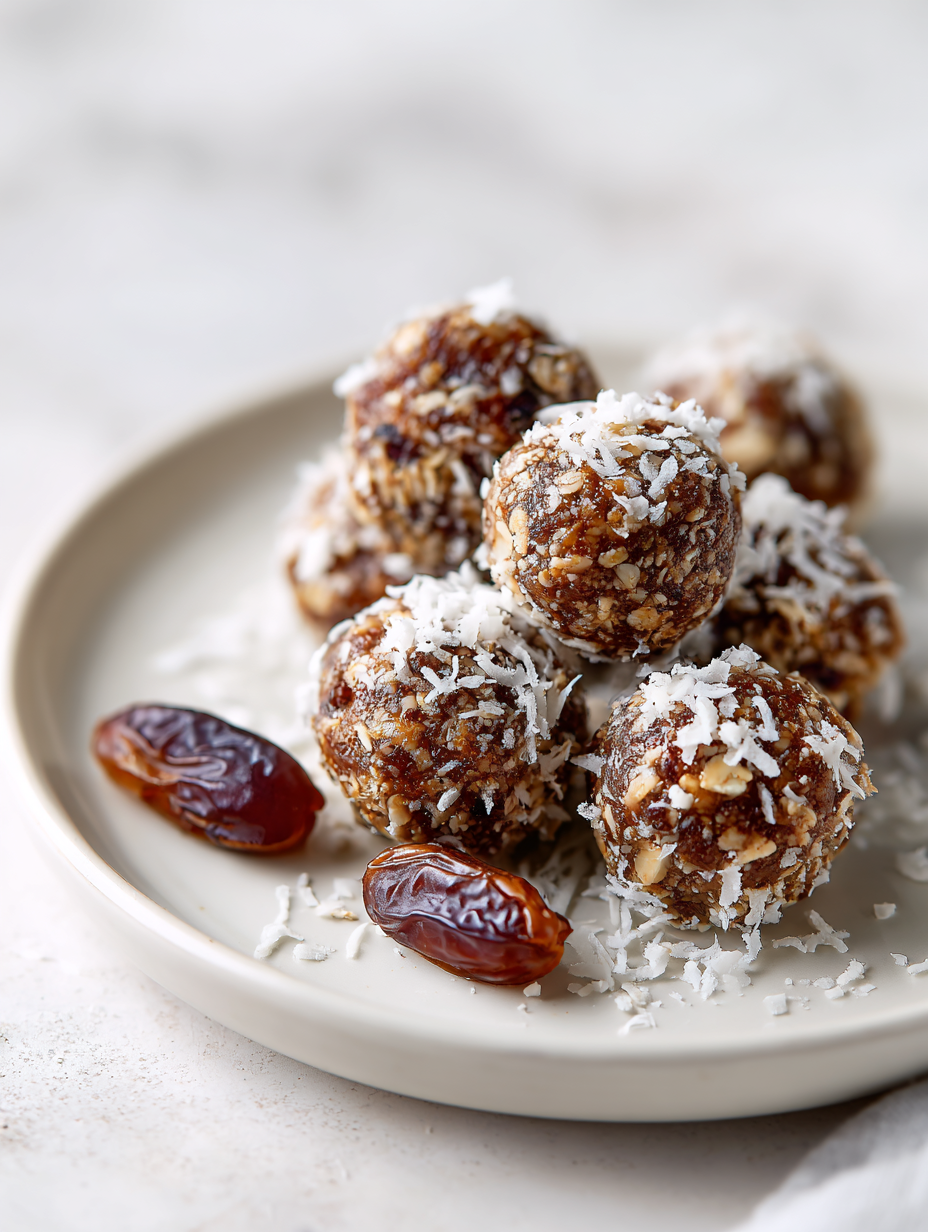
- Roll each ball in shredded coconut for a finished look and extra flavor. Place on a tray lined with parchment paper.
- Chill the bites in the fridge for at least 30 minutes—this helps them set and makes them easier to handle.
- Once chilled, check for firmness. If they’re too soft, give them a bit longer in the fridge. They should be firm to the touch but not hard.
- Serve directly from the fridge—these are best cold and chewy, with a burst of sweet, caramelized date flavor.
Let the balls chill in the fridge for at least 30 minutes before serving. Plate directly from the fridge for the best chewy texture and fresh flavor. Store leftovers in an airtight container—best within a week, or freeze for up to a month.
How to Know It’s Done
- Mixture should be sticky enough to roll without crumbling.
- Balls hold their shape firmly after chilling, not too soft or sticky.
- A faint caramel aroma from the dates and nuts, with a rich cocoa scent.
No-Bake Date Balls
Ingredients
Equipment
Method
- Chop the dates into small pieces using a sharp knife on a cutting board, which helps them blend more easily and creates a sticky base.
- Place the chopped dates into a food processor and pulse a few times until they start breaking down and become slightly sticky.
- Add the toasted and chopped nuts, cocoa powder, vanilla extract, and a pinch of salt to the processor.
- Pulse the mixture in short bursts until everything is well combined and the mixture begins to clump together, forming a sticky dough that feels pliable but holds its shape.
- If the mixture feels too dry or crumbly, add a teaspoon of water or maple syrup and pulse again until it becomes sticky. If it’s too sticky, sprinkle in a little more cocoa powder or chopped nuts.
- Scoop out about a tablespoon of the mixture and roll it between your palms into a compact ball, pressing firmly to ensure they hold together.
- Roll each ball in shredded coconut to coat the outside, giving them a neat, finished look and a chewy exterior.
- Place the coated balls on a tray lined with parchment paper, spacing them apart evenly.
- Chill the date balls in the refrigerator for at least 30 minutes to let them firm up and develop their chewy, caramel-like texture.
- Once chilled, check that the balls are firm and hold their shape. If they are too soft, give them a few more minutes in the fridge.
- Serve these delightful bites straight from the fridge for the best chewy, caramel-y experience, or store in an airtight container for up to a week.
Tips & Tricks for Perfect Bites
- Bolded Mini-Head: Use a damp spoon to easily portion sticky mixture without sticking.
- Bolded Mini-Head: Toast your nuts lightly to amplify their natural oils and deepen flavor before chopping.
- Bolded Mini-Head: Soften dates in warm water for 10 minutes to achieve a smoother, more cohesive dough.
- Bolded Mini-Head: Add a splash of water or maple syrup if the mixture feels too dry and crumbly.
- Bolded Mini-Head: Chill the rolled balls for at least 30 minutes—cold, firm bites are the best texture.
- Bolded Mini-Head: Roll in shredded coconut immediately after shaping for a tidy, flavorful coating.
- Bolded Mini-Head: For a smoother texture, pulse the mixture just until it starts to come together—avoid over-processing.
Common mistakes and how to fix them
- FORGOT to soften dates → Soak in warm water 10 minutes before blending.
- DUMPED in too many nuts → Use a smaller amount for better stickiness.
- OVER-TORCHED the mixture → Mix until just combined; avoid overheating to prevent dryness.
- MISSED chilling time → Chill for at least 30 minutes for firm, chewy bites.
Quick Fixes and Pantry Swaps
- When mixture is too dry → Splash in a teaspoon of warm water and blend again.
- If rolls stick to hands → Lightly dampen palms to prevent sticking during shaping.
- Splash chilled balls with a little coconut oil if they crumble when biting into them.
- When dates are too sticky → Chill briefly before processing to firm them up.
- Patch over cracks in balls with a tiny bit of melted chocolate or nut butter.
Prep, store, and reheat tips
- You can prepare the date mixture a day in advance; store in an airtight container in the fridge, where it will stay fresh and sticky.
- Chill the rolled balls in the fridge for at least 30 minutes before serving; this enhances their chewy texture and makes handling easier.
- Store leftovers in an airtight container in the fridge for up to a week; the flavors deepen slightly over time, becoming more caramel-y.
- Freeze the balls for up to a month—wrap individually in plastic wrap first. Thaw in the fridge or at room temperature for a few minutes before eating.
- Reheat isn’t necessary; these are best enjoyed cold, with a firm, chewy bite and rich, date-sweet aroma. If you prefer softer, let them sit at room temp for 10 minutes.
Top questions about no bake date balls
1. Can I use other dates or dried fruits?
Use soft, pitted Medjool dates for best stickiness and flavor. If yours are dry, soak them in warm water for 10 minutes.
2. Can I swap out the dates for something else?
Yes, you can substitute chopped dried apricots or figs, but the flavor and texture will change slightly, becoming a bit fruitier or chewier.
3. Should I toast the nuts beforehand?
Chop nuts finely in a food processor or by hand for a better texture and easier rolling. Toast nuts first to enhance flavor.
4. Do I need to chill the mixture or the balls?
Absolutely. Keep the mixture chilled for at least 30 minutes so the bites hold their shape and are easier to roll.
5. How long can I store these bites?
Yes, storing in an airtight container in the fridge keeps them fresh for about a week. Freeze for longer storage, up to a month.
6. What if my mixture is too dry or too sticky?
If the mixture feels too crumbly, add a teaspoon of water or maple syrup. If too sticky, add more chopped nuts or cocoa powder.
7. Can I make these dairy-free?
Yes, use coconut oil or nut butters instead of butter for dairy-free options. They add richness and help bind the mixture.
8. How can I enhance the flavor?
Add a pinch of cinnamon or a splash of espresso for a flavor boost that complements the sweetness of the dates.
9. How do I prevent the mixture from sticking to my hands?
When rolling, dampen your hands slightly to prevent sticking. Chill the balls if they become too soft to handle.
10. My date balls are cracking, what do I do?
If the bites crack or crumble, refrigerate the mixture longer or add a tiny bit more water or syrup before rolling.
These no-bake date balls are a quiet reminder that simple ingredients can come together into something unexpectedly satisfying. They’re perfect for a moment of calm in a hectic day or as a small, sweet reward after a busy afternoon. When you bite into one, you get that chewy, caramel richness that feels like a little bit of nostalgia wrapped up in a bite.
In the end, they’re not just treats—they’re a tiny act of kindness you make yourself, with ingredients that speak of comfort and familiarity. No matter how many you make, they seem to disappear faster than expected, leaving behind a lingering aroma of cocoa and toasted nuts. Sometimes, the simplest things truly are the best.
Welcome to Proud of This Mess – a place where food, creativity, and a little chaos come together on a plate!
I’m Emily Carter, the founder and heart behind this little corner of the internet. Born and raised in the United States, I’ve always had a passion for cooking, experimenting, and sharing the messy, delicious journey of creating food that brings people together. My philosophy is simple: good food doesn’t have to be perfect, and a little mess makes it memorable.
At Proud of This Mess, we believe that cooking is more than just following recipes—it’s about exploring flavors, discovering new techniques, and making every meal an experience worth savoring. From comforting weeknight dinners to indulgent desserts, our goal is to inspire home cooks of all levels to embrace the joy of food without fear of imperfection.