
This recipe is a little rebellion against the usual cookie dough safety rules, but with a twist—it’s all safe to eat straight from the bowl. There’s something about the raw, velvety texture mixed with chocolate chips that brings back childhood afternoons. It’s like holding a tiny, edible secret in your hand.
I find myself turning to these bites when I need comfort that’s quick and honest—no oven, no fuss. The best part? No raw eggs, no raw flour, just simple ingredients that hit that nostalgic spot without any worry. Sometimes, a spoonful of this is all I need to reset a chaotic day or to share a moment of sweet, unpolished joy.
This recipe is all about reclaiming childhood joy while emphasizing safe, edible cookie dough that skips eggs and raw flour—perfect for those moments when you crave a sweet, nostalgic treat without the fuss.
Childhood Nostalgia in Every Bite
- Making these bites feels like a small act of rebellion—indulging in childhood without guilt.
- The smooth, chocolatey texture always surprises me how satisfying raw cookie dough can be.
- I love how quick these come together—they’re my go-to for last-minute sweet cravings.
- Sharing these with friends sparks conversations about favorite childhood treats and messy memories.
- There’s a quiet joy in nibbling on a bite that’s perfectly sweet, chewy, and just a little naughty.
Childhood Nostalgia in Every Bite
This recipe was born out of a late-night craving for something sweet and satisfying, but with a twist — I wanted real, edible cookie dough that I could indulge in without worry. One evening, I mixed up a batch quickly, using ingredients I always keep stocked in the pantry. It became a little ritual for me to whip up these bites when I needed a quick sweet escape, especially during busy weekends or when unexpected guests showed up. Over time, I realized how much these tiny treats brought comfort and a sense of playful rebellion against the usual baking fuss.
Trivia and Origins
- These no-bake bites originated as a way to enjoy cookie dough safely, without raw eggs or flour.
- They gained popularity in the early 2000s as a quick, edible treat for kids and adults alike.
- Many homemade versions emerged from the need for a nostalgic snack that’s easy to make in minutes.
- They often circulate around social media as a simple, customizable sweet bite for any occasion.
- This recipe taps into the current trend of safe, raw treats that satisfy childhood cravings in a modern way.
Ingredient breakdown: key components
- Butter: I use unsalted for control, but salted adds a subtle savory note—try it if you prefer a richer flavor.
- Brown sugar: It’s my secret to that deep caramel vibe—darker brown makes it even more gooey and chewy.
- Vanilla extract: The splash of vanilla brightens everything—don’t skip it, even a tiny bit makes a difference.
- Chocolate chips: Semi-sweet are my go-to—they melt just enough to ooze, but feel free to swap for dark or milk.
- Flour substitute: I often use almond flour for a nutty twist—just be aware it changes the texture and flavor.
- Sweetener alternative: Maple syrup can replace sugar for a smoky, richer sweetness—just watch the moisture level.
- Salt: A pinch balances the sweetness—if you’re using salted butter, cut back a bit to avoid oversalting.
Spotlight on key ingredients
Chocolate Chips:
- Butter: I prefer unsalted to control saltiness, but salted butter adds a subtle savory punch—try it if you want a richer, more complex flavor.
- Semi-sweet melt just enough to ooze, creating that perfect chocolatey burst in every bite. Feel free to swap for dark or milk for different intensity.
- Brown sugar: Its molasses notes give the dough a deep caramel aroma and chewy texture—darker brown makes it even more gooey and rich.
Vanilla Extract:
- Butter: It’s the base that gives the dough its creamy, velvety feel. Too soft? Chill it a bit before mixing in other ingredients.
- Brown sugar: It’s what makes the bites sweet with a hint of caramel. If you want a less sweet version, reduce slightly or substitute with coconut sugar.
- Adds a warm, fragrant note that amplifies the chocolate flavor. A splash brightens every bite—don’t skimp on it.
Notes for ingredient swaps
- Dairy-Free: Swap butter for coconut oil or vegan butter for a richer, slightly tropical flavor—note that texture may become a bit softer.
- Sugar Alternatives: Use coconut sugar or agave syrup instead of brown sugar for a different sweetness profile, but expect a slightly different chewiness.
- Chocolate: Replace chocolate chips with chopped vegan chocolate or cacao nibs for a less sweet, more bitter bite with a crunch.
- Flour: Almond flour or oat flour can substitute all-purpose flour—these will change the texture, making it denser or more crumbly.
- Add-ins: Swap chocolate chips for chopped nuts or dried fruit—adds crunch and chew, but watch for moisture imbalance.
- Vanilla: Use vanilla bean paste for a more intense vanilla flavor or omit altogether if you prefer a less sweet, more chocolate-forward bite.
- Salt: Use sea salt flakes to intensify flavor or skip to keep it purely sweet—salt enhances the chocolate and sweetness.
Equipment & Tools
- Mixing bowl: To combine and blend ingredients smoothly.
- Spatula or wooden spoon: For mixing ingredients thoroughly and scraping down sides.
- Measuring teaspoons and cups: To accurately measure ingredients for consistency.
- Small cookie scoop (optional): To shape uniform bites easily.
- Lined tray or plate: For chilling and serving the bites.
Step-by-step guide to cookie dough bites
- Gather all your ingredients: butter, brown sugar, vanilla, flour, chocolate chips, and a pinch of salt. Have a small bowl and a spatula ready to mix.
- In a mixing bowl, cream together ½ cup (113 g) softened unsalted butter and ½ cup (100 g) brown sugar. Use a spatula or wooden spoon, about 2 minutes, until smooth and slightly fluffy. The mixture should smell warm and caramel-like.
- Add 1 teaspoon vanilla extract, mix briefly. Then, stir in 1 cup (120 g) of all-purpose flour. Mix until fully incorporated, the dough should feel firm and slightly crumbly but hold together when pinched. If it’s too dry, add a teaspoon of milk.
- Fold in ½ cup (90 g) chocolate chips, distributing evenly. The dough should appear speckled with gooey chocolate bits. If chips sink or clump, gently fold until spread out.
- Using a small cookie scoop or your hands, form dough into 1-inch (2.5 cm) bites. Place on a lined tray or plate. Chill in the fridge for at least 30 minutes to firm up and meld flavors.
- Once chilled, serve directly or store in an airtight container. These are best enjoyed cold but can be slightly warmed for a softer bite. No baking required!
- For serving, optional: drizzle with melted chocolate or sprinkle a pinch of sea salt for extra flavor. Plate with a napkin or small dish for easy snacking.
Chill the dough bites in the fridge for at least 30 minutes before serving. This helps the flavors meld and the bites set. Serve directly from the fridge for a firm, chewy texture, or let sit at room temperature for a softer, more decadent bite. Garnish with a pinch of sea salt or drizzle melted chocolate if desired.
How to Know It’s Done
- Dough feels firm but pliable, not sticky or crumbly.
- Chocolate chips are evenly distributed and slightly melted into the dough.
- Bites hold their shape when formed, with no cracks or crumbling.
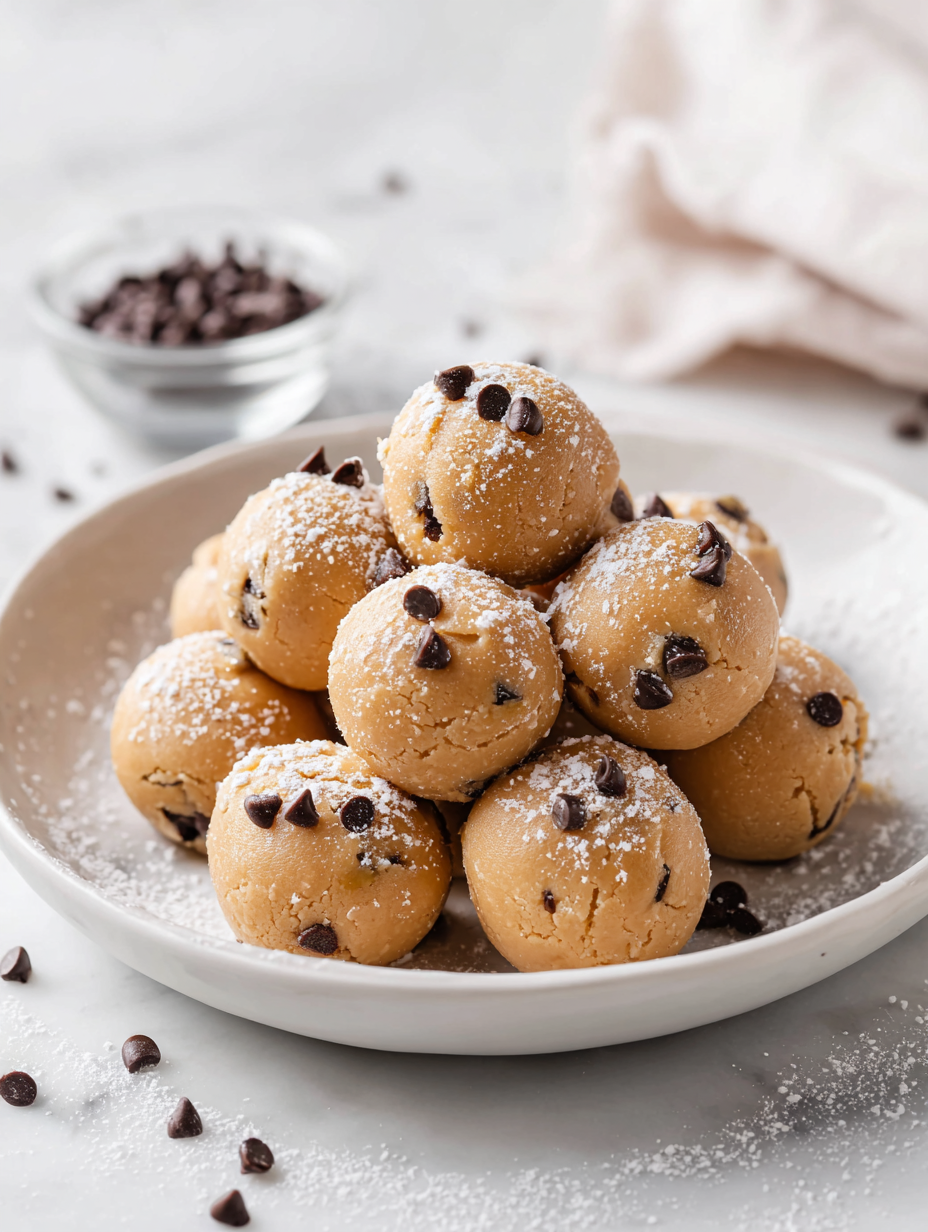
Edible Cookie Dough Bites
Ingredients
Equipment
Method
- In a mixing bowl, cream together the softened butter and brown sugar using a spatula or wooden spoon, until the mixture is smooth and slightly fluffy, and smells warm and caramel-like.
- Add the vanilla extract and mix briefly to incorporate its fragrant aroma into the dough.
- Stir in the all-purpose flour gradually, mixing until the dough feels firm but still slightly crumbly, coming together when pinched. If it feels too dry, add a teaspoon of milk to help it bind.
- Gently fold in the chocolate chips, ensuring they are evenly distributed throughout the dough. You can use a spatula for this step to prevent melting the chips.
- Using a small cookie scoop or your hands, shape the dough into 1-inch bites. Place each bite on a lined tray or plate. Once all are shaped, chill them in the fridge for at least 30 minutes to help them firm up and meld flavors.
- After chilling, the bites are ready to be enjoyed straight from the fridge or at room temperature for a softer, more decadent texture. Optional: drizzle with melted chocolate or sprinkle a pinch of sea salt for added flavor.
Notes
Tips and Tricks for Perfect Bites
- Chill the dough for at least 30 minutes to enhance flavor and firmness.
- Use a spatula to fold in chocolate chips gently—avoid overmixing to prevent melting.
- Slightly under-mix the flour for a more tender, chewy bite with a bit of rustic texture.
- For a smoother texture, warm the butter slightly before creaming to ensure even blending.
- Keep an eye on the chocolate chips when folding—they should stay chunky, not fully melted.
- If the dough feels too sticky, dust your hands lightly with flour or coconut flour for easier shaping.
- For a richer chocolate flavor, stir in a teaspoon of espresso powder or coffee extract before mixing.
Common mistakes and how to fix them
- FORGOT to measure ingredients precisely? Use a scale for accuracy and consistent results.
- DUMPED in too much flour? Sift or spoon lightly to avoid dry, crumbly bites.
- OVER-TORCHED the chocolate chips? Fold in gently at the end to prevent melting into a mess.
- MISSED chilling time? Ensure the bites are firm and hold shape before serving.
Quick fixes and pantry swaps
- When dough feels crumbly, splash in a teaspoon of milk to moisten and bind.
- If chocolate shatters when folding, gently warm the chips for a softer, more manageable texture.
- Splash a little vanilla or water if bites are too sticky to shape easily.
- Patch over cracks in the bites by pressing the edges back together—chill to set again.
- Shield from moisture by storing in an airtight container—shiny chocolate can get dull if exposed.
Prep, store, and reheat tips
- Prep the dough mixture ahead by mixing butter, sugar, and vanilla; it keeps well in the fridge for up to 24 hours, making assembly quicker later. The smell of creamy butter and caramelized sugar is inviting even before shaping.
- Store the finished bites in an airtight container in the fridge for up to 5 days. The texture remains chewy, but flavors deepen, especially if you let them sit for a day.
- For longer storage, freeze the bites in a single layer, then transfer to a zip-top bag; they’ll keep for about a month. Expect a firmer bite straight from the freezer—let sit at room temp for 10 minutes to soften.
- Reheat gently in the microwave for 10-15 seconds if you prefer a softer, melty chocolate experience. Watch for the chocolate to shimmer and the dough to warm through without melting completely.
Top questions about cookie dough bites
1. Can I eat these raw cookie dough bites?
Yes, these bites are completely safe to eat raw since they don’t contain eggs or raw flour. They have a smooth, velvety texture with bursts of chocolate flavor.
2. Can I use salted butter instead of unsalted?
Using unsalted butter helps control the saltiness, but salted butter adds a subtle savory note. Adjust the salt in the recipe accordingly.
3. Do I need to chill the dough before shaping?
Chilling the dough for at least 30 minutes firms it up, making it easier to shape. It also helps intensify the flavors.
4. Can I replace brown sugar with something else?
You can substitute brown sugar with coconut sugar or honey, but expect a different chewy texture and flavor profile.
5. Can I add different ingredients instead of chocolate chips?
Yes, you can swap chocolate chips for chopped nuts, dried fruit, or vegan chocolate for variety. Just watch for moisture changes.
6. My dough is too sticky to handle. What do I do?
If the bites are too sticky, dust your hands with a little flour or coconut flour to help shape them.
7. How should I store and reheat these bites?
Store the bites in an airtight container in the fridge for up to 5 days or freeze for up to a month. Reheat briefly for softer bites.
8. How do I prevent the chocolate from melting too much?
When folding in chocolate chips, do so gently to prevent melting. Slight warmth in the dough helps keep chips intact.
9. Can I enhance the flavor with additional ingredients?
For a richer flavor, add a splash of vanilla or espresso powder. For a milder taste, skip or reduce the vanilla.
10. My dough is crumbly. How can I fix it?
If the dough crumbles, add a tiny splash of milk or water to bring it together without making it too sticky.
These no-bake cookie dough bites are a small act of rebellion, a way to indulge without guilt or fuss. They bring back childhood memories with every chewy, chocolate-filled bite and remind me that simple ingredients can create real comfort. Sometimes, the best moments are just a handful of these in your pocket, ready to be enjoyed.
In a busy world, they’re quick to make and even quicker to disappear. Whether it’s a spontaneous treat or a planned snack, these bites keep that nostalgic spark alive. No matter when I reach for one, I’m always glad I kept this recipe close, a little reminder that sweetness doesn’t need to be complicated.
Welcome to Proud of This Mess – a place where food, creativity, and a little chaos come together on a plate!
I’m Emily Carter, the founder and heart behind this little corner of the internet. Born and raised in the United States, I’ve always had a passion for cooking, experimenting, and sharing the messy, delicious journey of creating food that brings people together. My philosophy is simple: good food doesn’t have to be perfect, and a little mess makes it memorable.
At Proud of This Mess, we believe that cooking is more than just following recipes—it’s about exploring flavors, discovering new techniques, and making every meal an experience worth savoring. From comforting weeknight dinners to indulgent desserts, our goal is to inspire home cooks of all levels to embrace the joy of food without fear of imperfection.