
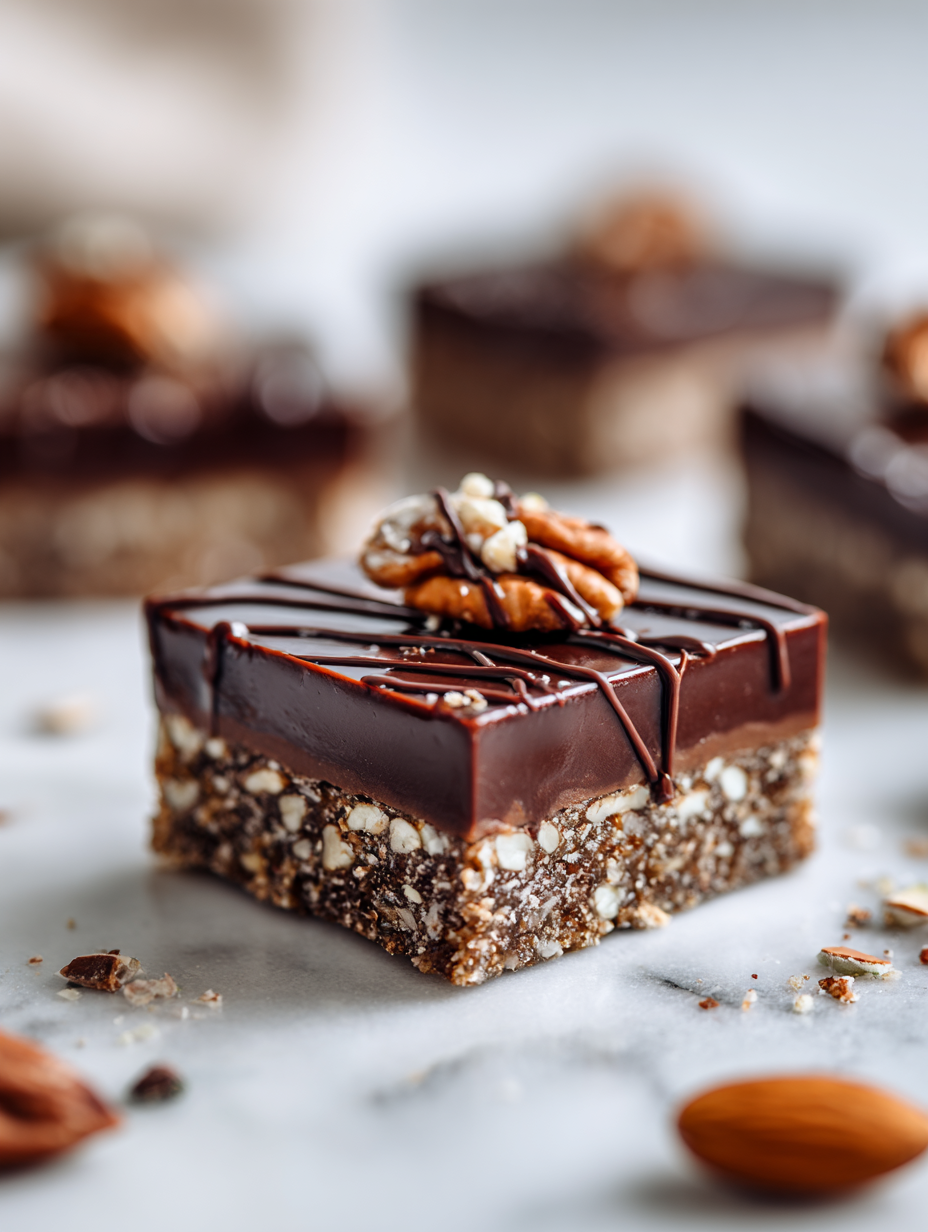
This no bake chocolate nut slice is my go-to when I need something sweet fast, but still crave that rich, nutty crunch. It’s like a little piece of childhood comfort, made with ingredients I always keep around — chocolate, nuts, and a dash of butter. No fuss, no oven, just a simple, satisfying treat that feels like a warm hug.
I love how forgiving this recipe is. Sometimes I toss in whatever nuts I have—almonds, walnuts, even a handful of pistachios if I’m feeling fancy. It’s perfect for when I want a quick dessert after dinner or a snack that’s easy to share with friends. Plus, the smell of melting chocolate and toasted nuts fills the kitchen with a cozy, inviting aroma.
What makes this slice special isn’t just the ease, but how adaptable it is. It’s a reminder that the best desserts don’t need to be complicated or perfect—just honest, flavorful, and made with a little love. And honestly, it’s become a little ritual in my kitchen whenever I need a sweet pick-me-up.
This recipe is my secret weapon for busy days when I need a quick, satisfying treat that feels indulgent but comes together with minimal fuss. It’s a reminder that sometimes, the best desserts are the simplest ones, made with ingredients I always keep on hand. No bake, no stress, just pure chocolatey comfort in every bite.
The story behind this recipe
- This recipe came about on a rainy afternoon when I needed a quick treat for a last-minute gathering. I wanted something that felt indulgent but didn’t require turning on the oven or fussing with complicated steps. The idea of combining crunchy nuts with rich, melt-in-your-mouth chocolate just felt right.
- I remember the first time I made it, the smell of toasted almonds mingling with the sweetness of melted chocolate filled the kitchen and brought back memories of childhood baking with my grandma. Since then, it’s become a go-to for when I need a fuss-free dessert that still feels special.
- Every time I make this slice, I think about how simple ingredients—nuts, chocolate, butter—can come together into something unexpectedly satisfying. It’s a reminder that sometimes, the best recipes are born from improvisation and a bit of nostalgia.
Ingredient breakdown: key components
- Dark chocolate: I love the richness of good quality dark chocolate melting into a glossy, oozy pool. You can swap it for milk chocolate if you prefer a sweeter, creamier slice—just expect a milder flavor.
- Mixed nuts: I tend to use a combo of almonds, walnuts, and hazelnuts, which add both crunch and depth. Toast your nuts lightly first for a smoky aroma that really wakes up the whole slice; skip if you’re allergic or want a softer texture.
- Butter: This gives the slice its glossy finish and holds everything together. I prefer salted butter for a touch of savory, but unsalted works fine—just cut the salt if you go that route.
- Sweetener (honey or golden syrup): I add a splash to enhance the chocolate’s richness and give a slight chewiness. Use maple syrup if you want a more pronounced flavor, but reduce the quantity to keep it firm.
- Vanilla extract: A few drops add warmth and depth to the chocolate. Skip if you’re out, but it really rounds out the flavor—think of it as the quiet but essential background note.
- Optional extras (sea salt, dried fruit): A pinch of flaky sea salt on top elevates the chocolate, while dried cranberries or apricots can add a chewy, tangy counterpoint. Use sparingly so it doesn’t overshadow the nuts and chocolate.
Spotlight on key ingredients
Dark chocolate:
- I love how it melts into a silky, oozy pool, creating that deep, bittersweet aroma. Swap with milk chocolate for a sweeter, creamier result—less intense, more mellow.
- Nuts: Toasted almonds and walnuts deliver a crunchy, smoky burst with each bite. If you’re allergic, try seeds like pumpkin or sunflower for similar crunch and a nutty aroma.
Mixed nuts:
- They add texture and richness, turning each bite into a satisfying crunch. Lightly toasted first, they release a fragrant, warm aroma that’s hard to resist. Skip if you prefer softer or seed-based textures.
- Butter: It binds everything together and gives that glossy finish. Salted butter adds a subtle savory note, while unsalted is neutral—adjust the salt in your recipe accordingly.
Notes for ingredient swaps
- Dairy-Free: Swap butter for coconut oil or vegan margarine. Expect a slightly different texture, maybe a tad softer or more coconut-y aroma.
- Chocolate: Use dairy-free dark chocolate or carob chips. The flavor will be less intense but still rich and satisfying.
- Nuts: Substitute with seeds like pumpkin or sunflower for crunch. They add a different, slightly earthier flavor and texture.
- Sweetener: Maple syrup or agave nectar can replace honey. They bring a different sweetness profile—more floral or caramel notes.
- Vanilla: Use vanilla essence or skip altogether. The slice will be less warm and rounded but still delicious.
- Additional Mix-ins: Dried fruits like cranberries or apricots can add tartness and chew. Use sparingly to avoid overwhelming the chocolate and nuts.
- Binder: Marshmallow or coconut flakes can act as additional binders or fillers, changing the texture but keeping it no bake.
Equipment & Tools
- 20cm (8-inch) square baking dish: Holds the mixture and helps shape the slice.
- Heatproof bowl: Melts the chocolate evenly using bain-marie.
- Spatula: Spreads and smooths the mixture in the dish.
- Knife: Cuts the set slice into pieces.
- Parchment paper: Prevents sticking and makes removal easy.
Step-by-step guide to no bake slice
- Gather your equipment: a 20cm (8-inch) square baking dish, a heatproof bowl, a spatula, and a knife for slicing.
- Line the baking dish with parchment paper, leaving a slight overhang for easy removal.
- Chop the dark chocolate into small pieces; this helps it melt evenly. Set aside.
- Toast the nuts lightly in a dry pan over medium heat for about 3-4 minutes, stirring frequently until fragrant and golden. Let cool slightly.
- Melt the chocolate: place the chopped chocolate in the heatproof bowl. Set the bowl over a pot of simmering water (bain-marie) at about 60°C (140°F). Stir gently until smooth and glossy, about 3-4 minutes. Be careful not to let the bowl touch the water.
- Remove the bowl from heat. Stir in the butter until fully melted and incorporated. Add the honey or golden syrup, vanilla extract, and a pinch of salt. Mix well.
- Fold in the toasted nuts quickly before the chocolate starts to set. Ensure nuts are evenly coated.
- Pour the mixture into the prepared dish, spreading it evenly with a spatula. Gently tap the dish to level the surface and remove air bubbles.
- Place the dish in the fridge for at least 2 hours or until the slice is firm and set. For quicker setting, freeze for about 1 hour.
- Once set, lift the slice out using the parchment overhang. Use a sharp knife to cut into squares or rectangles.
- Serve immediately or store in an airtight container in the fridge for up to a week.
Chill the slice in the fridge until firm, about 2 hours. Slice with a sharp knife, then serve directly or store in an airtight container in the fridge for up to a week.
How to Know It’s Done
- Chocolate is glossy and smooth, no graininess or separation.
- Nuts are toasted and fragrant, not burnt or raw.
- The slice feels firm and holds its shape when cut.
No Bake Chocolate Nut Slice
Ingredients
Equipment
Method
- Line your square baking dish with parchment paper, leaving a slight overhang for easy removal.
- Chop the dark chocolate into small pieces—this helps it melt smoothly and evenly. Set aside.
- Toast the mixed nuts in a dry pan over medium heat for about 3-4 minutes, stirring frequently until fragrant and golden. Let them cool slightly, then chop or break into smaller pieces.
- Set up a bain-marie by placing the chopped chocolate in a heatproof bowl over a pot of simmering water. Stir gently until the chocolate is melted, glossy, and smooth, about 3-4 minutes. Remove from heat.
- Stir the melted chocolate with the melted butter until well combined. Add the honey or golden syrup, vanilla extract, and a pinch of sea salt, then mix until smooth and shiny.
- Quickly fold in the toasted nuts until they are evenly coated with the chocolate mixture.
- Pour the mixture into your prepared dish, spreading it out evenly with a spatula. Gently tap the dish on the counter to remove any air bubbles and level the surface.
- Place the dish in the fridge and chill for at least 2 hours, or until the slice is firm and set. For quicker results, you can freeze it for about 1 hour.
- Once set, lift the slice out using the parchment paper overhang. Use a sharp knife warmed slightly to cut into squares or rectangles.
- Serve immediately or store in an airtight container in the fridge for up to a week. The slice will become even firmer and more chocolatey over time.
Notes
Pro tips for perfect slices
- Bolded Melting: Use chopped chocolate for faster, more even melting and a glossy finish.
- Crunch Boost: Toast nuts first to bring out their fragrant, smoky aroma before adding to the mixture.
- Chocolate Shine: Stir in butter off heat for a silky, shiny coating that sets beautifully.
- Layer Evenly: Tap the dish on the counter to eliminate air bubbles and create a smooth surface.
- Chill Time: Let the slice firm in the fridge for at least 2 hours; patience pays off for clean cuts.
- Cutting Tips: Warm your knife slightly before slicing to prevent cracking or crumbling.
- Flavor Depth: Add a pinch of sea salt on top before chilling to enhance the chocolate’s richness.
Common mistakes and how to fix them
- FORGOT to line the pan → Use parchment for easy removal and clean-up.
- DUMPED in all ingredients at once → Mix ingredients gradually to ensure even melting.
- OVER-TORCHED chocolate → Remove from heat immediately when melted, avoid direct contact with flame.
- MISSED cooling time → Let the slice chill until firm, or it will be too soft to cut cleanly.
Quick kitchen fixes
- When chocolate seizes, splash in a teaspoon of vegetable oil for smoothness.
- If nuts burn during toasting, turn down heat and stir constantly.
- DUMPED in too much salt? Rinse nuts quickly to reduce saltiness before mixing.
- Over-melted chocolate? Patch with a bit more chopped chocolate and stir until glossy.
- Shield cracks in the slice by warming the knife before slicing for clean cuts.
Prep, store, and reheat tips
- You can prepare the chocolate mixture and toast the nuts ahead of time. Keep them in separate airtight containers in the fridge. Expect up to 2 days for best freshness.
- Once assembled and set, the slice can be stored in an airtight container in the fridge for up to a week. The chocolate firms up further, making it easier to cut clean slices.
- Refrigerated slices will develop a firmer texture and intensify the chocolate flavor. Let it sit at room temperature for 10 minutes before slicing for a softer bite.
- If reheating slightly, warm in short bursts in the microwave at low power (20-30 seconds). The chocolate will soften, releasing a rich, cocoa aroma. Avoid overheating, which can cause melting or cracking.
Top questions about no bake slice
1. Can I use milk chocolate instead?
Use high-quality dark chocolate for a richer flavor and glossy melt. Milk chocolate works too, but it’s sweeter and less intense.
2. Can I swap the nuts?
Yes, you can substitute walnuts or pecans if you prefer a different crunch or flavor profile. Toast them lightly for extra aroma.
3. How long should I chill it?
Chill the slice until firm, usually around 2 hours. It should be solid enough to cut cleanly without crumbling.
4. Should I add salt on top?
Adding a pinch of sea salt on top enhances the chocolate’s richness and gives a nice contrast to the sweetness.
5. What if my chocolate seizes?
If your chocolate seizes or becomes grainy, add a teaspoon of vegetable oil and stir until smooth. This can rescue melted chocolate.
6. How do I get clean slices?
Use a sharp, warm knife to cut the slices. Warming the blade slightly helps prevent cracking and makes cleaner cuts.
7. How long does it last?
Store the slice in an airtight container in the fridge for up to a week. It firms up and the flavors deepen over time.
8. Can I make it in advance?
You can prepare the chocolate mixture and toast nuts ahead. Keep separately in the fridge for up to 2 days before assembling.
9. How do I reheat it?
Reheat in short bursts in the microwave at low power, just until slightly softened. Don’t overheat or it will lose texture.
10. What if my nuts burn?
If nuts burn during toasting, lower the heat and stir more often. Remove early if they smell smoky or look dark.
This no bake chocolate nut slice is more than just a quick treat; it’s a reminder that simple ingredients and a little patience can create something truly satisfying. Each bite offers a perfect balance of rich chocolate and crunchy nuts, a texture that’s both chewy and crisp. It’s a humble dessert, but one that feels like a small celebration every time I make it.
Whenever I need a sweet pick-me-up that’s effortless and comforting, this slice comes to mind. It’s a recipe I keep close, especially during busy weeks or when unexpected guests drop by. There’s something about the familiar aroma of melting chocolate and toasted nuts that makes the kitchen feel warmer and more inviting.
Welcome to Proud of This Mess – a place where food, creativity, and a little chaos come together on a plate!
I’m Emily Carter, the founder and heart behind this little corner of the internet. Born and raised in the United States, I’ve always had a passion for cooking, experimenting, and sharing the messy, delicious journey of creating food that brings people together. My philosophy is simple: good food doesn’t have to be perfect, and a little mess makes it memorable.
At Proud of This Mess, we believe that cooking is more than just following recipes—it’s about exploring flavors, discovering new techniques, and making every meal an experience worth savoring. From comforting weeknight dinners to indulgent desserts, our goal is to inspire home cooks of all levels to embrace the joy of food without fear of imperfection.