
Sometimes, the best desserts come together without turning on the oven. This no-bake chocolate cheesecake is one of those recipes that feels like a little secret—rich, creamy, and ready in no time, it’s perfect for hot days or when you’re short on patience but still craving something indulgent.
What I love most is how it combines the deep, fudgy flavor of good chocolate with a silky texture that practically melts on your tongue. No fuss, no baking, just a few simple ingredients coming together in a bowl, then chilling until they set just right. It’s the kind of dessert that feels fancy but is so straightforward, you’ll wonder why you didn’t make it sooner.
This recipe is a lifesaver during summer parties or last-minute gatherings. It keeps well in the fridge, and you can even make it a day ahead. The best part? It’s forgiving enough to adapt with whatever chocolate you have on hand—dark, semi-sweet, or even a splash of milk chocolate for a sweeter finish.
Focusing on the simplicity and elegance of a no-bake cheesecake that can be prepared in moments, perfect for those who want a rich, satisfying dessert without turning on the oven, especially during hot weather or busy days.
The Unexpected Joy of No-Bake Sweets
- Making this cheesecake feels like a little act of rebellion against the oven on hot days.
- I love how a handful of ingredients can turn into something so rich and satisfying with barely any effort.
- There’s a quiet pride in pulling this together last-minute and seeing everyone’s surprised faces.
- It’s become my go-to when I need a dessert that’s quick, impressive, and doesn’t heat up the kitchen.
- The best part? It’s a reminder that sometimes, simplicity really is the sweetest form of indulgence.
The story behind this recipe
This recipe was born out of a late summer craving for something cool and chocolatey, but with no oven in sight. I remember a particularly hot day when I wanted dessert without the fuss, and I realized that a good cheesecake could be made entirely without heat—just a bit of patience. The moment I tried it, I knew I had stumbled onto a keeper: rich, smooth, and surprisingly easy to whip up with ingredients I always keep handy. It’s become my go-to for spontaneous gatherings and those moments when I want dessert but don’t want to turn on the stove.
Trivia and Historical Notes
- This no-bake cheesecake gained popularity in the 1970s, coinciding with the rise of convenience desserts.
- Originally, it was a way to create rich desserts without needing an oven, especially in warmer climates.
- Some food historians believe the concept dates back to European icebox desserts before refrigeration was common.
- The use of cream cheese in a chilled dessert became mainstream in American kitchens during the post-war baking boom.
- Modern variations often incorporate gourmet chocolates and specialty toppings, elevating the simple concept.
Ingredient breakdown: key components
- Cream cheese: I love how it becomes silky and smooth as it melts into the chocolate—use full-fat for richness, or try Neufchâtel for a lighter feel.
- Dark chocolate: The deep, slightly bitter edge makes this cheesecake special; opt for a quality bar or chips, and melt gently over a double boiler or in short bursts in the microwave, smelling smoky and sweet.
- Heavy cream: Whips up into a glossy, velvety layer that balances the richness; if you’re out, evaporated milk can work, but it won’t be as airy.
- Sugar: Just a touch to cut the bitterness; superfine dissolves faster, so I use that for a smoother texture—taste as you go to avoid over-sweetening.
- Graham cracker crumbs: For the crust, I prefer a buttery, crunchy base, but you can swap in digestive biscuits or crushed cookies for different flavor notes—add a pinch of salt if using plain crackers.
- Butter: The binder that holds the crust together; use unsalted, melted until just bubbly, and keep an eye out for that nutty aroma as it browns slightly.
- Vanilla extract: A splash enhances the chocolate’s depth, but vanilla bean paste brings a more intense, aromatic note—use sparingly, it’s potent.
Spotlight on key ingredients
Cream cheese:
- I love how it becomes silky and smooth as it melts into the chocolate—use full-fat for richness, or try Neufchâtel for a lighter feel.
- Dark chocolate: The deep, slightly bitter edge makes this cheesecake special; opt for a quality bar or chips, and melt gently over a double boiler or in short bursts in the microwave, smelling smoky and sweet.
Heavy cream:
- Whips up into a glossy, velvety layer that balances the richness; if you’re out, evaporated milk can work, but it won’t be as airy.
- Sugar: Just a touch to cut the bitterness; superfine dissolves faster, so I use that for a smoother texture—taste as you go to avoid over-sweetening.
Notes for ingredient swaps
- Dairy-Free: Swap cream cheese for a coconut-based soft cheese or cashew cream—less tangy, more tropical feel.
- Vegan Chocolate: Use dairy-free dark chocolate or cocoa solids mixed with coconut oil—still rich, a bit more intense.
- Sugar Alternatives: Honey, maple syrup, or agave nectar can replace granulated sugar—adjust for sweetness, add a slight flavor change.
- Crust Base: Digestive biscuits or Oreo cookies (without filling) work well—try spiced graham crackers for extra warmth.
- Heavy Cream: Coconut cream or chilled evaporated milk can stand in—less airy but still creamy and smooth.
- Chocolate Type: Milk chocolate for sweeter, semi-sweet for balance, or even white chocolate for a different flavor spectrum—adjust sugar accordingly.
- Crust Texture: Use crushed cookies with a different flavor profile, like ginger snaps or vanilla wafers, for a twist.
Equipment & Tools
- Springform pan: To hold the crust and filling, making it easy to remove the cheesecake.
- Food processor or zip-top bag and rolling pin: To crush the graham crackers into fine crumbs.
- Double boiler or microwave: To melt the chocolate gently without scorching.
- Mixing bowls: To blend the ingredients smoothly.
- Spatula and whisk: To fold, scrape, and mix ingredients thoroughly.
- Plastic wrap: To cover the cheesecake during chilling.
Step-by-step guide to no-bake cheesecake
- Gather your equipment: a 20cm (8-inch) springform pan, mixing bowls, a spatula, and a whisk. Have a fine sieve ready for crumbs.
- Prepare the crust: crush 200g of graham crackers into fine crumbs using a food processor or zip-top bag and rolling pin. Mix with 100g melted butter until evenly coated.
- Press the crust: transfer the crumb mixture to the springform pan. Use the back of a spoon or a small glass to press it firmly into the base, creating an even layer. Chill in the fridge for 15 minutes.
- Melt the chocolate: place 200g of dark chocolate in a heatproof bowl. Melt over a double boiler or in short bursts in the microwave, stirring until smooth and fragrant (about 30 seconds). Let cool slightly.
- Beat the filling: in a large bowl, beat 300g of softened cream cheese with 100g of sugar until smooth. Add 150ml of heavy cream and a teaspoon of vanilla extract. Mix until fluffy and well combined.
- Incorporate the chocolate: fold the melted chocolate into the cream cheese mixture gently, keeping the texture airy. Do this in parts, until fully blended.
- Pour the filling: transfer the chocolate mixture over the chilled crust. Use a spatula to smooth the top evenly. Cover with plastic wrap and refrigerate for at least 4 hours, preferably overnight.
- Check for set: gently jiggle the pan—if the center wobbles slightly but holds shape, it’s ready. The top should look matte and firm.
- Finish and serve: run a warm knife around the edges of the pan before releasing the springform. Slice with a hot, clean knife for neat cuts. Optional: garnish with whipped cream or chocolate shavings.
Let the cheesecake chill in the fridge for at least 4 hours or overnight. When ready to serve, run a warm knife around the edges of the pan before unlocking the springform. Slice with a hot knife for clean cuts. Garnish as desired and serve straight from the fridge.
How to Know It’s Done
- The crust is firm and holds shape when pressed.
- The filling is set with a slight jiggle in the center.
- The top looks matte and dry, not shiny or runny.
No-Bake Chocolate Cheesecake
Ingredients
Equipment
Method
- Place the graham cracker crumbs in a food processor or inside a zip-top bag, then crush into fine crumbs with a rolling pin. Transfer to a bowl and mix in the melted butter until the crumbs are evenly coated and resemble wet sand.
- Press the crumb mixture firmly into the bottom of a springform pan, creating an even crust layer. Use the back of a spoon or a small glass to smooth it out. Chill in the fridge while you prepare the filling.
- Gently melt the dark chocolate over a double boiler or in short bursts in the microwave, stirring until smooth and fragrant. Let it cool slightly so it doesn’t melt the cream cheese when combined.
- In a large mixing bowl, beat the softened cream cheese with the superfine sugar until the mixture is smooth and creamy, with no lumps remaining. This should take about 2-3 minutes with an electric mixer.
- Add the vanilla extract to the cream cheese mixture and mix until combined. Then, fold in the melted chocolate gently, keeping the mixture airy and smooth.
- In a separate bowl, whip the chilled heavy cream until it forms stiff peaks, which should be glossy and firm to the touch.
- Carefully fold the whipped cream into the chocolate-cream cheese mixture in batches, gently combining until uniform and fluffy.
- Pour the smooth filling over the chilled crust, spreading it evenly with a spatula. Cover the pan with plastic wrap and chill in the fridge for at least 4 hours, preferably overnight.
- Once set, run a warm knife around the edges of the springform to loosen the cheesecake. Carefully remove the sides of the pan, revealing a glossy, dense chocolate cheesecake.
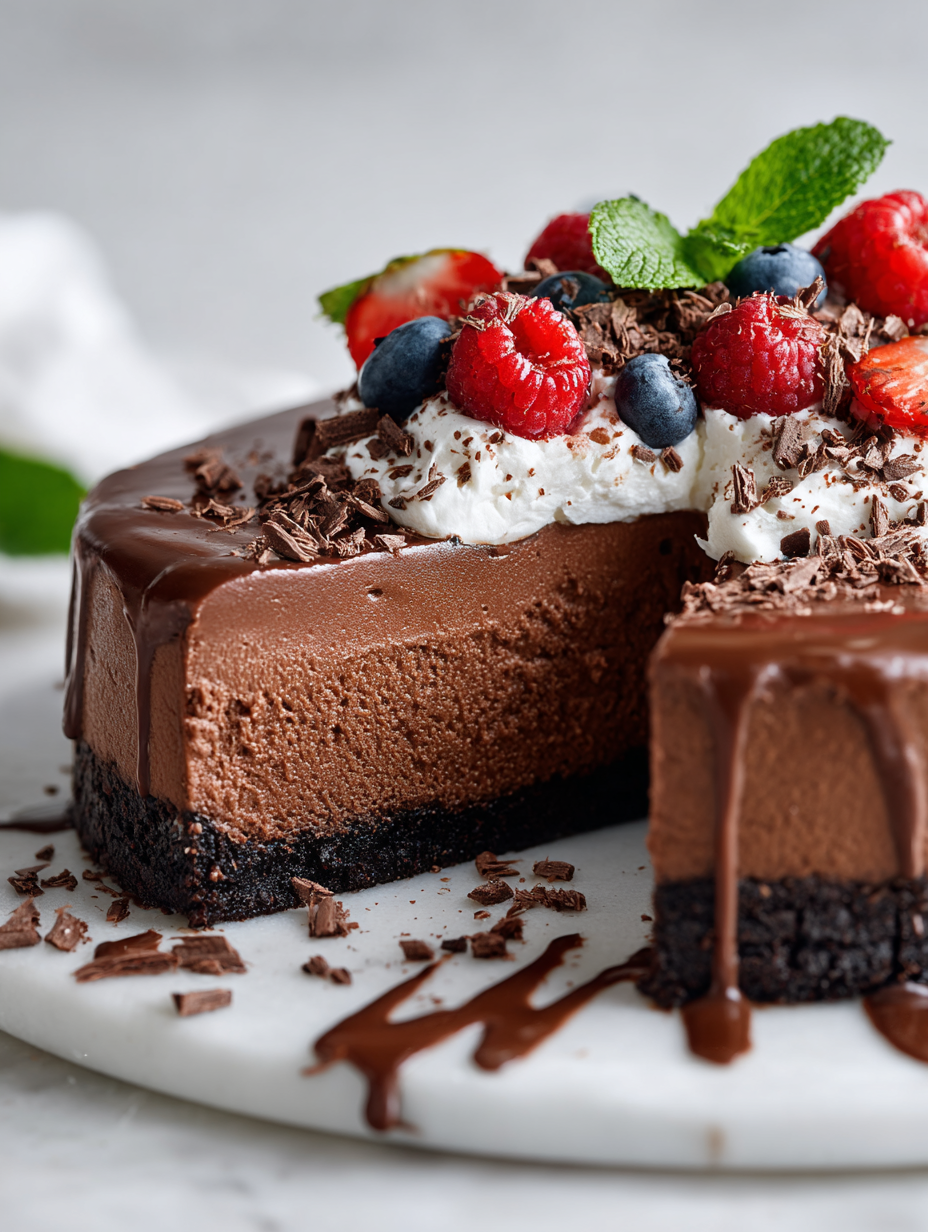
- Slice with a hot, clean knife for neat pieces. Serve as is or garnish with whipped cream, chocolate shavings, or berries for an extra touch of elegance.
Pro tips for perfect cheesecake
- Bolded mini-head: Chill your mixing bowl and beaters—warm cream whips unevenly, but chilled tools keep it glossy.
- Bolded mini-head: Melt chocolate gently—short bursts in the microwave prevent seizing and bring out that deep, smoky aroma.
- Bolded mini-head: Use a springform pan—eases removal and keeps those clean, sharp edges intact.
- Bolded mini-head: Press the crust firmly—and evenly—using the bottom of a glass for a crisp, consistent base.
- Bolded mini-head: Let the cheesecake set overnight—patience pays off with a perfectly firm, sliceable dessert.
- Bolded mini-head: Warm your knife—dip in hot water and wipe—makes smooth, clean slices through the rich, dense filling.
Common mistakes and how to fix them
- FORGOT to measure ingredients precisely → Use a scale for accuracy.
- DUMPED chocolate into hot water → Melt chocolate gently, avoid scorching.
- OVER-TORCHED the crust → Bake until golden, not dark, to prevent bitterness.
- MISSED chilling time → Chill at least 4 hours for perfect set.
Quick fixes and pantry swaps
- When the chocolate seizes, splash in a small splash of hot milk and stir gently.
- If the crust crumbles, patch with a thicker layer of melted butter and press firmly again.
- DUMPED in too much sugar? Add a splash of cream to balance sweetness and smooth the texture.
- When the cheesecake cracks, shield with whipped cream or chocolate shavings for a quick fix.
- Rescue a runny filling by folding in a touch of more whipped cream and chilling briefly.
Prep, store, and reheat tips
- Prepare the crust and make the filling up to a day in advance; keep tightly covered in the fridge. The flavors meld and the texture firms up overnight, making slicing easier and cleaner.
- Store the assembled cheesecake covered with plastic wrap in the fridge for up to 24 hours. The chocolate deepens in flavor, and the texture becomes more cohesive after a day chilling.
- If you need to keep it longer, it’s best to consume within 2 days; after that, the texture may start to soften or weep slightly. Keep an eye on the crust—it can absorb moisture over time.
- Reheat slices briefly at room temperature if you prefer softer, more melt-in-your-mouth bites. Just a few minutes out of the fridge will soften the edges and enhance the chocolate aroma, making each bite feel just right.
Top questions about no-bake cheesecake
1. Can I use cold cream cheese?
Use room temperature cream cheese for a smooth, lump-free filling that blends easily.
2. How long should I refrigerate it?
Chill the cheesecake for at least 4 hours, preferably overnight, until it feels firm and slightly wobbly in the center.
3. Can I microwave the chocolate?
Yes, melting the chocolate gently over a double boiler or in short microwave bursts prevents scorching and keeps the flavor rich and smoky.
4. Can I change the crust ingredients?
Substitute graham cracker crumbs with digestive biscuits or crushed cookies for different flavors and textures.
5. My cheesecake won’t set properly, what do I do?
If the filling is too soft, extend the chilling time or add a little more melted chocolate to help it set better.
6. Can I use light or reduced-fat ingredients?
Use full-fat cream cheese and heavy cream for the richest, silkiest texture. Light versions will make it less decadent.
7. How do I get neat slices?
Run a warm knife around the edges before removing the springform to get clean slices and prevent cracking.
8. How should I mix the filling?
Avoid overmixing once the chocolate is added to keep the filling airy and light rather than dense and heavy.
9. Why does my cheesecake crack?
To avoid cracks, don’t overbake (which isn’t necessary here), and ensure it’s well chilled before serving.
10. How can I decorate the cheesecake?
You can top it with whipped cream, chocolate shavings, or fresh berries to hide imperfections and add flavor.
This no-bake chocolate cheesecake feels like a small act of defiance against the heat and fuss of traditional baking. It’s a simple, honest treat that relies on good ingredients and a little patience, but the reward is a rich, velvety slice that almost melts in your mouth.
Right now, when summer’s heat makes turning on the oven a hassle, this recipe is a quiet reminder that sometimes, the best desserts are those that come together with just a few minutes of effort and a lot of chill time. It’s imperfect, adaptable, and almost always a hit—no oven required.
Welcome to Proud of This Mess – a place where food, creativity, and a little chaos come together on a plate!
I’m Emily Carter, the founder and heart behind this little corner of the internet. Born and raised in the United States, I’ve always had a passion for cooking, experimenting, and sharing the messy, delicious journey of creating food that brings people together. My philosophy is simple: good food doesn’t have to be perfect, and a little mess makes it memorable.
At Proud of This Mess, we believe that cooking is more than just following recipes—it’s about exploring flavors, discovering new techniques, and making every meal an experience worth savoring. From comforting weeknight dinners to indulgent desserts, our goal is to inspire home cooks of all levels to embrace the joy of food without fear of imperfection.