
Hell’s Kitchen Mac and Cheese is not about perfection. It’s about the chaos—melty cheese, crispy edges, and that slightly burnt top that you secretly love. It’s loud, messy, and totally unapologetic, just like a good night in a busy kitchen. I’ve seen it served in all kinds of settings, from frantic weeknights to big family gatherings, and it always brings a little bit of that wild energy to the table.
This dish isn’t refined or polished; it’s a celebration of imperfections. The way the cheese bubbles over, the crispy bits that crackle as you scoop, and the slightly uneven sauce that clings to each noodle—these are the moments that make it feel real. It’s a dish that invites you to lean in, get your hands dirty, and enjoy the glorious mess of it all.
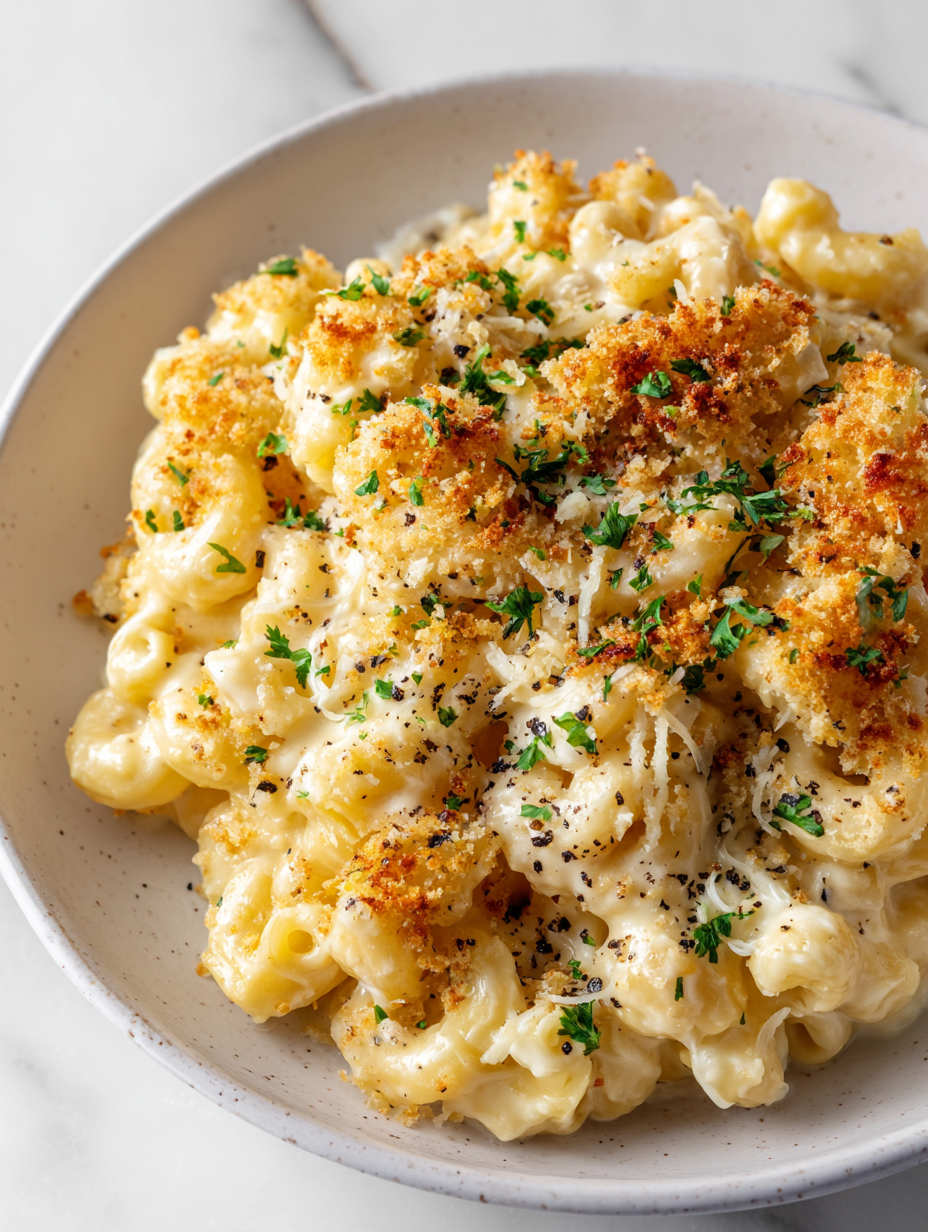
Focusing on how Hell’s Kitchen Mac and Cheese is a messy, chaotic dish that’s all about bold flavors and imperfect, loving imperfections in every cheesy, crispy bite.
Embracing the Chaos of Cheese
- I love how this dish turns chaos into comfort—cheese bubbling over, crispy edges, and that slightly burnt top that I secretly crave.
- Making this mac and cheese is my way of embracing imperfection; it’s loud, messy, and completely honest in its flavors.
- Every time I cook this, I remember the frantic energy of a busy kitchen where the best moments come from the wildest, unplanned bites.
- There’s a pride in creating something so imperfectly perfect—crusty, gooey, and bursting with bold flavors that make everyone smile.
- This dish reminds me that sometimes, the best meals are the ones made with a little chaos, a lot of cheese, and love in every bite.
The story behind this recipe
- This recipe came together after a chaotic night in the kitchen, craving something indulgent but with a bit of edge. I wanted a mac and cheese that wasn’t perfect in the traditional sense—more like a wild, unapologetic mess that still pulls you in with its cheesy charm. The burnt edges, crispy bits, and gooey center all tell a story of a dish made with love and a dash of reckless abandon.
- One night, I burned a batch slightly—just enough to get those crispy, caramelized bits that add so much flavor. Instead of tossing it, I leaned into the chaos, turning it into the core of what I love about this dish. It’s a reminder that sometimes, the best moments in cooking come from wild improvisation and a little bit of smoke.
- The dish is a tribute to kitchens that don’t follow the rules—where boldness beats precision, and every bite is a little messy but deeply satisfying.
Contextual origin, trivia, or history
- Hell’s Kitchen Mac and Cheese has roots in the classic American comfort food, but its name hints at the chaos and intensity of Gordon Ramsay’s kitchen style.
- This dish became a staple in many busy, high-pressure kitchens where messiness and bold flavors are celebrated over perfection.
- The crispy, burnt edges are not a mistake—they’re a badge of honor, often resulting from the intense heat of professional ovens or broilers.
- Variations of this dish have appeared in underground chef competitions, where the messier, the better, as a symbol of fearless cooking.
- Despite the name, it’s not a formal recipe—it’s more of a rebellious take on traditional mac and cheese, embracing chaos and flavor over finesse.
Key ingredients and tips
- Cheddar cheese: I prefer a sharp, aged cheddar for that deep, tangy punch that really stands out and melts smoothly into the sauce. Swap for Monterey Jack if you want a milder, creamier feel without losing that gooey texture.
- Elbow pasta: Classic for a reason—its shape traps the cheesy sauce perfectly. If you’re out, rotini or cavatappi work well, just make sure they’re cooked al dente to keep that satisfying bite.
- Milk: Whole milk makes the sauce silky and rich, but if you want a lighter version, try half-and-half or even a splash of heavy cream for extra decadence. Avoid skim—lacks the body needed here.
- Butter: I always use unsalted butter for control, but salted butter can add a subtle extra layer of flavor. Just cut back on salt in the recipe if you do.
- Breadcrumbs: For that crispy topping, I like panko—the coarser texture crisps up nicely. Toss with a little butter and paprika for added flavor, or skip if you prefer it softer.
- Hot sauce: A dash of hot sauce adds a smoky, spicy kick that cuts through the richness. Use your favorite for a personal touch—Tabasco or sriracha both work beautifully.
- Black pepper: Freshly cracked pepper gives a sharp, pungent bite that balances the cheese. Grind it generously—you’ll notice the difference in aroma and heat.
Key Ingredients in Focus
Cheddar cheese:
- I love how a sharp, aged cheddar melts into the sauce, offering a tangy, gooey richness that really stands out. Swap for Monterey Jack if you want a milder, creamier melt without losing that luscious texture.
- Panko breadcrumbs: I prefer coarse panko for that satisfying crunch. When toasted with butter and paprika, they turn golden and crispy, adding texture and a smoky note. Skip if you want a softer topping or prefer it less crunchy.
Pasta & Milk:
- Elbow macaroni: Its shape traps the cheese sauce beautifully, providing that classic bite. If you’re out, rotini or cavatappi work just as well, but cook until just al dente to keep the bite firm and satisfying.
- Whole milk: Creates a silky, rich sauce that clings to every noodle. Substitute with half-and-half or a splash of heavy cream for extra decadence, but avoid skim milk, which will make the sauce thin and less flavorful.
Notes for ingredient swaps
- Dairy-Free: Swap regular cheese for a plant-based cheese blend. It melts differently—less oozy, more creamy in texture.
- Gluten-Free: Use rice or chickpea pasta instead of traditional elbow macaroni. The sauce will cling differently, so stir gently.
- Vegan Milk: Almond or oat milk can replace whole milk. Expect a slightly lighter, less rich sauce with a subtle nutty note.
- Breadcrumbs: Panko can be replaced with crushed nuts or crispy fried onions for added texture and flavor.
- Cheddar Cheese: Monterey Jack or Gruyère can stand in, but they’ll alter the sharpness and meltability—less tang, more smoothness.
- Hot Sauce: Use a smoky chipotle or a tangy sriracha for different spice profiles—adjust amount to keep balance in flavor.
- Butter: Olive oil or coconut oil can replace butter—will change the richness and add a different aroma, lighter or more tropical.
Equipment & Tools
- Large pot: Cook the pasta to al dente.
- Heavy-bottomed saucepan: Make the cheese sauce evenly.
- Baking dish: Bake and crisp the top.
- Whisk: Prevent lumps while making sauce.
- Spoon or spatula: Mix and serve.
Step-by-step guide to Hell’s Kitchen Mac and Cheese
- Gather your equipment: a large pot for boiling pasta, a heavy-bottomed saucepan for cheese sauce, a baking dish, and a spoon for mixing.
- Cook the pasta: Bring a large pot of salted water to a boil (about 100°C/212°F). Add elbow macaroni and cook until just al dente, about 8 minutes. Drain and set aside.
- Make the cheese sauce: In the saucepan, melt 4 tbsp butter over medium heat (about 160°C/320°F). Once melted, whisk in 3 tbsp flour and cook for 1 minute until slightly nutty and bubbling.
- Gradually add 2 cups whole milk, whisking constantly to prevent lumps. Bring to a simmer, then lower the heat to medium-low (about 80°C/175°F). The sauce should thicken after about 5 minutes, looking glossy and smooth.
- Add cheese: Stir in 2 cups sharp cheddar (grated), a pinch of hot sauce, and freshly cracked black pepper. Continue stirring until cheese has melted into a creamy, oozy sauce. If it’s too thick, thin with a splash more milk.
- Combine pasta and sauce: Add the cooked pasta to the cheese sauce, stirring to coat evenly. Transfer to your prepared baking dish, spreading it out evenly.
- Crispy topping: Toss 1 cup panko breadcrumbs with 2 tbsp melted butter and a pinch of paprika. Sprinkle evenly over the top of the pasta.
- Bake: Place under a preheated broiler (around 200°C/390°F) for 3-5 minutes, watching closely. The top should turn golden brown and crispy, with bubbling cheese around the edges.
- Final touches: Remove from oven and let rest for 5 minutes. The cheese will set slightly, making serving easier and cleaner.
Let the mac and cheese rest for about 5 minutes after baking. Serve hot, with crispy topping intact, and enjoy the chaotic, cheesy goodness in every bite.
How to Know It’s Done
- Cheese sauce is glossy, smooth, and coats the back of a spoon.
- Breadcrumbs are golden brown and crispy, not burnt.
- Cheese reaches an internal temperature of about 70°C/158°F for safety and meltiness.
Hell’s Kitchen Mac and Cheese
Ingredients
Equipment
Method
- Cook a pound of elbow macaroni in a large pot of salted boiling water until just al dente, about 8 minutes. Drain and set aside.
- In a heavy-bottomed saucepan, melt 4 tablespoons of butter over medium heat until it starts to smell nutty and bubbles gently.
- Whisk in the flour and cook for about 1 minute, stirring constantly until the mixture turns a light golden color and smells toasty.
- Gradually pour in the milk, whisking steadily to prevent lumps. Bring the mixture to a gentle simmer, and cook for about 5 minutes until it thickens and becomes glossy.
- Add the grated sharp cheddar cheese to the sauce, stirring until it melts completely into a smooth, cheesy sauce. Stir in hot sauce and plenty of freshly cracked black pepper for bold flavor.
- Mix the cooked pasta into the cheese sauce, making sure all the noodles are well coated and gooey.
- Transfer the cheesy pasta mixture into a greased baking dish, spreading it out evenly.
- Toss the panko breadcrumbs with melted butter and paprika, then sprinkle evenly over the top of the pasta.
- Place the dish under a preheated broiler set to high, and cook for 3-5 minutes until the breadcrumbs turn golden brown and crispy, and the cheese is bubbling around the edges. Keep a close eye to prevent burning.
- Remove from the oven and let it rest for 5 minutes—this helps the cheese set slightly and makes serving easier. The top should be crispy and golden, with bubbling, cheesy goodness underneath.
Pro tips for perfect Mac and Cheese
- & bubbly: Use high heat briefly under the broiler to get that irresistible crispy, golden top with crackling edges.
- Cheese melt: Gradually add warm milk to melted cheese off heat to prevent separation and achieve a silky, oozy sauce.
- Panko crunch: Toast breadcrumbs in butter until golden for a deeply flavorful, crunchy topping that resists sogginess.
- Salt & season: Taste the sauce before baking—don’t be shy with seasoning to balance the rich, cheesy flavors.
- Slow stir: When making the roux, cook it long enough for a nutty aroma—about 1 minute on medium heat—before adding liquids.
- Oven prep: Preheat broiler fully—around 200°C/390°F—so the top crisps quickly and evenly without overcooking the cheese.
- Rest & serve: Let the dish sit for 5 minutes after baking; this helps the cheese set, making each cheesy, crispy bite more satisfying.
Common mistakes and how to fix them
- WON’T BURN THE CHEESE: Keep the heat moderate when melting cheese, stir constantly to avoid scorching.
- DIDN’T CRISP TOP: Broil at high heat for full 3-5 minutes; watch closely to prevent burning.
- SAUCE IS LUMPY: Whisk vigorously while adding milk to prevent clumps and create a smooth sauce.
- OVERCOOKED PASTA: Cook until just al dente, as it will continue to soften in the oven and sauce.
Fast fixes for cheesy chaos
- When sauce is too thick, splash in warm milk and stir gently to loosen.
- If cheese isn’t melting smoothly, lower heat and add a pinch of baking soda to balance acidity.
- Splash extra hot sauce if flavor feels dull—smoky heat brightens the dish instantly.
- Patch burnt edges by scraping or scooping; if too charred, add fresh cheese on top and broil briefly.
- Shield crispy topping with foil if it over-browns before cheese melts.
Prep, store, and reheat tips
- You can prep the cheese sauce and cook the pasta a day in advance. Keep them separate in airtight containers in the fridge for up to 24 hours. Reheat gently to preserve the creamy texture and avoid separation.
- Assemble the dish a few hours ahead of time, then cover and refrigerate. When ready to bake, let it sit at room temperature for 20 minutes to ensure even heating and crispy topping.
- Leftovers keep well for 2-3 days in the fridge. Reheat in the oven at 180°C/350°F until bubbling, about 15 minutes, and broil briefly for crispy topping. Expect the cheese to thicken slightly—stir in a splash of milk if needed.
- For freezer storage, assemble and freeze unbaked in a sealed dish for up to 2 months. Thaw overnight in the fridge, then bake as usual, adding a few extra minutes if cold from frozen. The texture might be slightly softer, but flavor remains bold.
- The flavor of reheated mac and cheese intensifies slightly, especially the cheesy, smoky notes. The top may lose some crispness but can be crisped up again under the broiler for a few minutes to regain that crunch.
Top questions about Hell’s Kitchen Mac and Cheese
1. Can I prepare this dish in advance?
Yes, you can bake it ahead and reheat. Just add a splash of milk before baking to keep it creamy.
2. Can I substitute the cheese?
Use sharp cheddar for a more pronounced flavor, but a milder cheese like Monterey Jack works for a smoother, less tangy sauce.
3. How do I get a crispy top?
Broil just until the top is golden and crispy, about 3-5 minutes. Keep a close eye to prevent burning.
4. How do I prevent the cheese from burning?
Adjust the heat to medium-low when making the cheese sauce to prevent burning and separation.
5. Can I make it gluten-free?
Yes, use gluten-free pasta like rice or chickpea varieties. They cook similarly but may absorb sauce a bit differently.
6. How can I add extra flavor?
Add hot sauce or smoked paprika to boost flavor and add a smoky, spicy kick that cuts through the richness.
7. What if the sauce gets too thick?
If the sauce is too thick, stir in a little warm milk until it reaches your desired consistency.
8. What kind of breadcrumbs should I use?
Use coarse panko breadcrumbs for maximum crunch. Toss with butter and paprika for extra flavor before topping.
9. How cooked should the pasta be?
Ensure the pasta is cooked just until al dente, as it will soften further during baking and prevent mushiness.
10. Why isn’t my cheese melting properly?
If the cheese isn’t melting, lower the heat and add a pinch of baking soda to balance acidity and help melt the cheese.
This dish isn’t about finesse or polish; it’s about embracing the glorious chaos of cheese, crispy edges, and imperfectly perfect bites. It’s a reminder that some of the best comfort foods come from wild improvisation and a little bit of smoke in the kitchen.
Whenever I make this mac and cheese, I think about how it’s a messy, loud celebration of flavor—something you lean into, not away from. It’s a dish that’s deeply satisfying, especially when you’re craving bold, unapologetic food that’s made with love and a little reckless abandon.
Welcome to Proud of This Mess – a place where food, creativity, and a little chaos come together on a plate!
I’m Emily Carter, the founder and heart behind this little corner of the internet. Born and raised in the United States, I’ve always had a passion for cooking, experimenting, and sharing the messy, delicious journey of creating food that brings people together. My philosophy is simple: good food doesn’t have to be perfect, and a little mess makes it memorable.
At Proud of This Mess, we believe that cooking is more than just following recipes—it’s about exploring flavors, discovering new techniques, and making every meal an experience worth savoring. From comforting weeknight dinners to indulgent desserts, our goal is to inspire home cooks of all levels to embrace the joy of food without fear of imperfection.