
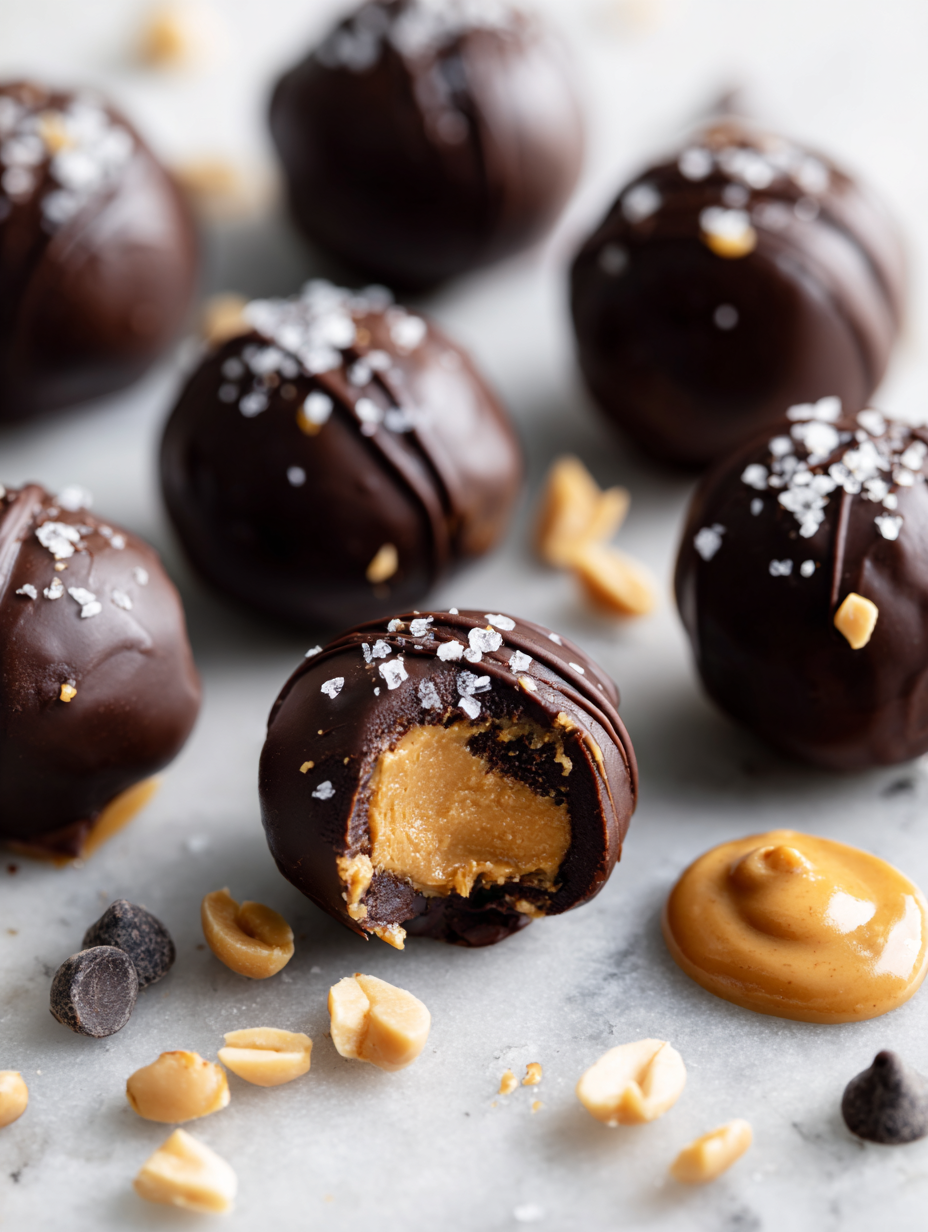
Making these chocolate peanut butter truffles feels like a little act of rebellion against the slick, perfect desserts you find online. It’s about messy hands, sticky fingers, and that satisfying crumble of chocolate coating with each bite. There’s a certain joy in the imperfect, in the way the peanut butter oozes out just slightly when you bite into them.
These truffles take me back to lazy weekend afternoons and the smell of peanut butter lingering in the air. They’re not polished or refined, but they’re honest and comforting—like a quick hug in chocolate form. It’s a recipe that reminds me that sometimes, the best treats are the simple ones we make at home, without fuss, just love and a little bit of chaos.
Focusing on the nostalgic comfort of childhood treats, this recipe emphasizes the imperfect, messy joy of making homemade truffles with simple ingredients that evoke memories of weekend baking sessions and lazy afternoons.
Nostalgic bites of childhood
- Biting into these takes me straight back to lazy Sunday afternoons with a jar of peanut butter and a spoon—pure, sticky comfort.
- There’s a wild, almost chaotic joy in rolling these truffles, feeling the peanut butter squish between your fingers.
- These treats remind me that sometimes, the messiest, simplest ingredients make the most memorable bites.
- I love how the peanut butter oozes slightly when you bite in—like a little secret hidden inside the chocolate shell.
- Making these feels like a small act of rebellion—rejecting perfection in favor of honest, homemade goodness.
The story behind this recipe
This recipe came together on a rainy Sunday when I was craving something rich and nostalgic but with a twist of simplicity. I remembered how my grandmother used to make peanut butter balls, but I wanted to elevate that comfort with good quality chocolate and a little bit of chaos. The messy process of rolling and coating these truffles makes me smile every time, reminding me that sometimes, the best treats are born from spontaneous moments and imperfect hands. It’s a reminder that joyful baking doesn’t need to be polished, just honest and a little bit fun.
Chocolate Peanut Butter Truffles Trivia
- These truffles echo a mid-20th century American home-cooked treat, where simple ingredients like peanut butter and chocolate became pantry staples for quick, satisfying desserts.
- The combination of chocolate and peanut butter gained popularity in the 1960s, thanks to the rise of candy bars like Reese’s Peanut Butter Cups, which inspired this homemade version.
- Historically, peanut butter was introduced to America in the late 1800s and quickly became associated with comfort food staples, leading to countless recipes blending it with chocolate.
Ingredient breakdown: key components
- Chocolate: I lean towards good quality dark chocolate; it melts smoothly and has that deep, cocoa aroma that’s almost smoky. If you prefer milk chocolate, it’ll be sweeter and creamier, but the richness might soften the peanut butter’s saltiness.
- Peanut Butter: I use a chunky, natural peanut butter for texture, but a smooth variety works if you want a more uniform bite. The natural oils mean it’s oozy and fragrant—if yours feels dry, warm it slightly to loosen it up.
- Butter: I add a touch of butter to the chocolate for a glossy finish and easy coating. Unsalted is best so the salt in the peanut butter stands out. If you skip it, the coating might be a little less shiny but still tasty.
- Sweetener: Sometimes I toss in a drizzle of honey or maple syrup in the peanut butter for a subtle floral note. If you like a more subdued sweetness, stick to just the peanut butter—if you want a little extra, add a pinch of flaky sea salt.
- Cocoa Powder: I prefer a bittersweet, unsweetened cocoa powder; it intensifies the chocolate flavor and adds a slight bitterness that balances the sweetness. You can swap for Dutch-process cocoa for a smoother, less acidic flavor, but avoid sweetened cocoa powders.
- Coating: I use crushed pretzels or graham crackers along with the chocolate for texture and flavor contrast. If you want a cleaner look, stick to just melted chocolate, but the crunch really makes these special.
- Extras: A pinch of flaky sea salt on the finished truffles heightens all the flavors—don’t skip it if you love that salty-sweet combo. A dusting of cocoa or powdered sugar can add a pretty finishing touch, too.
Spotlight on key ingredients
Chocolate:
- I prefer a rich, bittersweet dark chocolate; it melts smoothly and has a deep cocoa aroma that’s almost smoky. Swap with milk chocolate for a sweeter, creamier bite, but it softens the peanut butter’s saltiness.
- Peanut Butter: I love using chunky, natural peanut butter for texture; it’s oozy and fragrant. If you want a uniform bite, go for smooth but warm it slightly to loosen if it feels dry.
Peanut Butter:
- The natural oils make it oozy and fragrant—if yours feels dry, gently warm it to loosen it up before mixing.
- Cocoa Powder: I lean towards unsweetened, bittersweet cocoa for depth and slight bitterness that balances sweetness. Dutch-process gives a smoother flavor, but avoid sweetened varieties for best control.
Notes for ingredient swaps
- Chocolate: I prefer bittersweet dark chocolate for depth; swap with milk chocolate for a sweeter, creamier bite, but watch the melting point.
- Peanut Butter: Natural, chunky peanut butter adds texture and ooziness; use smooth if you want a more uniform coating, but skip oil separation first.
- Butter: Unsalted butter gives shine and smoothness; substitute with coconut oil for a dairy-free version, which will add a faint coconut aroma.
- Sweetener: Honey or maple syrup can add floral notes; omit or reduce if you want a less sweet, more intense peanut flavor.
- Cocoa Powder: Use Dutch-process for a smoother, less acidic taste; avoid sweetened cocoa powders to prevent unwanted sweetness in the coating.
- Crunchy Toppings: Pretzels or graham cracker crumbs add crunch; for a softer texture, skip or replace with toasted coconut flakes.
- Additional Salt: Flaky sea salt enhances sweetness; if avoiding salt, skip it but consider a pinch of smoked paprika for smoky depth.
Equipment & Tools
- Mixing bowl: For melting and mixing chocolate and peanut butter.
- Spatula: To stir melted chocolate and combine ingredients.
- Cookie scoop: To portion out uniform truffle sizes.
- Parchment paper: To set the truffles without sticking.
- Microwave-safe bowl: For melting chocolate evenly and quickly.
- Fork: To dip and coat truffles in chocolate.
Step-by-step guide to making truffles
- Equipment & Tools: Gather a mixing bowl (for melting chocolate), a spatula (for stirring), a small cookie scoop (for uniform truffle size), parchment paper (for setting), and a microwave-safe bowl (for melting chocolate).
- Melt the chocolate: Break 200g of dark chocolate into pieces. Microwave in 30-second bursts, stirring after each, until smooth and shiny, about 1.5 minutes total. Let cool slightly.
- Prepare peanut butter mixture: In a bowl, combine 1 cup chunky peanut butter with 2 tbsp softened butter and 1 tbsp honey (if using). Mix until smooth and slightly creamy.
- Form the truffles: Using the cookie scoop, portion out about 1 tbsp of peanut butter mixture. Roll into balls with your hands, then place on parchment-lined tray. Chill for 15 minutes.
- Coat the truffles: Dip each peanut butter ball into the melted chocolate using a fork, letting excess drip off. Place back on parchment paper. If the chocolate starts to firm, re-warm briefly in microwave for 10 seconds.
- Add crunch: Before the chocolate sets, sprinkle with crushed pretzels or graham cracker crumbs for texture and flavor contrast. Lightly press if needed.
- Rest & set: Allow the coated truffles to rest at room temperature for about 30 minutes or until the chocolate is firm and glossy. For quicker setting, refrigerate for 15 minutes.
- Final check: The chocolate should be shiny and firm to the touch. The peanut butter inside should feel firm but yield slightly when pressed. The coating should crackle when bitten.
- Serve or store: Once set, gently transfer to a container. These can be kept in the fridge for up to a week or frozen for 1 month. Bring to room temp before serving for optimal flavor.
Let the coated truffles rest at room temperature until the chocolate is glossy and firm, about 30 minutes. For a quicker set, refrigerate for 15 minutes. Serve directly from the fridge, but bring to room temp for richer flavor.
How to Know It’s Done
- Chocolate coating is glossy and firm, not sticky or dull.
- Peanut butter inside is set but yields slightly when pressed.
- Crushed toppings adhere well and add crunch with a slight shimmer.
Chocolate Peanut Butter Truffles
Ingredients
Equipment
Method
- Break the dark chocolate into small pieces and place them in a microwave-safe bowl. Microwave in 30-second bursts, stirring after each, until smooth and shiny. Set aside to cool slightly.
- In a mixing bowl, combine the chunky peanut butter with softened butter and honey. Stir vigorously until the mixture is smooth, fragrant, and slightly creamy—this will remind you of sticky weekend afternoons.
- Add the peanut butter mixture to the melted chocolate and fold together gently. The mixture should become thick, sticky, and well combined—like a fudgy, peanutty dough.
- Using a cookie scoop, portion out about one tablespoon of the mixture. Roll each into a ball with your hands—don’t worry about perfect shapes, embrace the messy, nostalgic look. Place them on a parchment-lined tray and refrigerate for 15 minutes to firm up.
- Once chilled, take each peanut butter ball and dip it into the cooled melted chocolate, using a fork to help coat evenly. Let the excess chocolate drip off before placing the coated truffle back onto the parchment paper.
- Immediately sprinkle the crushed pretzels or graham crackers on top of the chocolate-coated truffles for crunch and texture contrast. Gently press them in if needed, then let the chocolate set at room temperature for about 30 minutes until glossy and firm.
- Once the chocolate has hardened and is shiny, transfer the truffles to a serving plate or store in an airtight container in the fridge. Let them sit at room temperature for a few minutes before enjoying to bring out the full aroma and flavor.
Notes
Tips and tricks for perfect truffles
- Bolded Mini-Head: Use a silicone spatula → Gently fold melted chocolate into peanut butter for a smooth, glossy coating.
- Bolded Mini-Head: Chill the mixture → Rest in the fridge for at least 15 minutes to make rolling easier and cleaner.
- Bolded Mini-Head: Temperature check → Melt chocolate until just smooth and shiny at around 45°C (113°F), avoid overheating to prevent seizing.
- Bolded Mini-Head: Proper coating → Dip in chocolate and let excess drip off to avoid thick, uneven layers that crack or slide off.
- Bolded Mini-Head: Rest for best finish → Let coated truffles sit at room temp until chocolate is firm and glossy, about 30 minutes.
- Bolded Mini-Head: Finishing touch → Sprinkle crushed pretzels or sea salt immediately after coating for crunch and flavor contrast.
- Bolded Mini-Head: Re-melt carefully → If chocolate thickens during dipping, warm briefly in 10-second bursts to keep it fluid without burning.
Common mistakes and how to fix them
- FORGOT to temper the chocolate → Use gentle heat, avoid overheating to prevent seizing.
- DUMPED in all ingredients at once → Mix gradually, ensuring even incorporation to prevent lumps.
- OVER-TORCHED the chocolate → Remove from heat immediately; add a small amount of butter to smooth.
- SKIPPED chilling step → Chill thoroughly for better shaping and coating adhesion.
Quick fixes and pantry swaps
- When chocolate seizes, splash in a teaspoon of vegetable oil to restore smoothness.
- If the peanut butter is too dry, warm it slightly to loosen before mixing.
- DUMPED in too much salt? Rinse briefly, then re-balance with a touch of honey or more peanut butter.
- Over-melting the chocolate? Patch it with a small piece of fresh, chopped chocolate and stir until smooth.
- When coating feels thick or lumpy, re-melt in 10-second bursts to shimmer and flow smoothly.
Prep, store, and reheat tips
- Preparing the peanut butter mixture and forming the balls can be done a day ahead; keep them covered in the fridge to prevent drying out.
- Once coated with chocolate, the truffles can be stored in an airtight container in the fridge for up to a week, maintaining their glossy finish and firm texture.
- For longer storage, freeze the uncoated or coated truffles for up to a month; let thaw at room temperature before serving to preserve flavor and texture.
- Reheating isn’t necessary; serve chilled or at room temperature. If the chocolate coating feels a little soft, let them sit out for 10 minutes to regain firmness and shine.
Top questions about chocolate peanut butter truffles
1. What kind of chocolate should I use?
Use a good quality dark chocolate with a deep cocoa aroma. It melts smoothly and gives a rich flavor. For a sweeter taste, milk chocolate works, but it softens the peanut butter’s saltiness more.
2. Can I use smooth peanut butter?
Natural, chunky peanut butter adds texture and a fragrant oiliness. If you prefer a more uniform bite, smooth peanut butter is fine. Warm it slightly if it feels dry or stiff.
3. Can I make these dairy-free?
Yes, you can substitute coconut oil for butter to make these dairy-free. It adds a faint coconut aroma and makes the coating glossy, but may soften faster in warm weather.
4. How can I adjust the sweetness?
Adding a teaspoon of honey or maple syrup to the peanut butter enhances sweetness and depth. Adjust according to your taste—less is more if you want a more pronounced peanut flavor.
5. What cocoa powder should I use?
Dutch-process cocoa powder gives a smoother, less acidic chocolate flavor. Regular unsweetened cocoa is fine, but avoid sweetened cocoa powders to keep the coating balanced.
6. Can I skip the toppings?
Crushed pretzels or graham cracker crumbs add crunch and flavor contrast. For a cleaner, smoother coating, just use melted chocolate, but the crunch makes a big difference.
7. How do I get the coating right?
Chill the formed truffles for at least 15 minutes before coating to make rolling easier. After coating, let them rest at room temp or in the fridge until the chocolate is firm and shiny.
8. What if my chocolate seizes?
If the chocolate seizes or gets lumpy, add a small splash of vegetable oil or warm it gently in short bursts. Stir until smooth and shiny, then proceed.
9. How should I store them?
Store the completed truffles in an airtight container in the fridge for up to a week, or freeze for up to a month. Bring to room temperature before serving for best flavor.
10. How do I fix sticky or cracked truffles?
If the peanut butter mixture feels too sticky to roll, chill it in the fridge for 15-20 minutes. If the coating cracks, make sure the chocolate is fully set and not too warm when dipping.
These truffles are a reminder that some of the best desserts come from simple, honest ingredients that you can throw together quickly. When you bite into one, the combination of rich chocolate and salty peanut butter hits just right, with that satisfying crunch on the outside.
Making them is a bit messy, a little chaotic, but always worth it. They’re perfect for when you need a small, sweet thing that feels homemade and real—no fuss, just flavor and a little bit of nostalgia.
Welcome to Proud of This Mess – a place where food, creativity, and a little chaos come together on a plate!
I’m Emily Carter, the founder and heart behind this little corner of the internet. Born and raised in the United States, I’ve always had a passion for cooking, experimenting, and sharing the messy, delicious journey of creating food that brings people together. My philosophy is simple: good food doesn’t have to be perfect, and a little mess makes it memorable.
At Proud of This Mess, we believe that cooking is more than just following recipes—it’s about exploring flavors, discovering new techniques, and making every meal an experience worth savoring. From comforting weeknight dinners to indulgent desserts, our goal is to inspire home cooks of all levels to embrace the joy of food without fear of imperfection.