Category: Desserts

  • Spooky Sweetness: Halloween Pumpkin Rice Krispie Treats with a Witchy Twist

    Spooky Sweetness: Halloween Pumpkin Rice Krispie Treats with a Witchy Twist

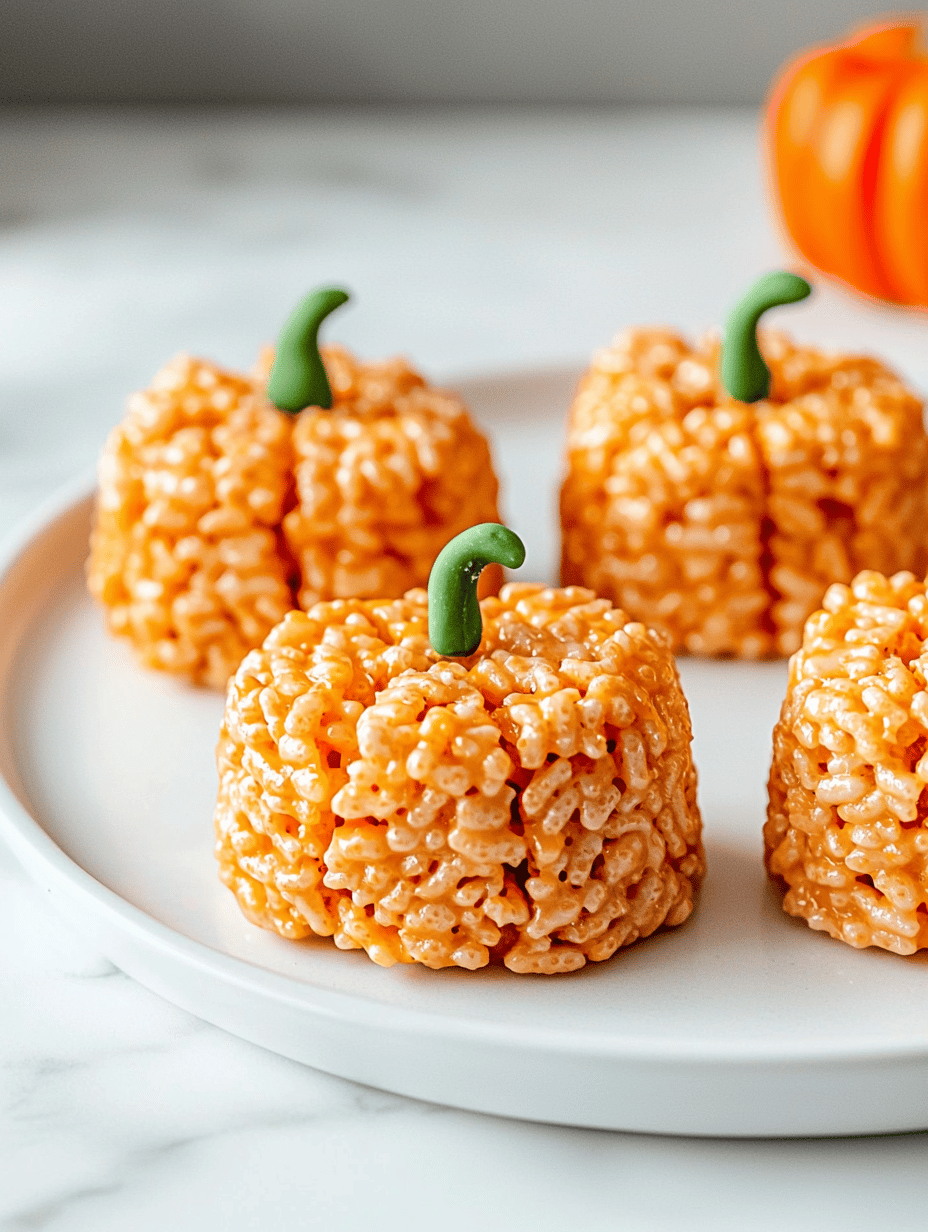
    Halloween is the only night where I feel permission to mix chaos and charm in the kitchen. This year, I decided to transform my usual Rice Krispie treats into pumpkin-shaped delights that carry a little bit of mischief and a splash of fall magic. The scent of caramelized pumpkin melds with toasted marshmallows, creating an irresistible aroma that dances through my home.

    These treats aren’t just for making monsters happy; they also bring a nostalgic sparkle to my annual Halloween gatherings. With just a handful of ingredients and a sprinkle of creativity, you can turn a simple snack into a conversation-starting centerpiece. Plus, they’re perfect for ‘mummy’ snack bags or spooky party tables.

    Pumpkin-Shaped Rice Krispie Treats

    These rice Krispie treats are transformed into cute pumpkin shapes, combining toasted marshmallows and caramelized pumpkin to create a fall-inspired snack. They develop a crispy exterior with a soft, chewy center, resembling miniature pumpkins in appearance and texture.
    Prep Time 15 minutes
    Cook Time 10 minutes
    Total Time 25 minutes
    Servings: 8
    Course: Main Course
    Cuisine: American
    Calories: 150

    Ingredients
      

    • 4 cups mini marshmallows preferably fresh
    • 6 cups rice cereal (like Rice Krispies) store-bought
    • 1/2 cup caramelized pumpkin puree see note for preparation
    • 2 tablespoons unsalted butter
    • 1 teaspoon vanilla extract

    Equipment

    • Large pot
    • Spatula
    • Silicone mold or parchment-lined tray
    • Cooking thermometer
    • Kitchen scale or measuring cups

    Method
     

    1. Start by preparing the caramelized pumpkin puree: cook pumpkin puree in a skillet over medium heat until it thickens and turns a deep orange color, about 8-10 minutes, stirring frequently. Let it cool slightly before using.
      2 tablespoons unsalted butter
    2. In a large pot, melt the unsalted butter over low heat, letting it melt slowly and smell fragrant.
      2 tablespoons unsalted butter
    3. Add the mini marshmallows to the melted butter and stir gently until completely melted and glossy, creating a sticky, smooth mixture and releasing a sweet aroma.
      4 cups mini marshmallows
    4. Remove the pot from heat and quickly fold in the caramelized pumpkin puree, stirring until well combined and smooth.
      1/2 cup caramelized pumpkin puree
    5. Gradually add the rice cereal to the mixture, folding gently with a spatula to evenly coat the cereal without crushing it.
      6 cups rice cereal (like Rice Krispies)
    6. Scoop the mixture into a silicone mold or onto a parchment-lined tray, then press firmly to compact it and shape into small pumpkin-like mounds.
    7. Use your fingers or a small tool to add a small, star-shaped stem on top of each treat, resembling a pumpkin’s stalk.
    8. Let the treats set at room temperature for about 10-15 minutes until firm and easily removable from the mold or tray.
    9. Once cooled and set, carefully remove the treats from the mold or tray and display them on a serving platter.
    10. Enjoy these colorful, festive pumpkin treats—they’re perfect for a spooky party or Halloween celebration.
    As the evening winds down, these pumpkin Rice Krispie treats remind us that the sweetest moments often come from a little bit of chaos and a lot of imagination. They’re easy to make, but the smiles they inspire are unforgettable.

    This recipe is a gentle nudge to embrace your inner kid and enjoy the thrill of turning familiar treats into festive fun. Whatever your Halloween plans, these treats are sure to add a splash of color and a dash of joy to your spooky night.

  • The Enchanted Apple Cake: A Nostalgic Twist for Fall

    The Enchanted Apple Cake: A Nostalgic Twist for Fall

    As autumn leaves drift down outside, my kitchen fills with the warm scent of cinnamon and caramelized apples. This apple cake is not just a dessert; it’s a piece of memory wrapped in tender layers, reminding me of childhood afternoons baking with my grandmother. The secret is in a simple twist: incorporating a hint of ginger to awaken those crisp apple notes.

    Every bite is a gentle dance of textures—a moist crumb complemented by aromatic, slightly tart apple slices. It’s perfect for cozy gatherings, an ode to fall’s bounty and the comfort of baking that defines the season.

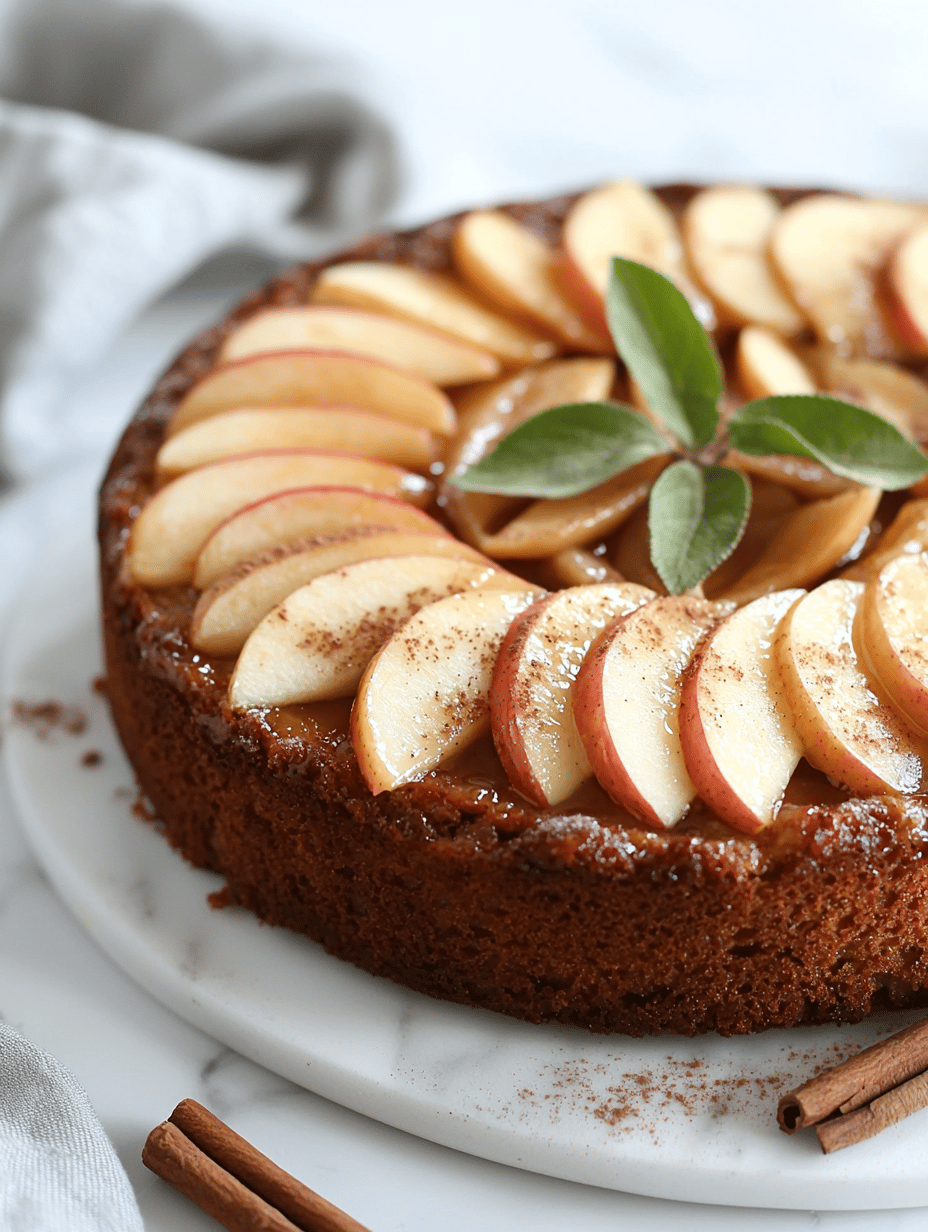
    Apple Cinnamon Cake with Ginger

    This apple cake is made by mixing a moist batter with sliced apples incorporated into the mixture, then baked until golden brown and tender. The final texture is a tender crumb interspersed with soft, aromatic apple slices and a hint of ginger to enhance the fall flavors.
    Prep Time 20 minutes
    Cook Time 40 minutes
    Total Time 1 hour
    Servings: 8
    Course: Main Course
    Cuisine: Comfort Food
    Calories: 350

    Ingredients
      

    • 2 cups all-purpose flour sifted
    • 1 cup granulated sugar
    • 1/2 cup unsalted butter melted
    • 3 large eggs
    • 1 teaspoon ground cinnamon
    • 1/2 teaspoon ground ginger
    • 1 teaspoon vanilla extract
    • 1/2 teaspoon baking powder
    • 1/4 teaspoon salt
    • 3 medium apples peeled, cored and sliced

    Equipment

    • Mixing bowls
    • Electric mixer or whisk
    • 9-inch baking pan
    • Knife
    • Cutting board
    • Spatula

    Method
     

    1. Preheat your oven to 350°F (175°C) and grease a 9-inch baking pan to prepare for baking.
    2. In a large mixing bowl, whisk together the sifted flour, sugar, cinnamon, ginger, baking powder, and salt until evenly combined.
    3. In a separate bowl, whisk the eggs, melted butter, and vanilla extract until smooth and slightly frothy.
    4. Pour the wet mixture into the dry ingredients and fold gently with a spatula until just combined, avoiding overmixing.
    5. Fold in the sliced apples into the batter, distributing them evenly throughout the mixture.
    6. Pour the batter into the prepared baking pan and smooth the top with a spatula for even baking.
    7. Bake in the preheated oven for about 40 minutes, or until the top is golden brown and a toothpick inserted in the center comes out clean.
    8. Remove the cake from the oven and let it cool in the pan for about 15 minutes. Then transfer it to a wire rack to cool completely.
    9. Slice the cooled cake and serve it warm or at room temperature, enjoying the tender crumb and aromatic apple slices.
    This apple cake isn’t just about flavor; it’s about creating moments. A slice paired with a cup of spiced tea, and suddenly, the world slows down a bit.

    Baking it is straightforward, but each bite feels special—a reminder that sometimes, the simplest ingredients can craft the most heartfelt treats.

  • Spooky Sweetness: Halloween Graveyard Pudding Cups

    Spooky Sweetness: Halloween Graveyard Pudding Cups

    Imagine stumbling upon a mini graveyard right on your dessert plate. That’s what makes these Halloween Graveyard Pudding Cups so irresistible—they turn a simple treat into a spooky spectacle. Using everyday ingredients, you can conjure up a dessert that surprises both kids and adults alike.

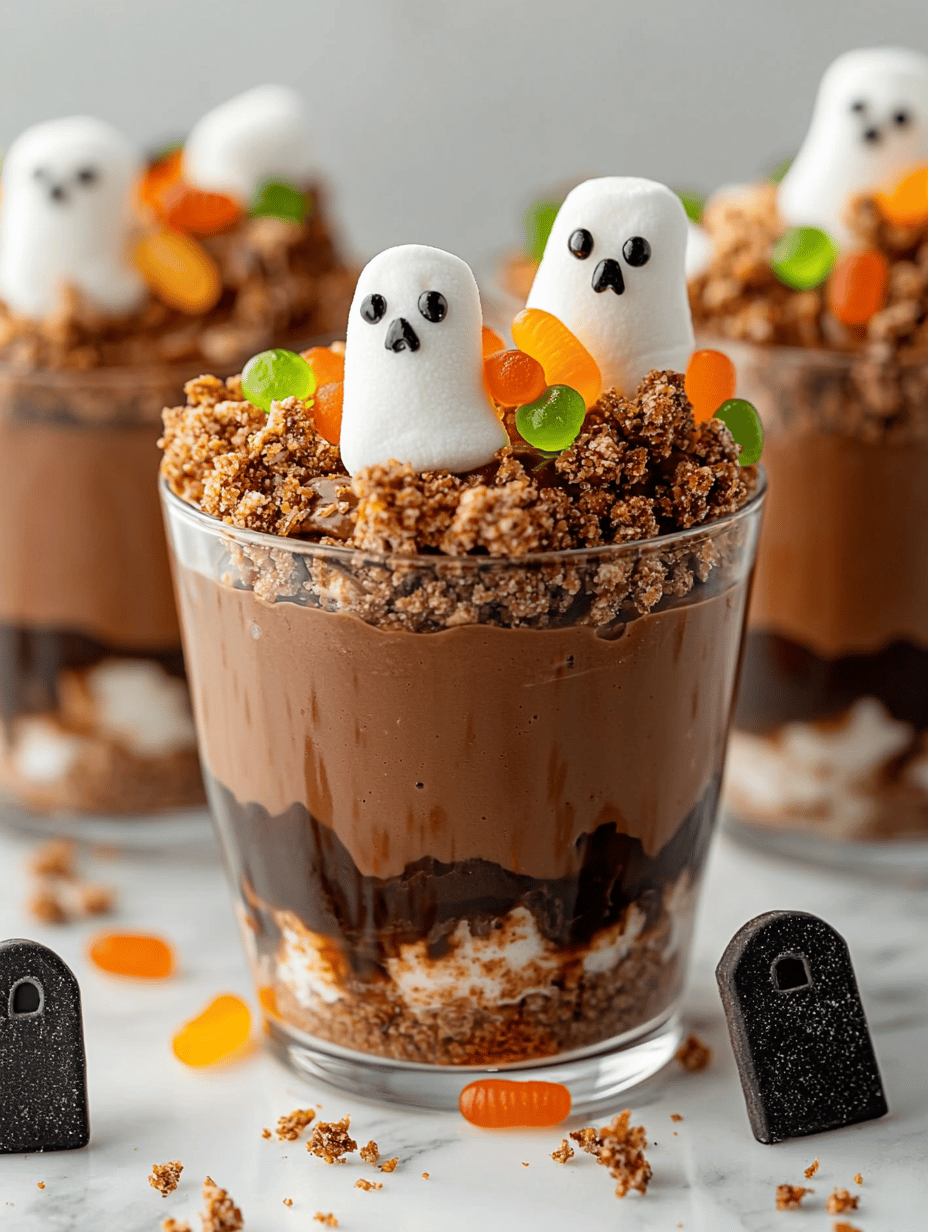
    This recipe is all about chaos and creativity. The crumbled cookies mimic dirt, and ghostly marshmallow tombstones topple over—it’s like a haunted scene frozen in a cup. Plus, the flavors of chocolate pudding and vanilla layers create a perfect creepy-sweet balance.

    WHY I LOVE THIS RECIPE?

    • It sparks childhood memories of digging in the yard after rain; messy, joyful, and nostalgic.
    • It’s chaos in a cup, allowing wild decoration and creepy themes that excite any Halloween party.
    • The quick assembly makes it ideal for last-minute fright nights without dulling the fun.
    • The combination of textures—crunchy cookies, silky pudding, soft marshmallows—keeps each bite interesting.
    • Bringing a little spooky magic into daily life feels like a small Halloween spell.

    AVOID MY DISASTER (You’re Welcome)

    • FORGOT the cookie dirt? Sprinkle more crushed cookies to hide the mess.
    • DUMPED too much pudding in one cup? Layer less to keep it tidy and manageable.
    • OVER-TORCHED the marshmallow? Quickly dunk it in cold water to stop the browning—then replace it.
    • MISLOCATED the tombstones? Use pretzels or broken cookie pieces; they’re easier to reposition.

    QUICK FIXES THAT SAVE YOUR DAY

    • When pudding is too thick, stir in a splash of milk for a silkier, glossier texture.
    • Patch a toppled tombstone with a dab of extra frosting—sweet glue for the spooky scene.
    • Splash some black food coloring into the cookie crumbs for deeper dirt effect.
    • When marshmallows brown too fast, shield them with foil or a quick oven retreat.
    • Spot a missing grave? Toss in some crushed dark cookies or chocolate shavings—problem solved!

    This Halloween treat is more than just fun; it’s a mini production that makes your seasonal gathering memorable. The visual impact combined with the rich, creamy flavors creates a dessert that’s as delightful to look at as to taste.

    In a season overflowing with pumpkin spice and cinnamon, these pudding cups offer a playful, cool alternative. They let you indulge in a little spookiness without the fuss of elaborate baking. Plus, they’re perfect for both kids’ parties and grown-up get-togethers—proof that simple ingredients can conjure up some serious Halloween magic.

    Halloween Graveyard Pudding Cups

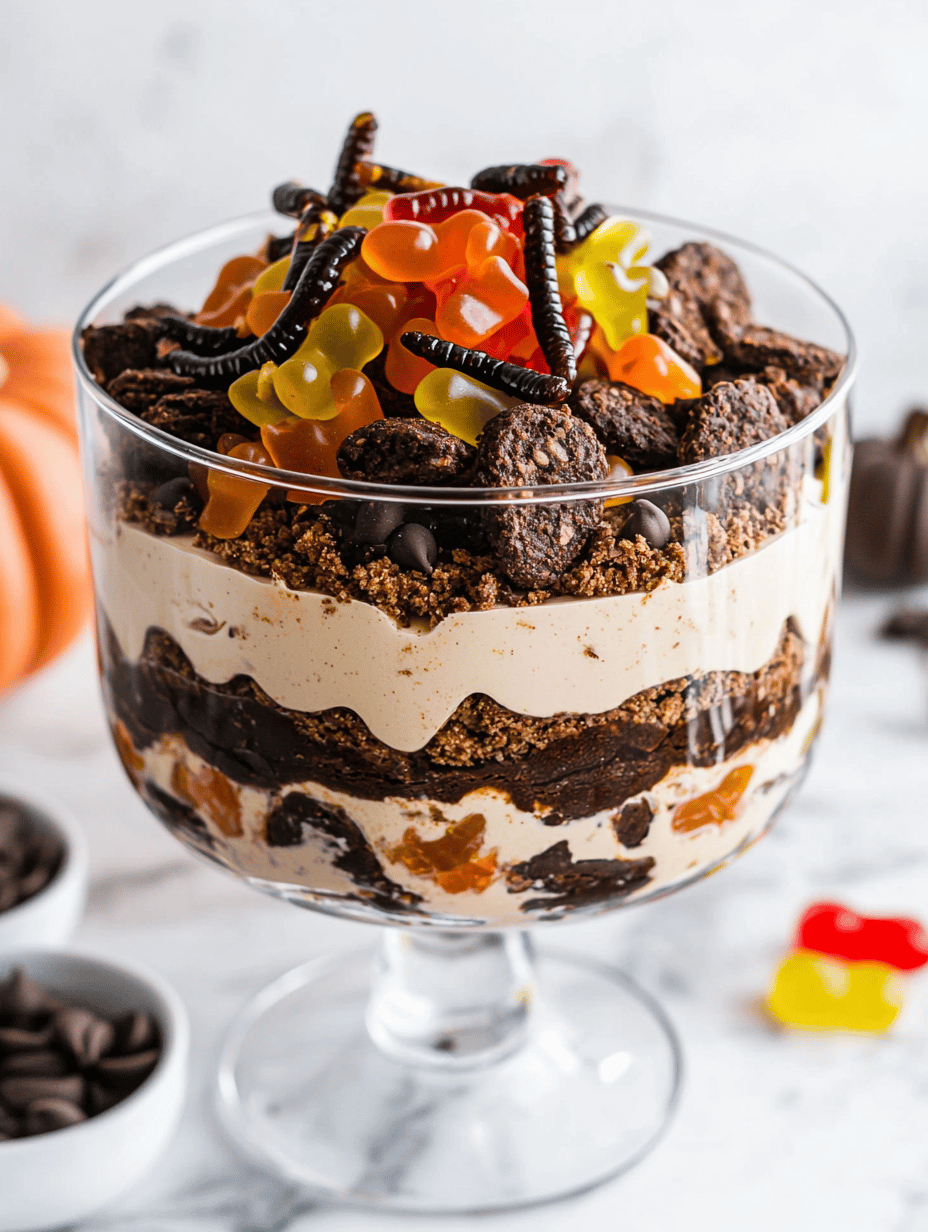
    These Halloween Graveyard Pudding Cups are layered dessert treats featuring creamy chocolate and vanilla puddings topped with crumbled cookies that mimic dirt, and marshmallow tombstones that topple over. The assembly involves layering, decorating with crushed cookies and marshmallows, and creating a spooky scene in individual cups, resulting in a playful and textured dessert with a contrasting combination of smooth, crunchy, and soft elements.
    Prep Time 20 minutes
    Cook Time 10 minutes
    Total Time 30 minutes
    Servings: 6
    Course: Main Course
    Cuisine: Halloween
    Calories: 250

    Ingredients
      

    • 2 pouches instant chocolate pudding mix prepare according to package directions
    • 2 cups cold milk for pudding
    • 1 cup vanilla pudding homemade or store-bought
    • 1 cup crushed chocolate cookies for dirt layer
    • 12 large marshmallows for tombstones
    • optional black food coloring to darken cookie crumbs

    Equipment

    • Mixing bowls
    • Whisk
    • Small spatula
    • Clear serving cups or jars
    • Spoon or piping bag

    Method
     

    1. Mix the instant chocolate pudding mix with cold milk in a bowl until thoroughly combined and smooth. Let it set in the refrigerator for about 5 minutes, or until thickened.
    2. In a separate bowl, whisk the vanilla pudding until smooth and creamy, ready for layering.
    3. Begin assembling each pudding cup by spooning a layer of vanilla pudding into the bottom of the cup, spreading it evenly.
    4. Add a generous layer of prepared chocolate pudding on top of the vanilla, creating a nice contrast.
    5. Sprinkle a good handful of crushed cookies over the pudding layers to mimic dirt, covering the surface lightly or heavily depending on your preference.
    6. Cut some marshmallows in half diagonally and gently press them into the top to resemble tombstones, sticking them into the dirt layer.
    7. If desired, tint some crushed cookies with black food coloring and sprinkle around the tombstones for a more eerie dirt effect.
    8. Repeat the layering process in the remaining cups, finishing with a layer of crushed cookies and tombstones on top.
    9. Chill the cups in the refrigerator for another 10 minutes to let everything set and the flavors meld.
    10. Just before serving, optionally add more crushed cookies or mini marshmallows for extra decoration and creepiness.
    11. Serve the spooky pudding cups in individual cups or small containers, ready to amaze with their haunted scene.

    Creating these horror-inspired pudding cups turns a simple dessert into a themed experience. The mix of textures and flavors, combined with a dash of chaos, makes every spoonful a tiny adventure. Plus, they’re endlessly customizable to suit your spooky style.

    Whether for a last-minute party or a fun family project, these graveyard cups bring a touch of the macabre to your table. They’re quick to assemble, visually striking, and packed with nostalgic comfort. As the season’s chill sets in, these treats add just the right amount of sweet, spooky fun to any autumn gathering.

  • Haunted Sweetness: Spooky Poison Toffee Apples for Halloween

    Haunted Sweetness: Spooky Poison Toffee Apples for Halloween

    Halloween is the perfect time to indulge in some mischievous treats that look as good as they taste. This year, Ifeature a playful twist on classic toffee apples with a dark, ominous update thatit the spooky season. The secret? Using unusual food colorings, spooky edible decorations, and a touch of chaos that turns simple apples into haunted confections.

    Harness your inner witch or wizard to create these chillingly delicious Poison Toffee Apples. Each bite crackles with the crispness of fresh apple, layered with a thick, shiny, toffee coating that shimmers like a witches’ potion. These are not just treats; they are Halloween magic, capturing both nostalgia and chaos in a single, striking bite.

    ## WHY I LOVE THIS RECIPE?
    – Illuminates my kitchen with vibrant, eerie colors and smells like caramelized sugar.
    – Sparks childhood memories while adding a modern, spooky flair.
    – Challenges my decorating skills with a mad scientist’s twist.
    – Fits perfectly with the season of playful scares and sweet revenge.
    – Offers a crowd-pleasing, shareable snapshot for social media chaos.

    ## AVOID MY DISASTER (Youetcher)
    – FORGOT to use a thermometer, end up with sticky, burnt toffee. Use a sugar thermometer for that perfect golden hue.
    – DUMPED the hot toffee onto apples without a stick, resulting in a melted mess. Proper skewers keep it tidy.
    – OVER-TORCHED the toffee till dark brown, causing bitter flavor. Remove from heat immediately as it turns amber.
    – CHIPPED the apple coating with a careless spoon, causing cracks. Handle with gentle, even layers.

    ## QUICK FIXES THAT SAVE YOUR DAY
    – If the toffeeirm and sticky, splash with a little cold water to loosen.
    – When the apples slide off, patch with a tiny dab of melted chocolate.
    – Shield burnt toffee by quickly stirring in a splash of cream, reducing the bitterness.
    – When decorations fall off, reapply with a smidge of edible glue.
    – If the smell of burnt sugar fills the air, shimmer the kitchen with a splash of vanilla extract to mask it.

    These Poison Toffee Apples are a hauntingly sweet addition to your Halloween spread. They combine the thrill of a spicy, crispy bite with the artistry of a mad confectioner. Perfect for parties or a solo spectacle of spooky culinary craft.

    Let the chaos of creation pace your spooky season. As each apple gets its dark coating and wickedly fun embellishments, you add a dash of mystery and mischief to your festivities. Nothing beats the sight of these chilling delights paired with ghostly good company around a flickering jack-o’-lantern light.

    Poison Toffee Apples

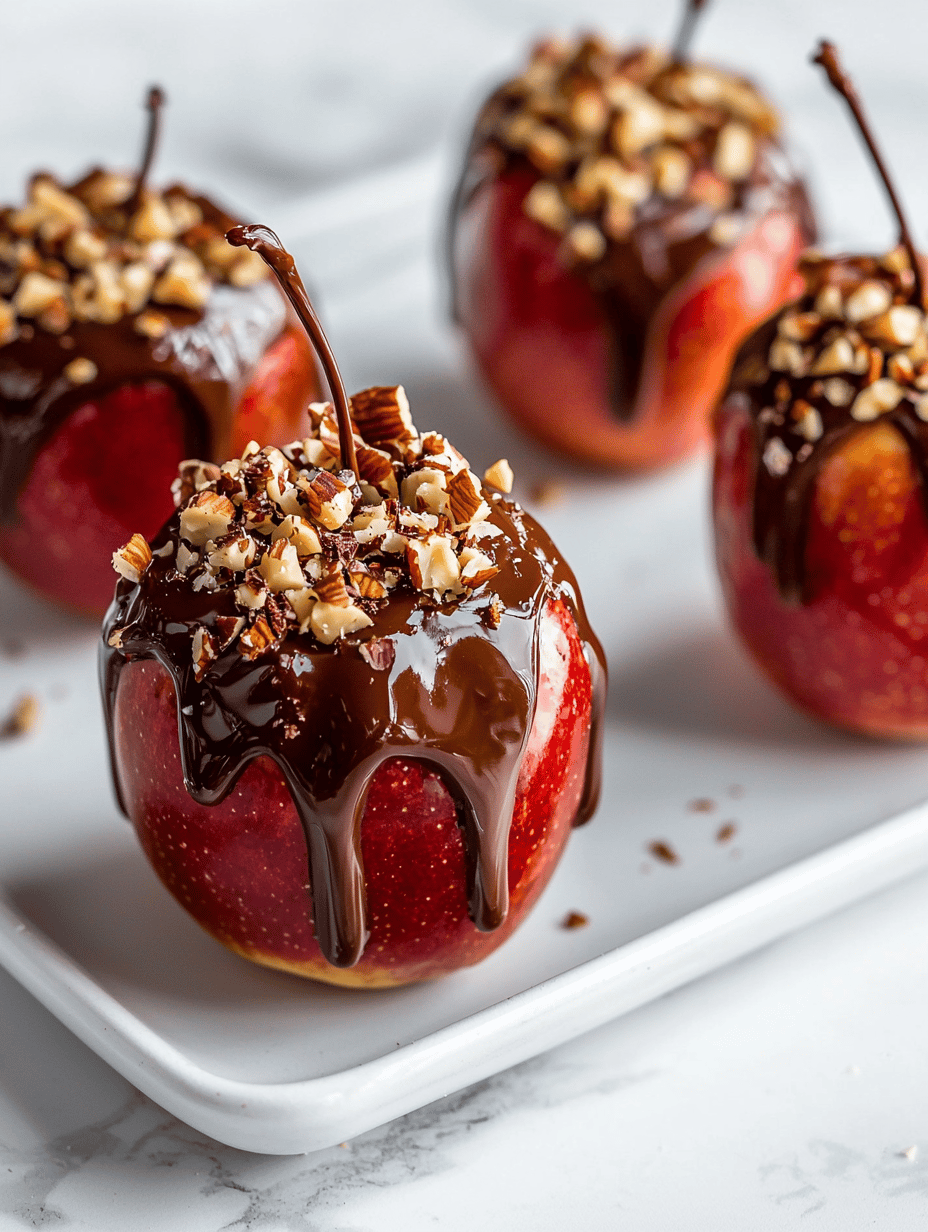
    Poison Toffee Apples are a Halloween treat featuring crisp apples coated in a shiny, golden toffee layer. The toffee is prepared by boiling sugar and butter until it reaches the right temperature, then poured over skewered apples to harden into a brittle shell. The finished apples have a smooth, glossy exterior with a crunchy texture around the crisp apple interior.
    Prep Time 20 minutes
    Cook Time 15 minutes
    Total Time 35 minutes
    Servings: 6
    Course: Main Course
    Cuisine: Halloween
    Calories: 150

    Ingredients
      

    • 6 medium fresh apples (preferably tart varieties like Granny Smith) washed and dried
    • 1 cup granulated sugar for toffee
    • 1/4 cup unsalted butter cut into cubes
    • 1/4 cup water to help dissolve sugar
    • optional food coloring, black or dark purple for eerie effects
    • optional edible decorations like googly eyes or sprinkles for spooky embellishments

    Equipment

    • Cooking thermometer
    • Skewers or sticks
    • Heavy-bottomed saucepan
    • Baking sheet lined with parchment paper

    Method
     

    1. Insert skewers into the tops of each apple, piercing through the core and leaving enough handle to hold.
    2. Combine sugar, water, and butter in a heavy-bottomed saucepan over medium heat.
    3. Bring the mixture to a gentle boil, stirring until the sugar dissolves completely. Attach a cooking thermometer to monitor the temperature.
    4. Cook without stirring until the sugar mixture reaches 300°F (hard crack stage), watching for a rich amber color and a bubbling, fragrant aroma.
    5. Remove the toffee from heat immediately and, if desired, stir in a few drops of food coloring for a spooky hue. Mix quickly to distribute the color evenly.
    6. Dip each apple into the hot toffee, tilting the pan to coat evenly, then lift out and let excess drip off.
    7. Place the coated apples on the prepared parchment-lined tray. Allow the toffee to harden at room temperature, which takes about 10-15 minutes.
    8. Add spooky edible decorations like eyes or sprinkles onto the cooled toffee apples for a haunting effect.
    9. Once the toffee is fully hardened, serve these glossy, crunchy venomous-looking apples as a festive Halloween treat.

    Notes

    Keep a close eye on the sugar temperature to prevent burning. Use a stable surface when cooling the apples and handle with care as the toffee is extremely hot. Decorating with edible details enhances the spooky vibe.
    This recipe is a reminder that Halloween treats can be as creative as your wildest nightmares. The preparation might be a bit chaotic, but the result is truly worth the effort. Plus, the playful mess adds to the holiday charm.

    Enjoy making these Poison Toffee Apples, knowing that each one is a small act of edible mischief. Who needs magic wands when you have sticky, colorful, spooky apples? Cheers to a season full of fun, fright, and flavor.

  • Why Pumpkin Cookies Are the Cozy Autumn Dream You Didn’t Know You Needed

    Why Pumpkin Cookies Are the Cozy Autumn Dream You Didn’t Know You Needed

    As the leaves turn from green to fiery shades of orange and red, my craving for anything pumpkin-flavored skyrockets. But these aren1;t your typical pumpkin cookies topped with sugar glaze; I1;m talking about a soft, spiced cookie that captures the essence of fall with every bite.

    What makes this recipe special is the unexpected depth of flavor—think hints of cinnamon and nutmeg, balanced by the sweet, earthy pumpkin. It’s a recipe that feels nostalgic yet fresh, perfect for sharing during cozy gatherings or simply warming up your kitchen.

    H2: WHY I LOVE THIS RECIPE?
    – The aroma of cinnamon and pumpkin filling my home makes every day feel like a harvest festival.
    – These cookies are forgiving, forgiving, forgiving—perfect for bakers still mastering the art of the perfect bake.
    – They remind me of childhood, with a moist center and slightly chewy edges.
    – Plus, they disappear fast at my gatherings, a testament to their irresistible charm.

    Spiced Pumpkin Cookies

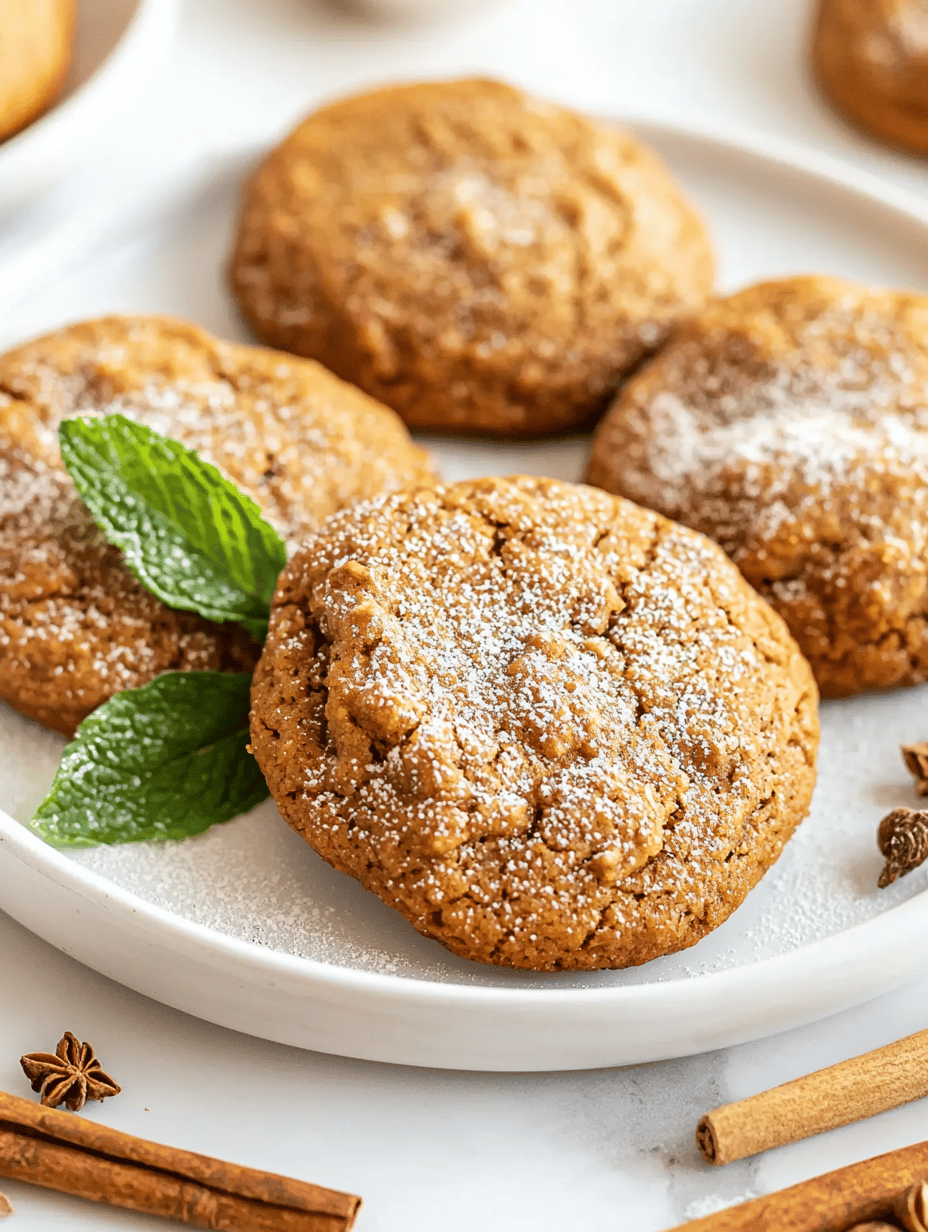
    These soft, chewy cookies feature pumpkin puree and warm spices like cinnamon and nutmeg, creating a moist interior with lightly crispy edges. The dough is mixed, shaped, and baked to golden perfection, resulting in an aromatic treat with a cozy autumnal flavor profile.
    Prep Time 15 minutes
    Cook Time 12 minutes
    Total Time 27 minutes
    Servings: 24
    Course: Main Course
    Cuisine: American
    Calories: 120

    Ingredients
      

    • 1 3/4 cups all-purpose flour
    • 1 teaspoon baking soda
    • 1/2 teaspoon ground cinnamon
    • 1/2 teaspoon ground nutmeg
    • 1/2 teaspoon salt
    • 1/2 cup packed light brown sugar
    • 1/2 cup granulated sugar
    • 1/2 cup unsalted butter, softened
    • 1 cup canned pumpkin puree
    • 1 large egg
    • 1 teaspoon vanilla extract

    Equipment

    • Mixing bowls
    • Silicone spatula
    • Baking sheet
    • Parchment paper
    • Cookie scoop or spoon
    • Cooling rack

    Method
     

    1. Preheat the oven to 350°F (177°C). Line a baking sheet with parchment paper to prevent sticking.
    2. In a large bowl, whisk together the flour, baking soda, cinnamon, nutmeg, and salt until well combined. This ensures even distribution of the spices and leavening agents.
    3. In a separate bowl, cream the softened butter, light brown sugar, and granulated sugar using a spatula or mixer until the mixture is light, fluffy, and slightly pale—about 2-3 minutes.
    4. Add the pumpkin puree, egg, and vanilla extract to the butter-sugar mixture. Mix thoroughly until the batter is smooth and fragrant, with a vibrant orange color and a slightly thick consistency.
    5. Gradually add the dry ingredients into the wet mixture, folding gently with a spatula until just combined. The dough will be somewhat sticky but manageable.
    6. Use a cookie scoop or spoon to portion out round balls of dough and place them evenly spaced on the prepared baking sheet. Flatten each ball slightly with the back of the scoop or your fingers for even baking.
    7. Bake in the preheated oven for 10-12 minutes, or until the edges are golden brown and the centers look set but still soft.
    8. Once baked, remove the cookies from the oven and transfer them to a cooling rack. Allow them to cool for at least 10 minutes; this helps set their shape and enhances their chewy texture.
    9. Enjoy these warm or at room temperature, perhaps with a glass of milk or a drizzle of glaze if desired. Their moist interior and softly crispy edges make them perfect for fall gatherings or cozy nights.
    Baking these pumpkin cookies is more than making a sweet treat; it’s a ritual that celebrates the changing season. The comforting aroma, the tender crumb—each element helps us pause and savor the now.

    Whether it’s a quick bake for a sudden craving or a weekend project, these cookies bring a warm, fragrant glow into those cooler days. They serve as a gentle reminder that small joys, like a batch of homemade cookies, can brighten even the gloomiest afternoon.