Category: Desserts

  • Spooky Sweetness: Halloween Candy Corn Parfaits with a Twist

    Spooky Sweetness: Halloween Candy Corn Parfaits with a Twist

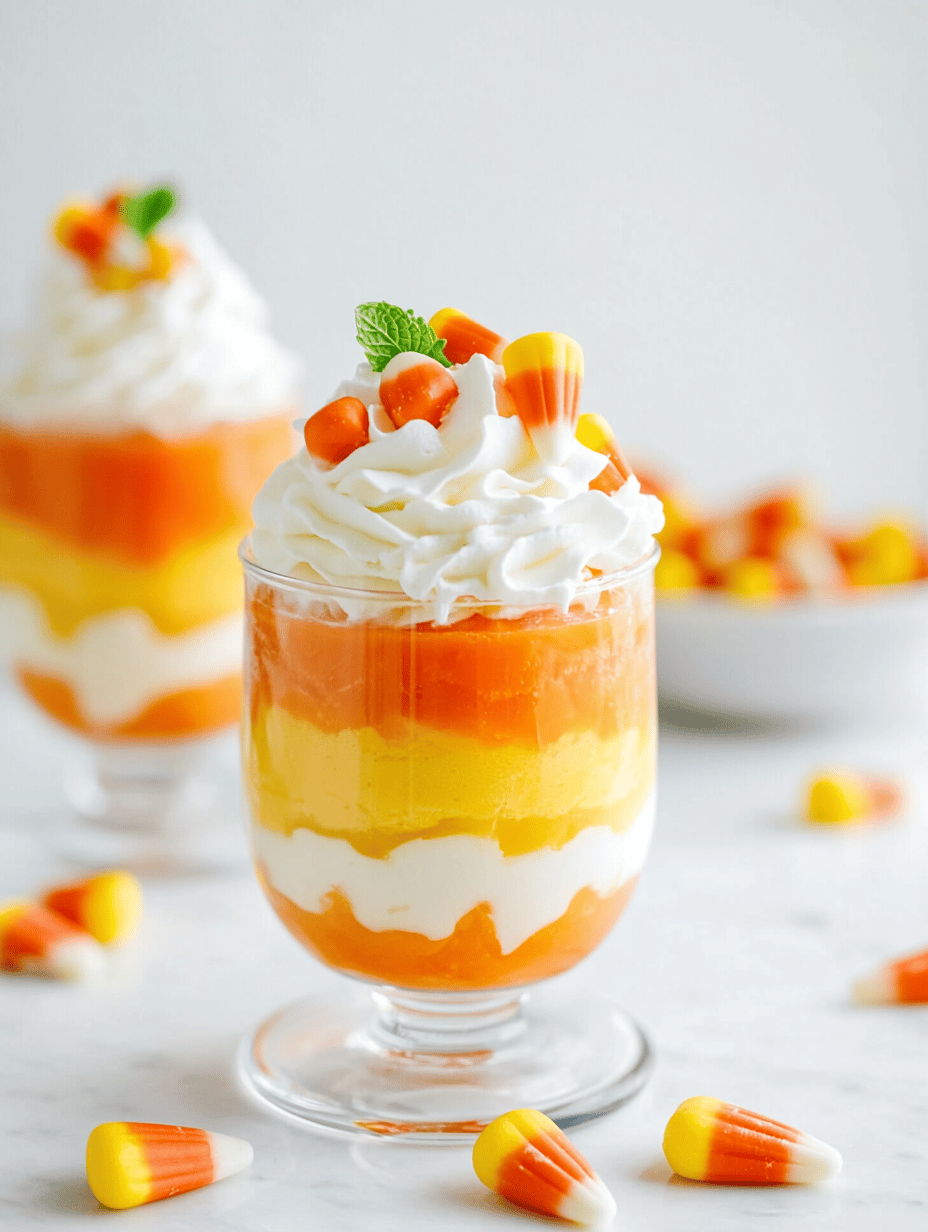
    When October rolls around, my search for festive treats often leads to classic pumpkin pies and caramel apples. But this year, I decided to embrace a surprising twist on Halloween sweets—Candy Corn Parfaits that blend nostalgia with a playful presentation. The bright orange, white, and yellow layers not only look cheerful but bring a burst of childhood memories.

    These parfaits aren’t just eye candy; their layered textures offer a delightful mix of creamy and crunchy bites. Plus, they come together in minutes, making them perfect for last-minute gatherings or spooky movie nights. Watching the vibrant colors stack up is almost as satisfying as tasting them.

    Candy Corn Parfaits

    Candy Corn Parfaits consist of layered creamy and crunchy textures arranged in vibrant orange, white, and yellow sections to resemble candy corn. The dessert involves assembling flavored pudding or mousse with crushed cookies or candy for contrast, resulting in a colorful, eye-catching presentation with a smooth and crunchy final texture.
    Prep Time 10 minutes
    Total Time 10 minutes
    Servings: 4
    Course: Main Course
    Cuisine: American
    Calories: 250

    Ingredients
      

    • 1 cup vanilla pudding or mousse prepared and chilled
    • 1 cup crushed vanilla cookies or graham crackers for crunch layer
    • 1 cup orange-flavored pudding or mousse prepared and chilled
    • 1 cup yellow-colored pudding or mousse prepared and chilled
    • optional candy corn or small candy pieces for decoration

    Equipment

    • Clear Serving Glasses or Cups
    • Mixing bowls
    • Whisk
    • Measuring cups and spoons
    • Spoon or piping bag

    Method
     

    1. Start by spooning a layer of vanilla pudding into the bottom of each glass, smoothing it out with the back of a spoon for an even base.
    2. Add a layer of crushed cookies over the vanilla pudding, spreading them to create a crunchy contrast.
    3. Next, carefully pipe or spoon the orange-flavored pudding on top, creating a distinct orange layer above the cookies.
    4. Follow with a layer of yellow-colored pudding, adding it over the orange layer to complete the colorful stacking.
    5. Repeat the layering process if desired for a taller parfait, or finish with a final dollop of pudding on top.
    6. Decorate the top with mini candy corn or candies to resemble the classic candy corn look.
    7. Serve immediately for best texture, with crunchy cookies providing a satisfying bite against the creamy layers.

    Notes

    Feel free to customize the colors or add extra candies for more visual flair.
    As the checklist of Halloween treats gets longer, this parfait recipe adds a fun, colorful option that’s easy to assemble. It’s a no-fuss way to impress little ghouls and goblins alike, and to indulge in a sweet, nostalgic moment.

    Enjoy the crisp, sweet layers this season—no matter if your costume is scary or silly. These parfaits will stay fresh in the fridge until it’s party time, ready to fill your table with a festive splash of color. Sometimes, simple sweets bring the best memories.

  • Spooky Sweetness: Halloween Ghost Brownies

    Spooky Sweetness: Halloween Ghost Brownies

    Halloween baking often gets wrapped up in the spook and the scare, but I like to flip the script. These Ghost Brownies are a whimsical twist that brings a touch of ghostly charm to your dessert table. They’re dark, fudgy, and perfect for adding a dash of playful eeriness to any Halloween gathering.

    What makes these brownies special isn’t just their ghostly appearance. It’s how the simple addition of white chocolate eyes turns a classic treat into a fun, spooky spectacle. Plus, they’re quick to whip up and impossible to resist, even for those who usually skip the dessert table.

    **WHY I LOVE THIS RECIPE?**
    – It combines my love for baking with holiday creativity.
    – The contrast of deep chocolate and bright white eyes makes them visually striking.
    – They’re a nostalgic reminder of childhood trick-or-treat adventures.
    – The process is wickedly fun, especially assembling the ghosts.
    – They invite playful chaos in the kitchen, a perfect Halloween tradition.

    Ghost Brownies

    Ghost Brownies are fudgy, chocolate treats with a dense and moist texture, shaped into small squares resembling ghosts. They are topped with white chocolate eyes to create a playful, spooky appearance suitable for Halloween celebrations.
    Prep Time 15 minutes
    Cook Time 25 minutes
    Total Time 40 minutes
    Servings: 12
    Course: Main Course
    Cuisine: American
    Calories: 180

    Ingredients
      

    • 1/2 cup unsweetened cocoa powder for richness
    • 1 cup all-purpose flour for structure
    • 1/2 cup granulated sugar sweetens the brownies
    • 1/4 cup vegetable oil for moisture
    • 3 large eggs bind the ingredients
    • 1 teaspoon vanilla extract add flavor
    • 4 oz white chocolate for topping
    • 24 small white chocolate chips or candies for eyes

    Equipment

    • Mixing bowls
    • Silicone spatula
    • 8×8 inch baking pan
    • Parchment paper
    • Microwave-safe bowl
    • Small spoon or toothpick

    Method
     

    1. Preheat your oven to 350°F (175°C). Line the baking pan with parchment paper for easy removal.
    2. In a microwave-safe bowl, melt the white chocolate in 30-second bursts, stirring in between until smooth.
    3. In a large mixing bowl, whisk together the eggs, sugar, and vanilla until well combined and slightly frothy.
    4. Add the melted white chocolate to the egg mixture and stir until smooth.
    5. In a separate bowl, sift together the cocoa powder and flour, then gradually fold them into the wet ingredients with a spatula until just combined.
    6. Pour the batter into the prepared baking pan, spreading it evenly with a spatula.
    7. Bake for 25 minutes, or until a toothpick inserted into the center comes out with a few moist crumbs. Let the brownies cool completely in the pan.
    8. Once cooled, lift the brownies out of the pan using the parchment paper and cut into small squares.
    9. Melt the remaining white chocolate slightly to make it easier to work with. Use a small spoon or toothpick to place two white chocolate chips or candies on each brownie as eyes, creating a ghostly face.
    10. Allow the eyes to set slightly before serving so they adhere firmly to the brownies.
    11. Arrange the ghost brownies on a serving platter and enjoy their dark, fudgy texture with playful white eyes for a spooky fun treat.

    Notes

    For best results, use high-quality white chocolate and work quickly when attaching the eyes to prevent melting. You can also use edible markers to draw faces instead of chocolate eyes for variety.
    In the end, these Ghost Brownies are all about celebrating the fun of Halloween. They bring a sense of whimsy and delight that’s hard to find elsewhere this season. Sharing them feels like receiving a tiny ghostly hug from the oven.

    Whether you’re baking for a party or just craving a festive treat, these brownies are sure to put a smile on everyone’s face. They remind us that a little imagination can turn ordinary desserts into extraordinary memories. Happy haunting—and baking!

  • Spooky Elegance: The Ultimate Halloween Spider Web Cake

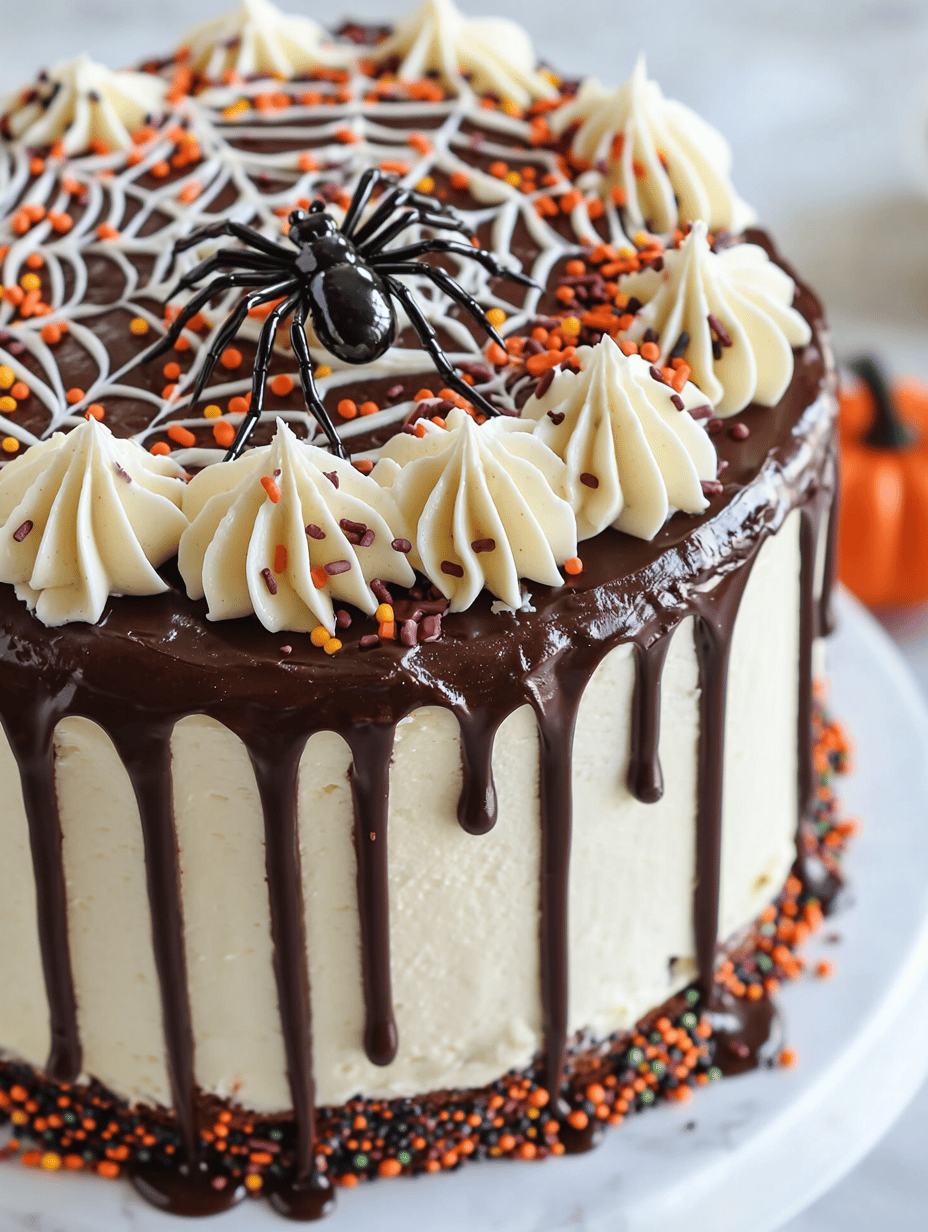
    Spooky Elegance: The Ultimate Halloween Spider Web Cake

    Every October, my kitchen turns into a haunted workshop where chaos and creativity collide. This year, I decided to craft something that balances spooky charm with edible art: a Halloween Spider Web Cake with a twist. Picture a cake that not only tastes divine but also doubles as a sinister, stunning centerpiece for any haunted gathering.

    As I layer on rich chocolate frosting and swirl the perfect web, I can’t help but appreciate how this project bridges childhood nostalgia with adult flair. It’s an invitation to play with textures, contrasts, and eerie elegance. Perfect for those who love a little chaos in their culinary adventures.

    Halloween Spider Web Cake

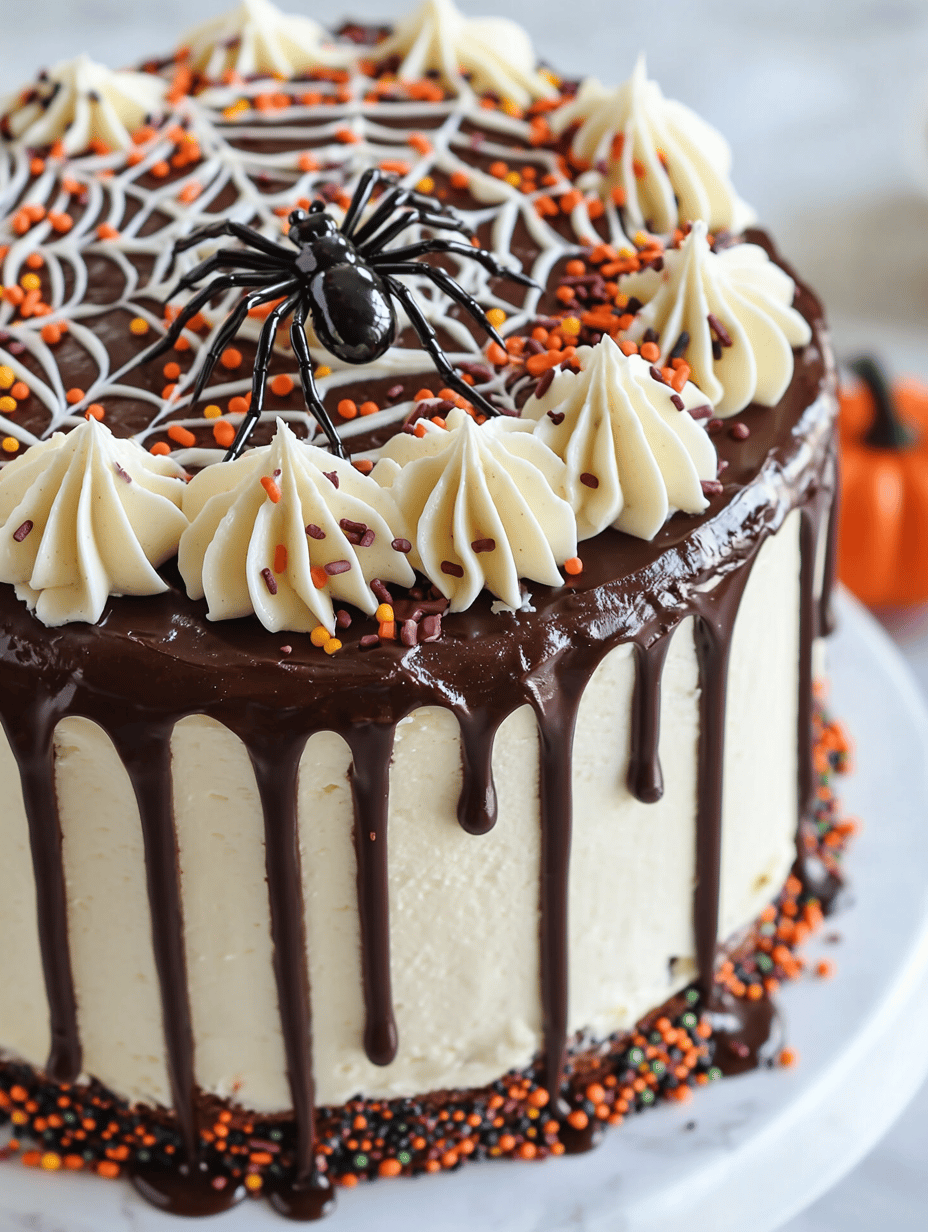
    This cake features a chocolate sponge base layered with rich frosting, decorated with a spooky spider web design made from icing or ganache. The web pattern and dark hues give it an eerie, striking appearance, perfect for Halloween festivities. The final cake has a moist texture with a glossy decorative web on top.
    Prep Time 30 minutes
    Cook Time 35 minutes
    Total Time 1 hour 5 minutes
    Servings: 8
    Course: Main Course
    Cuisine: Halloween
    Calories: 520

    Ingredients
      

    • 2 cups all-purpose flour sifted
    • 2 cups granulated sugar
    • 3/4 cup unsweetened cocoa powder preferably Dutch-processed
    • 1 1/2 teaspoons baking powder
    • 1 1/2 teaspoons baking soda
    • 1/2 teaspoon salt
    • 2 eggs large eggs
    • 1 cup buttermilk or milk with a splash of vinegar
    • 1/2 cup vegetable oil
    • 2 teaspoons vanilla extract
    • 1 cup hot water
    • 3 cups powdered sugar for frosting
    • 1/2 cup unsweetened cocoa powder for frosting
    • 1/4 cup butter softened
    • 2-3 tablespoons milk to adjust frosting consistency

    Equipment

    • Mixing bowls
    • Electric mixer
    • Round cake pans
    • Cooling rack
    • Piping bag with small round tip
    • Spatula

    Method
     

    1. Preheat your oven to 350°F (175°C). Grease two 8-inch round cake pans and lightly dust with cocoa powder or flour to prevent sticking.
    2. In a large bowl, sift together the flour, cocoa powder, baking powder, baking soda, and salt. Whisk to combine evenly.
    3. Add the sugar and mix until the dry ingredients are evenly coated. In a separate bowl, beat the eggs, buttermilk, oil, and vanilla until smooth and combined.
    4. Gradually add the wet mixture to the dry ingredients, mixing on low speed. Once combined, carefully pour in the hot water, mixing slowly to incorporate. The batter will be thin but smooth.
    5. Divide the batter evenly between the prepared cake pans. Bake for about 30-35 minutes, or until a toothpick inserted in the center comes out clean.
    6. Let the cakes cool in pans for 10 minutes, then turn out onto a wire rack to cool completely. This helps the layers set and makes them easier to handle.
    7. In a bowl, beat the softened butter until creamy. Gradually add the powdered sugar and cocoa powder, mixing well. Mix in the milk a tablespoon at a time until the frosting reaches a spreadable consistency.
    8. Spread a layer of frosting on top of one cooled cake layer. Place the second layer on top and apply a thin crumb coat all over the cake. Chill for 15 minutes.
    9. Once chilled, apply a final layer of frosting smoothly around the cake. Use a spatula to create an even surface.
    10. Fill a piping bag fitted with a small round tip with the remaining frosting. Pipe concentric circles on the top of the cake, starting from the center outward to create a web pattern.
    11. Use a small toothpick or skewer to draw lines from the center to the edges, connecting the circles and forming a spider web design. Carefully clean the piping tip and enjoy your spooky Halloween Spider Web Cake!

    Notes

    For extra effect, add plastic spiders or other Halloween themed decorations before serving.

    This Spider Web Cake is more than just a dessert. It’s a seasonal sculpture that captures the spirit of Halloween’s playful spookiness. The smell of chocolate, vanilla, and a hint of mystery fills my home with each step.

    Every slice is a reminder of how a little chaos can create something truly memorable. Whether you’re celebrating with friends or just indulging your own love for the eerie, this cake makes the night special. It’s a treat wrapped in a web of fun and flavor.

  • Spooky Fun: The Haunted Brain Jello Mold

    Spooky Fun: The Haunted Brain Jello Mold

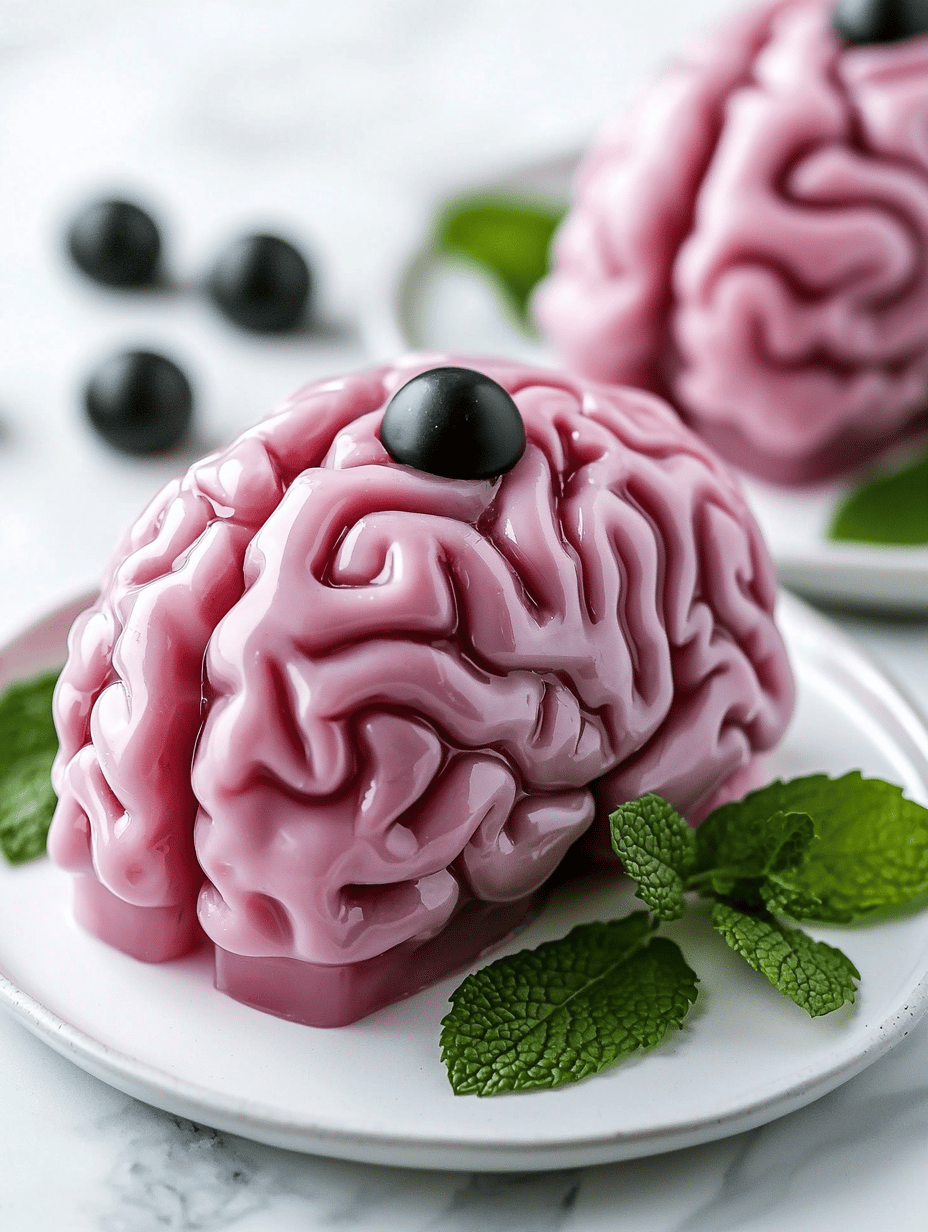
    As fall deepens and Halloween approaches, I find myself craving something delightfully spooky yet surprisingly easy to make. Enter the Halloween Brain Jello Mold—a delightfully ghoulish treat that transforms simple gelatin into a creepy, brain-like spectacle. The moment you turn this mold out, it looks just like a squishy, grotesque brain, perfect for a themed party or a creepy centerpiece.

    What excites me most is how this recipe marries childhood nostalgia with a touch of horror. It’s satisfying to hear squeals of delight (or squeamish shrieks) as guests see this unsettling splatter of red and pink. Plus, the smell of fruity gelatin combined with a hint of vanilla creates a sweet, tart aroma that’s oddly inviting.

    WHY I LOVE THIS RECIPE?

    • Creating this brain feels like crafting a piece of edible horror art—so satisfying!
    • It’s a fun chaos tool for kids and adults alike, perfect for Halloween chaos.
    • The squeal of surprise when you reveal the mold—it’s priceless.
    • The blend of fruity gelatin with creepy aesthetics is delightfully nostalgic.
    • It’s a conversation starter, guaranteed to make your party unforgettable.

    AVOID MY DISASTER (You’re Welcome)

    • FORGOT to spray the mold properly, the gelatin stuck—grease before pouring next time.
    • DUMPED the hot water into the gelatin—caused cloudiness, stir gently and cool before adding.
    • OVER-TORCHED the gelatin, it became rubbery—use gentle heat and stir carefully.
    • SUFFUSED the mold with too much food coloring, it stained the fridge—add coloring gradually.

    QUICK FIXES THAT SAVE YOUR DAY

    • When gelatin is lumpy, SPLASH cooler water and stir until smooth.
    • Patch flavor with a splash of fruit juice if it tastes bland.
    • Shield your mold with plastic wrap to prevent a skin forming on top.
    • If the gelatin turns too firm, reheat briefly and re-pour.
    • When in doubt, add a drop of vanilla for a sweet lift—smells like pastries.

    This creepy, fun treat is pure seasonal joy. The way it jiggles and wobbles adds a playful touch to any October gathering. It’s also perfect for those who love dessert that’s as strange as it is tasty.

    In a season celebrating the eerie and uncanny, this brain mold stands out as a whimsical, spooky favorite. Each slice offers a satisfying wobbly hit of fruity sweetness. It’s a reminder that Halloween can be both delightfully creepy and deliciously fun.

    Halloween Brain Jello Mold

    This dish is a gelatin-based dessert shaped to resemble a human brain, achieved by pouring flavored gelatin into a brain-shaped silicone mold. The gelatin is set until firm, creating a wobbly, textured appearance with a bright red or pink hue that mimics exposed brain tissue. The final product is a creepy, gelatinous sculpture perfect for Halloween parties or themed gatherings.
    Prep Time 20 minutes
    Cook Time 10 minutes
    Total Time 30 minutes
    Servings: 8
    Course: Main Course
    Cuisine: Halloween
    Calories: 80

    Ingredients
      

    • 3 cups fruit-flavored gelatin mix preferably red or pink
    • 2 cups boiling water hot but not boiling over
    • 1 cup cold water to bring mixture to the right consistency
    • 1 teaspoon vanilla extract optional, for added aroma

    Equipment

    • Saucepan
    • Silicone brain mold
    • Whisk
    • Measuring cups and spoons
    • Mixing bowl

    Method
     

    1. Spray your silicone brain mold lightly with cooking spray to ensure easy removal later.
    2. In a mixing bowl, pour the gelatin mix and add the boiling water. Whisk vigorously for about 2 minutes until the gelatin is completely dissolved and the mixture is smooth and slightly thickened.
    3. Add the cold water and vanilla extract to the gelatin mixture, then whisk again until fully combined. The mixture should be homogeneous and starting to cool slightly.
    4. Pour the gelatin mixture slowly into the prepared silicone mold, filling it up just to the top. Tap the mold gently on the counter to eliminate air bubbles and help the gelatin settle evenly.
    5. Place the mold in the refrigerator and allow the gelatin to set for at least 4 hours, or until completely firm and jiggle-proof.
    6. Once set, gently invert the mold onto a serving plate. Carefully remove the silicone, revealing your creepy, brain-like gelatin sculpture.
    7. Slice and serve, showcasing the textured, wobbly, and eerily realistic brain appearance. Enjoy the fun, spooky aesthetic during your Halloween celebration!

    Giving your party a little extra horror humor with this brain mold can be memorable. Guests will talk about the creepy jello long after the night ends, especially when they realize how easy it was to make. Plus, it’s a cool way to play with textures and visuals in your seasonal spread.

    Whether you’re hosting a haunted gathering or just craving a weird dessert, this recipe hits the spot. It’s simple, spooky, and endlessly customizable with different colors and flavors. Happy haunting, and enjoy your delightfully creepy creation!

  • Spiced Pumpkin Bread with a Surprise Twist

    Spiced Pumpkin Bread with a Surprise Twist

    As autumn leaves dust the ground with hues of burnt orange and deep red, I find myself craving the comforting aroma of freshly baked pumpkin bread. But this isn’t just any pumpkin loaf; it’s a recipe that marries unexpected spices and a tender crumb that delight the senses. The secret? A splash of cinnamon and a hint of ginger, stirred into a batter that whispers fall in every bite.

    What makes this bread truly special is the way it transforms simple ingredients into a sensory experience. The top crisps up slightly, offering a satisfying crunch before giving way to moist, spiced pumpkin goodness. Imagine slicing into warm bread as the spicy scent fills the air — it’s an instant caress to the spirit, perfect for weekend mornings or cozy afternoons.

    In a season that encourages slow mornings and lingering whispers of pumpkin spice, this recipe feels like a small celebration of fall. It’s easy enough to whip up on a whim but special enough to share at gatherings. Trust me, once you try this, your kitchen will be filled with the aroma of fall—an aroma that beckons everyone closer.

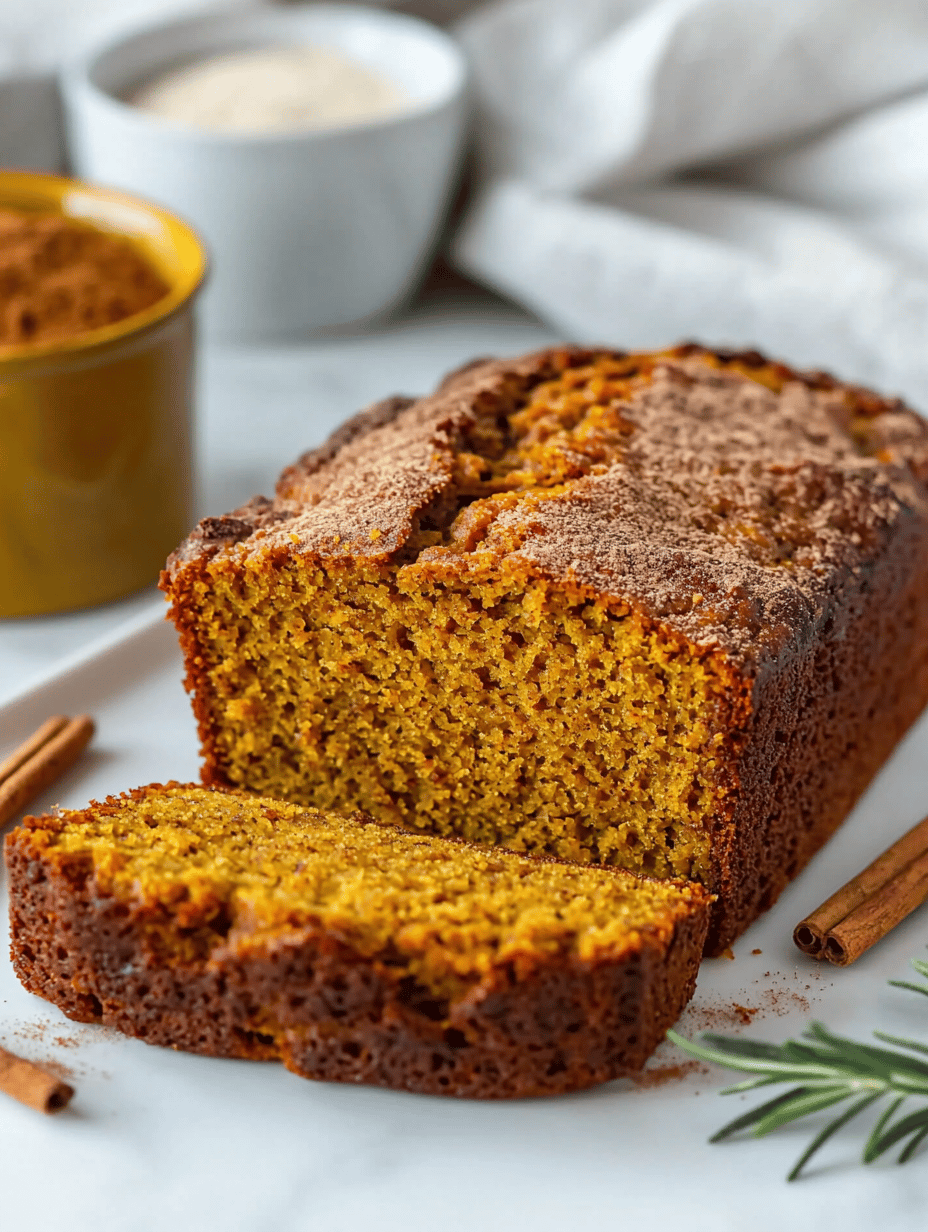
    Pumpkin Bread with Spiced Crust

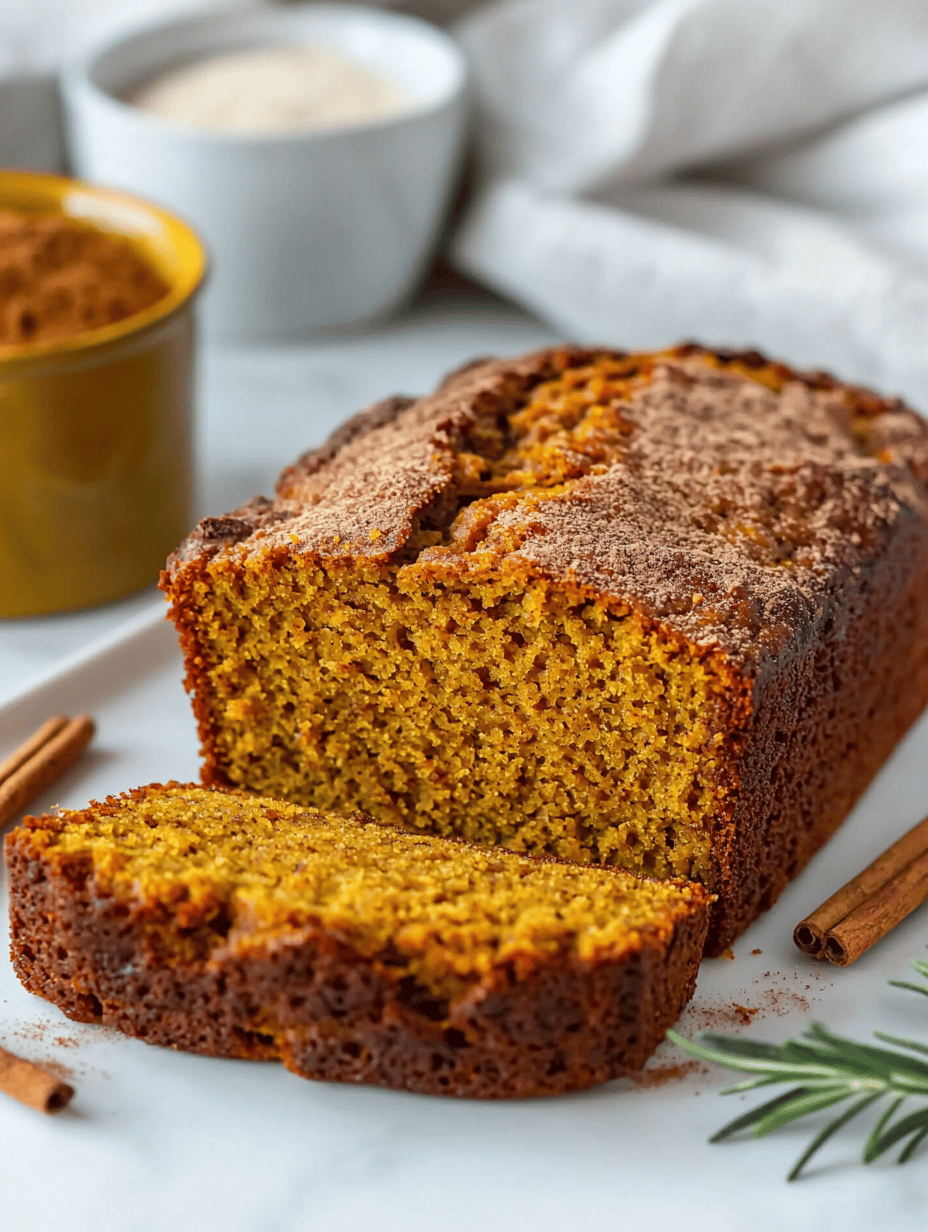
    This pumpkin bread is made by mixing pureed pumpkin with flour, sugar, and warming spices, then baking until the crust is lightly crisp and the interior remains moist and tender. The final loaf has a golden-brown top with a fragrant, spiced aroma and a soft, crumbly texture that reveals a moist, pumpkin-infused crumb inside.
    Prep Time 15 minutes
    Cook Time 45 minutes
    Total Time 1 hour
    Servings: 8
    Course: Main Course
    Cuisine: American
    Calories: 220

    Ingredients
      

    • 1 3/4 cups all-purpose flour
    • 1 cup granulated sugar
    • 1/2 cup vegetable oil
    • 1 cup pumpkin puree
    • 3 large eggs
    • 1 1/2 teaspoons baking soda
    • 1 teaspoon ground cinnamon
    • 1/2 teaspoon ground ginger
    • 1/2 teaspoon salt

    Equipment

    • Mixing bowls
    • Loaf pan

    Method
     

    1. Preheat your oven to 350°F (175°C) and grease a standard loaf pan to prevent sticking.
    2. In a large mixing bowl, whisk together the dry ingredients: flour, sugar, baking soda, cinnamon, ginger, and salt. This helps evenly distribute the spices and leavening agents.
    3. In another bowl, whisk the eggs until they’re well combined and slightly frothy, which encourages a light texture.
    4. Add the pumpkin puree and vegetable oil to the eggs, then whisk until the mixture is smooth and uniform. The mixture should look slightly thick and glossy.
    5. Pour the wet ingredients into the dry ingredients and gently fold them together using a spatula. Stop mixing once just combined; overmixing can make the bread dense.
    6. Pour the batter into the prepared loaf pan, spreading it evenly to the edges with a spatula. The batter should be slightly thick but pourable.
    7. Place the pan in the oven and bake for about 45 minutes, or until a toothpick inserted into the center comes out clean and the top is golden brown.
    8. Remove the bread from the oven and let it cool in the pan for 10 minutes, allowing the crumb to set slightly and making it easier to remove.
    9. Gently lift the pumpkin bread out of the pan and transfer it to a wire rack to cool completely, which will help the crust stay crisp.
    10. Once cooled, slice the pumpkin bread to reveal its tender crumb, with bits of spice shining through and a lightly crisp top.
    11. Enjoy slices warm or at room temperature, letting the fragrant spices fill your kitchen with cozy fall aromas.

    Notes

    For an extra touch, sprinkle a little cinnamon sugar on top before baking for a sweet crust.

    This pumpkin bread isn’t just a seasonal treat; it’s a reminder of the simple pleasures that come with fall. The blend of spices and pumpkin’s richness creates a comforting aroma that sticks around long after baking. It’s perfect for sharing, whether at a brunch or a quiet moment in the afternoon.

    As the days grow shorter and the air turns crisp, baking this bread feels like a small act of warmth. The way the spices bloom with each bite makes it clear why pumpkin remains a fall favorite. This recipe is a cozy tradition in the making, one slice at a time.

  • Sun-Kissed Peach Crumble: A Rustic Delight

    Sun-Kissed Peach Crumble: A Rustic Delight

    As summer begins to wane, the ripe aroma of peaches still lingers in the air, inviting us to indulge in homemade treats that celebrate their fleeting sweetness. I recently discovered a way to capture that perfect balance of juiciness and crispiness with a peach crumble that feels like a cozy hug on a cool evening. The secret lies in selecting the most fragrant peaches and baking them into a warm, buttery paradise.

    But what truly sets this recipe apart is a touch of cinnamon and a sprinkle of oats that add texture and depth to each bite. It’s a simple pleasure that turns humble summer fruit into a show-stopping dessert. The best part? The aroma alone draws everyone into the kitchen, eager for a taste.

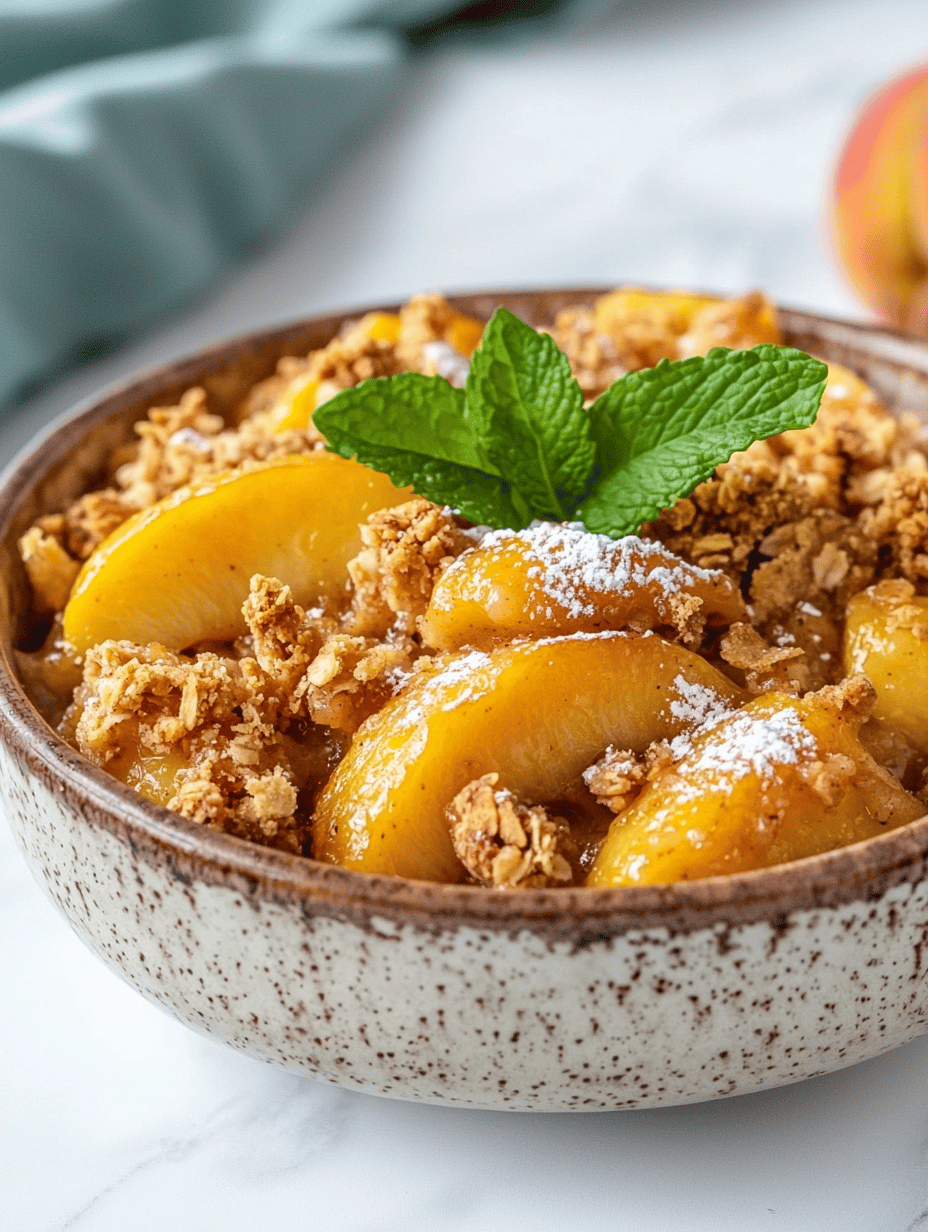
    Peach Crumble

    This peach crumble features tender baked peaches topped with a crispy, buttery oat and cinnamon streusel. The dish combines juicy fruit with a crumbly topping, resulting in a warm, textured dessert with aromatic spices and a golden-brown finish.
    Prep Time 15 minutes
    Cook Time 40 minutes
    Total Time 55 minutes
    Servings: 6
    Course: Main Course
    Cuisine: American
    Calories: 250

    Ingredients
      

    • 4 cups peach slices ripe and fragrant, peeled and sliced
    • 1 tablespoon lemon juice to prevent browning and enhance flavor
    • 1/2 cup granulated sugar
    • 1 teaspoon cinnamon ground
    • 1 cup old-fashioned oats for texture
    • 1/2 cup all-purpose flour
    • 1/2 cup brown sugar
    • 1/2 cup unsalted butter cold, cubed
    • Pinch salt

    Equipment

    • Mixing bowls
    • Baking dish
    • Knife
    • peeler
    • Measuring cups
    • Measuring spoons
    • pastry cutter or fork
    • Oven

    Method
     

    1. Preheat your oven to 375°F (190°C). In a large bowl, gently toss the sliced peaches with lemon juice, granulated sugar, and cinnamon until evenly coated. Transfer the mixture into a buttered baking dish, spreading it out to form an even layer.
    2. In a separate bowl, combine the oats, flour, brown sugar, and a pinch of salt. Use a pastry cutter or fork to cut the cold, cubed butter into the dry ingredients until the mixture resembles coarse crumbs with some larger pea-sized pieces.
    3. Sprinkle the crumble topping evenly over the peaches, covering the surface completely for a crispy top layer.
    4. Place the baking dish in the preheated oven and bake for about 40 minutes, or until the topping is golden brown and the fruit is bubbling around the edges.
    5. Remove the peach crumble from the oven and let it cool slightly; the filling should be thickened, and the topping crisp and fragrant. Serve warm, optionally with a scoop of vanilla ice cream or a dollop of whipped cream.

    This peach crumble is more than just a dessert; it’s a reminder of lazy summer days and the comforting joy of homemade baking. Its seasonal charm makes it perfect for late summer gatherings or quiet family evenings. As the peaches soften and release their sweet perfume, the whole house fills with a nostalgic scent that makes any moment special.

    Whether served warm with a scoop of vanilla ice cream or just as it is, this crumble always feels like a small celebration. It’s a straightforward recipe to master, and each batch reminds me why I love the magic of simple, seasonal ingredients. Enjoy creating this little piece of summer’s glow whenever you need a sweet pick-me-up.

  • Spooky Nostalgia: Halloween Dirt Cake with Gummy Worms

    Spooky Nostalgia: Halloween Dirt Cake with Gummy Worms

    Ever wonder how a simple dessert transforms into a childhood haunted house? This Halloween Dirt Cake is not just a treat—it’s a trip down memory lane with a spooky twist. The smell of rich chocolate and crushed cookies mingling with fruity gummy worms whirling in a eerie swirl makes every bite an adventure.

    This dessert is perfect for those who love a little chaos on their plate. It’s a playful mix of textures: creamy pudding, crunchy cookies, and chewy worms, all layered into a mischievous monster’s lair. Plus, it’s easy enough for kids to help make, turning the prep into a mini Halloween workshop.

    With just a few simple ingredients, you can whip up a dessert that sparks joy and giggles. It’s the kind of dish that feels tailored for October’s cool, crisp nights and spooky gatherings.

    Halloween Dirt Cake

    Halloween Dirt Cake is a layered dessert made with creamy chocolate pudding, crushed cookies for a crumbly texture, and gummy worms that add a chewy element. Its appearance resembles a muddy, spooky scene, with layered textures that range from smooth to crunchy and chewy. The assembled dish is served in a fun, rustic presentation, perfect for Halloween gatherings.
    Prep Time 20 minutes
    Cook Time 10 minutes
    Total Time 30 minutes
    Servings: 8
    Course: Main Course
    Cuisine: American
    Calories: 250

    Ingredients
      

    • 1 package instant chocolate pudding mix for fluffy pudding base
    • 2 cups cold milk for preparing pudding
    • 1 cup crushed chocolate cookies for texture and decoration
    • 1 cup gummy worms for chewy, spooky effect

    Equipment

    • Mixing bowls
    • Whisk
    • Ramekins or a large serving dish
    • Spatula
    • Plastic wrap

    Method
     

    1. In a mixing bowl, whisk together the instant chocolate pudding mix and cold milk until smooth and slightly thickened, about 2 minutes. The pudding should become glossy and start to set.
    2. Spread a thin layer of crushed cookies at the bottom of your serving dish or individual ramekins to create a messy, earthy base. This adds crunch and a spooky soil-like appearance.
    3. Pour the prepared pudding over the crushed cookie layer, smoothing it out gently with a spatula to create an even surface. The pudding will be glossy and thick.
    4. Sprinkle another layer of crushed cookies over the pudding to add more texture and resemble dirt.
    5. Distribute gummy worms across the top, pressing some slightly into the pudding to give a realistic, buried effect. The worms should appear as if emerging from the dirt.
    6. Chill the assembled Dirt Cake in the refrigerator for at least 1 hour to allow the pudding to firm up and flavors to meld.
    7. Just before serving, you can add extra crushed cookies around the edges for a messy look or more gummy worms for extra spookiness. Serve chilled and enjoy the playful, dirt-like appearance with a variety of textures.

    Notes

    For added Halloween effect, use themed serving dishes or decorations. Feel free to vary the amount of gummy worms for more or less creature crawling out of the dirt.
    This dirt cake isn’t just about the visual fun; it’s about creating moments of joy that stick. The familiar chocolate and creamy textures bring comfort amid the season’s spooky chaos.

    As you carve pumpkins and deck out your porch, this dessert can be a centerpiece of celebration or a sneaky midnight snack. Its playful presentation invites smiles and stories, making Halloween a little sweeter and a lot messier—in all the best ways.

  • Spooky Delight: Halloween Monster Eyeball Cake Pops

    Spooky Delight: Halloween Monster Eyeball Cake Pops

    Every October, I find myself haunted by a craving for something both eerie and adorable. These Halloween Monster Eyeball Cake Pops perfectly blend unsettling visuals with a sweet, nostalgic crunch. Crafting them feels like piecing together a little monster universe on a stick, each eyeball a tiny jolt of festive fun.

    What makes these treats stand out is the amusing chaos that comes with their creation. Watching the kids’ faces light up at the grotesque yet cute eyeballs makes all the mess worthwhile. Plus, the mix of red veins and gooey centers lends a satisfyingly spooky texture you can’t resist biting into.

    Halloween Monster Eyeball Cake Pops

    These cake pops are crafted to resemble creepy eyeballs, combining cake, frosting, and candy coatings to achieve a smooth and glossy exterior with grotesque red veins. Each eyeball features a gooey center and detailed decorations that make them both visually striking and delightfully sweet with a chewy bite. The final appearance is that of miniature, disturbing yet adorable eyeballs on sticks, perfect for Halloween celebrations.
    Prep Time 30 minutes
    Total Time 30 minutes
    Servings: 12
    Course: Main Course
    Cuisine: Halloween
    Calories: 150

    Ingredients
      

    • 1 box ready-made cake (vanilla or chocolate) crumbled after baking
    • 1 cup buttercream or frosting frosting for mixing with cake crumbs
    • 2 cups white chocolate or candy melts coating for glossy finish
    • Red gel food coloring amount as needed red veins for decoration
    • Black gel or edible marker amount as needed pupil for realistic eyeball look
    • Optional edible red or pink gel for gooey center effect

    Equipment

    • Mixing bowls
    • Food processor or blender
    • Baking sheet
    • Lollipop sticks or skewers
    • Microwave-safe bowl or double boiler
    • Wax paper or parchment paper
    • Spray or spatula for coating
    • Fine-tipped piping bag or toothpick

    Method
     

    1. Crumble the cake into fine crumbs using a fork or your hands, then place them in a large mixing bowl. Add the frosting gradually and mix until the mixture is dense, cohesive, and easy to roll into balls.
    2. Scoop out small portions of the cake mixture and roll each into a smooth, round ball about the size of a golf ball. Place them on a baking sheet lined with wax paper and refrigerate for about 30 minutes to firm up.
    3. Melt the white chocolate or candy melts in a microwave-safe bowl in 20-second bursts, stirring until smooth. Dip a lollipop stick into the melted coating, then insert it into each cake ball about halfway to create the eyeball on a stick.
    4. Dip each cake pop into the melted coating, swirling gently to cover completely and creating a shiny, smooth surface. Tap off excess coating and set them upside down on wax paper to dry and harden.
    5. Once the coating is set, use a fine-tipped piping bag or toothpick to draw red veins onto each eyeball for a creepy, veiny effect. Add a small black dot for the pupil to give the eyeball a realistic, spooky look.
    6. If desired, create a gooey center by injecting small amounts of edible red or pink gel into the middle of the eyeballs with a toothpick, adding a gruesome, squishy appearance.
    7. Arrange the finished eyeball cake pops on a serving tray. They’re now ready to serve, with a glossy finish, spooky decorations, and a fun, chewy texture that’s perfect for Halloween festivities.

    Notes

    To enhance the spooky effect, consider adding glow-in-the-dark edible accents or serving in a dimly lit setup.

    These eyeball cake pops are more than just treats; they’re a conversation starter at any Halloween gathering. They bring a playful, slightly grotesque charm that’s perfect for setting a spooky scene.

    Embracing the chaos of Halloween baking keeps the season lively and memorable. Whether you’re a seasoned baker or a curious newcomer, these fun treats invite you to add a dash of creepy whimsy to your festive table.

  • The Unusual Charm of Spiced Pumpkin Muffins with a Surprise Twist

    The Unusual Charm of Spiced Pumpkin Muffins with a Surprise Twist

    As the leaves turn golden and the air takes on a chill, pumpkin recipes surge in popularity. But today, I want to take pumpkin muffins beyond the usual cinnamon sweetness. Imagine a hint of smoky paprika intertwined with warm spices, adding a whisper of sophistication to a cozy classic.

    This recipe is about embracing imperfect mornings. The aroma of toasted pumpkin seeds mingling with nutty undertones creates a sensory journey before you even take a bite. Sweet, spicy, with an unexpected savory edge — it’s a new way to appreciate fall’s most iconic squash.

    Whether you’re baking for a brunch spread or craving a snack that sparks conversation, this muffin offers something different. It’s easy enough to whip up in under thirty minutes, yet impressive enough to make you feel like a kitchen wizard. Fall in love with pumpkin all over again, with a twist you won’t see coming.

    Smoky Pumpkin Muffins with Toasted Seeds

    These pumpkin muffins are baked with warm spices and a hint of smoky paprika, creating a balanced blend of sweet, spicy, and savory flavors. Topped with toasted pumpkin seeds, they have a moist, tender crumb and a nutty aroma, making them a cozy fall treat.
    Prep Time 20 minutes
    Cook Time 15 minutes
    Total Time 35 minutes
    Servings: 12
    Course: Main Course
    Cuisine: American
    Calories: 210

    Ingredients
      

    • 1 1/2 cups all-purpose flour
    • 1/2 cup brown sugar
    • 1 teaspoon baking soda
    • 1/2 teaspoon ground cinnamon
    • 1/2 teaspoon ground nutmeg
    • 1/4 teaspoon smoked paprika
    • 1/4 teaspoon salt
    • 1 cup pure pumpkin puree
    • 1/3 cup vegetable oil
    • 2 large eggs
    • 1 teaspoon vanilla extract
    • 1/4 cup pumpkin seeds for topping, toasted until golden

    Equipment

    • Mixing bowls
    • Whisk
    • Muffin tin
    • Silicone spatula
    • Toaster or oven for toasting pumpkin seeds

    Method
     

    1. Preheat your oven to 375°F (190°C) and line a muffin tin with paper liners or grease it lightly.
    2. In a large mixing bowl, whisk together the flour, brown sugar, baking soda, cinnamon, nutmeg, smoked paprika, and salt. This ensures the dry ingredients are well combined and free of lumps.
    3. In a separate bowl, stir together the pumpkin puree, vegetable oil, eggs, and vanilla extract until the mixture is smooth and slightly frothy.
    4. Pour the wet ingredients into the dry mixture and gently fold everything together with a silicone spatula until just combined. Be careful not to overmix to keep the muffins tender.
    5. Divide the batter evenly among the muffin cups, filling each about three-quarters full. This helps the muffins rise evenly.
    6. Top each muffin with a few pumpkin seeds, lightly pressing them into the batter for a toasted, nutty crunch.
    7. Bake in the preheated oven for about 15 minutes, or until the muffins are golden brown and a toothpick inserted in the center comes out clean.
    8. Once baked, remove the muffins from the oven and allow them to cool in the tin for a few minutes. Then transfer to a wire rack to cool completely.
    9. Enjoy the muffins warm or at room temperature, with the toasted pumpkin seeds adding a delightful crunchy contrast.

    Notes

    For extra flavor, sprinkle a pinch of smoked paprika on top before baking. Muffins can be stored in an airtight container for up to two days or frozen for longer storage.

    These muffins are a testament to the charm of unexpected flavor combinations. They turn what could be just another fall snack into a memorable treat that sparks curiosity and joy.

    Today’s pumpkins do more than just adorn porch steps; they inspire new baking adventures. As the season shifts, I find comfort in experimenting with familiar ingredients that, with a twist, open up a world of flavors.

  • Spooky-Sweet Halloween Pumpkin Cheesecake Bars

    Spooky-Sweet Halloween Pumpkin Cheesecake Bars

    Halloween nights often bring a mix of chaos and charm, but this year I wanted to create something that combines the festive spirit with unexpected elegance: Pumpkin Cheesecake Bars with a twist of spiced nostalgia.

    The smell of cinnamon, nutmeg, and pumpkin baking fills the air, creating a cozy yet eerie vibe. These bars aren’t just treats; they’re a conversation starter at every ghoulish gathering, blending creamy texture with a crispy crust that echoes fall’s crisp air.

    What makes this recipe stand out is its subtle sophistication hiding behind a playful Halloween facade. It’s perfect for those who crave familiar flavors but want a treat that’s unique enough to surprise—even delight—your guests.

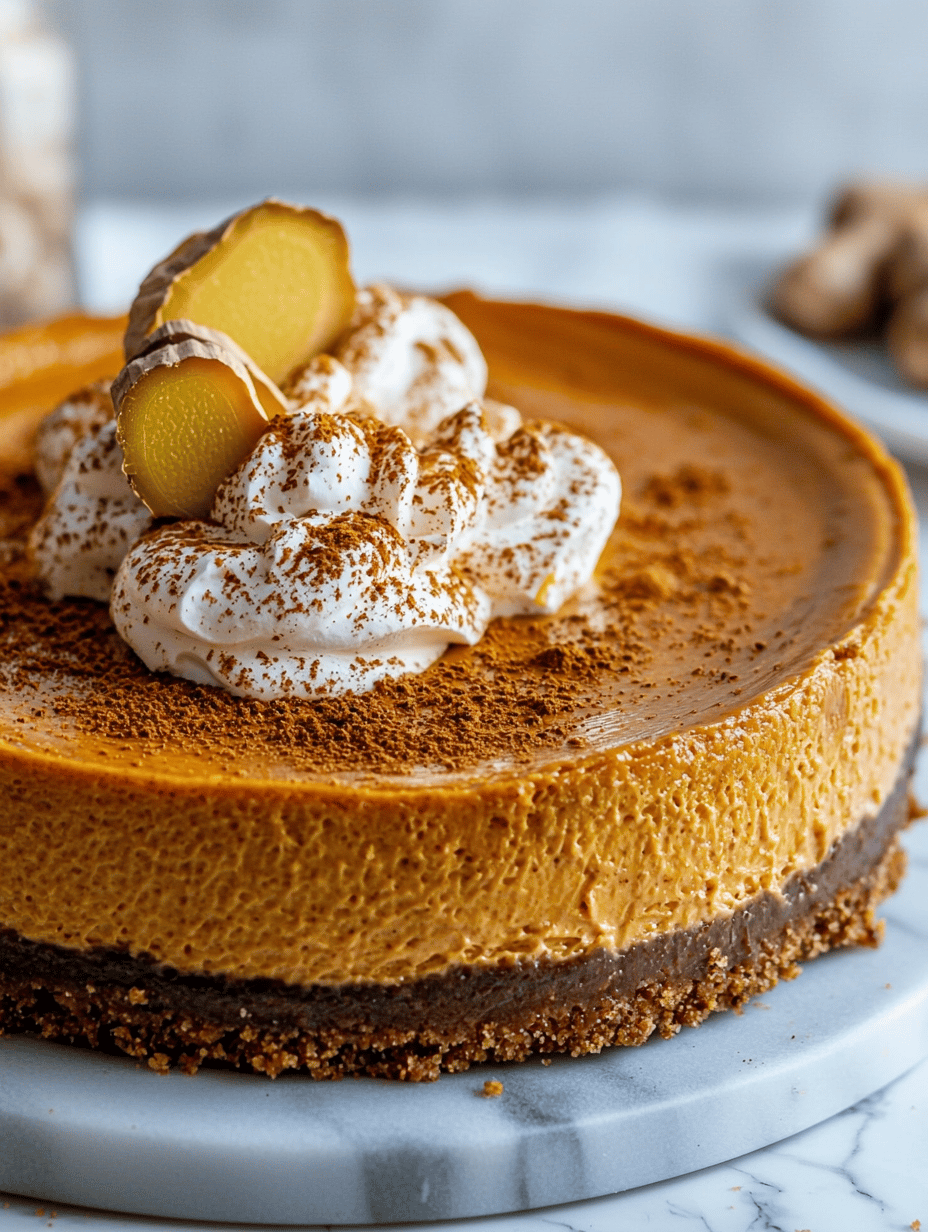
    Pumpkin Cheesecake Bars

    Pumpkin Cheesecake Bars with a spiced crust feature a creamy pumpkin filling infused with cinnamon and nutmeg atop a crispy, buttery crust. The bars are baked until set and have a smooth, dense texture with a slightly firm crust for easy slicing and serving. Their appearance showcases a vibrant orange filling contrasted by the golden crust, perfect for autumnal occasions.
    Prep Time 20 minutes
    Cook Time 40 minutes
    Total Time 1 hour
    Servings: 12
    Course: Main Course
    Cuisine: American
    Calories: 320

    Ingredients
      

    • 1 cup graham cracker crumbs
    • 1/4 cup granulated sugar
    • 6 tablespoons unsalted butter, melted
    • 16 oz cream cheese, softened
    • 1 cup canned pumpkin pure pumpkin puree
    • 3/4 cup granulated sugar
    • 2 large eggs
    • 1 1/2 te teaspoons ground cinnamon
    • 1/2 teaspoon ground nutmeg
    • 1/2 teaspoon salt

    Equipment

    • Mixing bowls
    • 9×13 inch baking pan
    • Electric mixer or whisk
    • Measuring cups and spoons
    • Rubber spatula
    • Oven

    Method
     

    1. Preheat the oven to 350°F (175°C). In a mixing bowl, combine graham cracker crumbs and sugar, then stir in melted butter until the mixture resembles wet sand. Press this mixture evenly into the bottom of a lined 9×13 inch baking pan to form a crust, then bake for 10 minutes to set it.
    2. In a large bowl, beat the softened cream cheese with an electric mixer until smooth and creamy, about 2 minutes. Add canned pumpkin, sugar, cinnamon, nutmeg, and salt, mixing well after each addition until the mixture is fully combined and silky.
    3. Crack in the eggs one at a time, beating on low speed after each addition to incorporate fully. The filling should become thick and slightly fluffy, with a fragrant spice aroma filling the air.
    4. Pour the pumpkin mixture over the baked crust, spreading it evenly with a spatula to ensure a flat, smooth surface. Tap the pan gently on the counter to remove any air bubbles and settle the filling.
    5. Bake in the preheated oven for about 35-40 minutes, or until the filling is set around the edges but still slightly soft in the center. The top should be lightly golden and fragrant.
    6. Remove from the oven and let the bars cool completely in the pan on a wire rack. Once cooled, refrigerate for at least 2 hours or overnight to allow the filling to firm up for clean cutting.
    7. Slice the chilled pumpkin cheesecake into squares or bars. Serve chilled or at room temperature, revealing a creamy interior with a hint of spice and a crispy crust.

    Notes

    For a more festive look, garnish with whipped cream or caramel drizzle before serving.

    Sharing these Halloween Pumpkin Cheesecake Bars feels like passing along a secret—delicious and delightfully spooky. The depth of flavors paired with their festive look makes them a perfect seasonal treat. Every bite carries a touch of fall’s crisp air and childhood’s thrill.

    As the season spins into full swing, this recipe offers a chance to slow down and savor the little moments—together with loved ones or in quiet reflection. They’re more than just dessert; they’re a sweet little celebration of everything autumn represents.