
There’s something about the crunch of these rice krispie bites that instantly takes me back to lazy afternoons in childhood. No fuss, no oven required, just a simple handful of ingredients that come together quickly and satisfy that sweet, crispy craving. It’s a recipe that’s become my go-to for when I want a treat without the mess or the wait.
What I love most is how flexible these bites can be—swap the chocolate chips for dried fruit, add a pinch of sea salt, or even toss in a handful of nuts. They’re honest, unpretentious, and perfect for pulling together in a pinch. Plus, they’re a reminder that sometimes, the best things in life are just a handful of ingredients stirred together and pressed into a tray.
Focusing on the nostalgic comfort of childhood treats, this recipe emphasizes how simple, no-bake snacks can bring back memories and create new ones, especially when made with honest, everyday ingredients that don’t require a fuss or oven.
Childhood comfort in every bite
- These bites remind me of lazy Sunday afternoons, where the smell of toasted marshmallows still lingers in the air.
- I get a rush of pride when kids ask for seconds, not realizing how quick and easy they are to make.
- Sometimes I crave something sweet and crispy that doesn’t require turning on the oven—these hit just right.
- There’s a nostalgic comfort in pressing these into a tray, like I’m back in my grandma’s kitchen, making treats without fuss.
Childhood comfort in every bite
This recipe came together on a busy afternoon when I needed something quick, satisfying, and no-fuss. I wanted to capture that childhood joy of crispy, sweet bites without turning on the oven or fussing over complicated steps. It’s a reminder that sometimes, the simplest ingredients pressed together can bring the biggest smile. Making these is like pressing pause on chaos and reconnecting with a sweet, crunchy memory in just minutes.
Historical roots of Rice Krispie treats
- These crispy bites trace back to mid-20th-century American snack innovation, where convenience and simplicity became key.
- Rice Krispies treats became popular in the 1930s, originally designed as an easy-to-make dessert that could be whipped up quickly.
- The no-bake concept gained traction during wartime shortages, making such recipes staples in home kitchens.
- This recipe embodies the essence of frugal comfort food—using everyday ingredients to create something sweet without fuss.
Key ingredients and tips
- Marshmallows: I love how they melt into gooey sweetness, making the mixture sticky and easy to work with. Skip the mini ones if you want a smoother texture.
- Rice Krispies: Their crunch is what makes these bites special. Use freshly opened cereal for maximum crispness—stale cereal can turn soggy fast.
- Butter: It adds richness and helps everything hold together. For a lighter version, try coconut oil, but expect a slightly different flavor and texture.
- Chocolate chips: I toss in semi-sweet for classic flavor, but white or dark chocolate works too. Melted chocolate drizzles add a glossy finish and extra indulgence.
- Vanilla extract: Just a splash brightens the overall flavor—don’t skip it, even if it feels small. It makes everything taste more rounded.
- Optional add-ins: Nuts, dried fruit, or sprinkles—whatever you like. Just remember, too many mix-ins can make bites fall apart or be harder to cut.
- Sea salt: A tiny pinch on top enhances sweetness and adds a bit of contrast. Use flaky sea salt for a pop of flavor and a little shimmer.
Key Ingredients and Their Quirks
Marshmallows:
- I love how they melt into gooey sweetness, making the mixture sticky and easy to work with. Skip the mini ones if you want a smoother texture.
- Rice Krispies: Their crunch is what makes these bites special. Use freshly opened cereal for maximum crispness—stale cereal can turn soggy fast.
- Butter: It adds richness and helps everything hold together. For a lighter version, try coconut oil, but expect a slightly different flavor and texture.
Chocolate chips and vanilla:
- Cereal: The crispy rice creates that iconic texture. Open a fresh box for the crunchiest bites—stale cereal dulls the experience.
- Chocolate chips: Melted or not, they add a glossy, sweet finish. Semi-sweet or dark are classic, but white chocolate can brighten things up.
- Vanilla extract: Just a splash brightens all those flavors—don’t skip it, even if it seems small. It’s the secret to a well-rounded taste.
Notes for ingredient swaps
- Dairy-Free: Swap butter for coconut oil or dairy-free margarine. Expect a slightly different richness and a subtler aroma.
- Sugar-Free: Use a natural sweetener like honey or agave syrup. The texture might be a little stickier, but still delicious.
- Gluten-Free: Ensure your cereal is labeled gluten-free. The texture remains crisp, but flavor might be a touch milder.
- Vegan: Replace marshmallows with vegan marshmallow alternatives or melted coconut cream. Expect a creamier, less gooey result.
- Add-ins: Dried fruits, nuts, or seeds—adjust quantities to prevent bites from falling apart. They add texture and flavor, so don’t overdo it.
- Chocolate: Use carob chips or swap for a different flavored chocolate for variety. Keep an eye on melting times to avoid burning.
- Cereal: Try crispy rice or gluten-free options. The crunch will vary, but the base concept stays the same.
Equipment & Tools
- Large saucepan: To melt marshmallows and butter evenly.
- Spatula: To fold ingredients and press mixture into the dish.
- Parchment-lined dish: To prevent sticking and make removal easier.
- Sharp knife: To cut the firm bites cleanly.
Step-by-step to crispy bites
- Equipment & Tools: Gather a large mixing bowl, a spatula, and a 20cm (8-inch) square baking dish lined with parchment paper.
- Melt marshmallows: In a large saucepan over low heat, about 90°C (194°F), melt 200g marshmallows, stirring constantly until smooth and gooey. Be patient, don’t rush the melt or marshmallows will stick and burn.
- Add butter: Stir in 50g unsalted butter, letting it melt completely. The mixture should turn glossy and fragrant, about 1 minute.
- Combine cereal: Pour 150g Rice Krispies into the melted marshmallow mixture. Gently fold with the spatula until evenly coated. Keep the mixture soft but well combined.
- Transfer to dish: Scoop the mixture into your prepared dish. Use the spatula or a piece of parchment to press it down evenly, about 1–2 minutes. Don’t pack too hard; you want a gentle press for a tender bite.
- Cool and set: Let the bites sit at room temperature for 20–30 minutes, or until firm. If in a rush, refrigerate for 10 minutes but avoid freezing, which can make them too hard.
- Cut into bites: Using a sharp knife, slice into 1-inch squares. Wipe the knife clean between cuts for neat edges. Work quickly before the mixture firms up too much.
- Finish and serve: For a glossy finish, melt 50g chocolate chips and drizzle over the bites. Let sit for 10 minutes to set, then serve or store.
Let the bites cool completely at room temperature, then slice into squares. For a glossy touch, drizzle melted chocolate. Serve immediately or store in an airtight container.
How to Know It’s Done
- Marshmallow mixture is smooth, glossy, and fragrant before adding cereal.
- Cereal is fully coated but mixture remains soft enough to press without cracking.
- Bites are firm and hold shape after cooling, with a slight bounce when pressed.
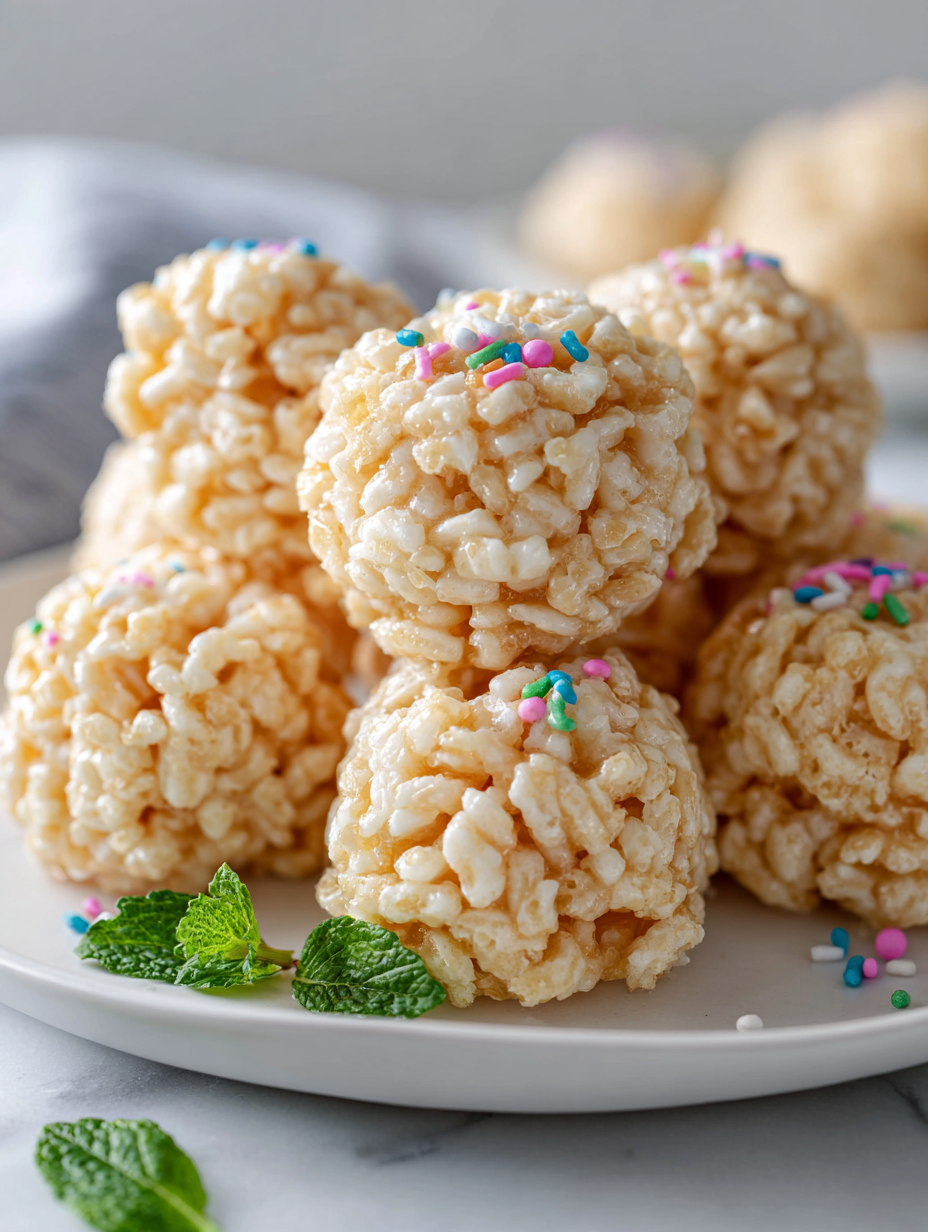
No-Bake Rice Krispie Bites
Ingredients
Equipment
Method
- Gather a large saucepan, a spatula, and line an 8-inch square dish with parchment paper.
- Place the marshmallows in the saucepan and melt them over low heat, stirring constantly until the mixture is smooth, glossy, and fragrant—about 3 minutes. You'll hear a gentle bubbling and see the marshmallows turn into a gooey pool.
- Add the butter to the melted marshmallows, stirring until it melts completely and the mixture becomes shiny and fragrant, about 1 minute. This adds richness and helps everything come together.
- Pour the crispy rice cereal into the marshmallow mixture. Gently fold the cereal in with your spatula until it’s evenly coated and the mixture looks sticky and well combined, with a slight puffed appearance and a sweet aroma filling the air.
- Scoop the mixture into the prepared dish and use the back of your spatula or a piece of parchment to press it down gently, spreading it into an even layer about 1 inch thick. Press softly to avoid squishing all the air out but firmly enough that the mixture sticks together.
- Let the mixture cool at room temperature for 20–30 minutes until firm, or refrigerate for about 10 minutes for a quicker set. You’ll notice it becomes less sticky and more solid, with a golden hue on top.
- Once cooled and firm, use a sharp knife to cut into 1-inch squares. Wipe the knife clean between cuts for neat edges. You’ll hear a satisfying crunch as the knife slices through the crispy bites.
- If desired, melt the chocolate chips gently and drizzle over the bites for an extra touch of sweetness and shine. Let the chocolate set for about 10 minutes before serving.
- Enjoy these crunchy, sticky bites immediately or store in an airtight container at room temperature for up to 3 days for maximum freshness and crunch.
Pro tips for perfect Rice Krispie Bites
- Use fresh cereal for maximum crunch and avoid sogginess.
- Melt marshmallows slowly over low heat to prevent burning and ensure smoothness.
- Press mixture gently but firmly into the pan for even bites and better cohesion.
- Wipe your knife clean between cuts for neat, even squares.
- Slightly under-melt marshmallows if you want a softer, chewier texture; over-melt for a firmer bite.
- Add a pinch of salt or vanilla to enhance sweetness and flavor depth.
- For glossy drizzles, melt chocolate chips gently and work quickly to prevent seizing.
Common mistakes and how to fix them
- FORGOT to lightly oil the pan → Use non-stick spray to prevent sticking.
- DUMPED all marshmallows at once → Add marshmallows gradually for even melting.
- OVER-TORCHED the mixture → Keep heat low and stir constantly to avoid burning.
- MISSED the pressing step → Press mixture firmly but gently for even bites.
Quick fixes and pantry swaps
- When mixture is too sticky → Splash a little more melted butter to loosen it up.
- If bites are too soft → Patch with a quick chill in the fridge for 5 minutes.
- Splash cold water on hands before pressing → Prevents sticking and makes pressing easier.
- When cereal feels soggy → Swap in fresh cereal and start over for crisp bites.
- DUMPED too many chocolate chips → Shield with a light dusting of powdered sugar for a balanced look.
Prep, store, and reheat tips
- Prepare the mixture up to a day in advance; keep it covered in the fridge to prevent drying out.
- Store the finished bites in an airtight container at room temperature for up to 3 days; they stay crispy and sweet.
- For longer storage, refrigerate for up to a week, but expect a slight loss of crunch and a softer texture.
- Reheat by briefly microwaving at 50% power for 10 seconds if you prefer a softer bite, but best enjoyed at room temp.
- Let refrigerated bites come to room temperature before serving to regain some of their original crunch and aroma.
Top questions about Rice Krispie Bites
1. How do I keep the bites crunchy?
Use fresh marshmallows and cereal for the crispiest texture. Stale ingredients make bites soggy and less satisfying.
2. My mixture is too sticky to press?
If the mixture is too sticky, gently spray your hands with a bit of cooking spray before pressing into the pan.
3. How do I get clean cuts?
Refrigerate the bites for at least 30 minutes to firm them up before cutting. Use a sharp knife for clean slices.
4. How do I melt marshmallows properly?
Stir the marshmallows over low heat slowly until melted and glossy. High heat can cause burning and uneven melting.
5. Can I make these dairy-free?
Swap butter for coconut oil for a dairy-free version, but expect a slightly different aroma and slightly softer texture.
6. Can I add nuts or fruit?
Add-ins like nuts or dried fruit should be chopped small and mixed in just before pressing to prevent sogginess.
7. How long do these last?
Store leftovers in an airtight container at room temperature for up to 3 days for best crunch and freshness.
8. Bites are too soft after cooling?
For a quick fix if bites are too soft, chill them in the fridge for about 10 minutes before serving.
9. What kind of chocolate should I use?
Use semi-sweet or dark chocolate chips for a richer flavor, or white chocolate for a sweeter, milder finish.
10. My bites won’t hold together?
If mixture is not sticking together, add a few more melted marshmallows or a tiny splash of melted butter.
These no-bake rice krispie bites are a reminder that simple ingredients can create something nostalgic and satisfying. Sometimes, all it takes is a handful of marshmallows and cereal to bring back childhood memories or create new quick treats.
They’re perfect for busy days, unexpected guests, or those moments when you crave something sweet without the fuss of baking. Plus, the flexibility to add your favorite mix-ins makes them endlessly customizable. A little crunch, a touch of sweetness, and a lot of memories in every bite.
Welcome to Proud of This Mess – a place where food, creativity, and a little chaos come together on a plate!
I’m Emily Carter, the founder and heart behind this little corner of the internet. Born and raised in the United States, I’ve always had a passion for cooking, experimenting, and sharing the messy, delicious journey of creating food that brings people together. My philosophy is simple: good food doesn’t have to be perfect, and a little mess makes it memorable.
At Proud of This Mess, we believe that cooking is more than just following recipes—it’s about exploring flavors, discovering new techniques, and making every meal an experience worth savoring. From comforting weeknight dinners to indulgent desserts, our goal is to inspire home cooks of all levels to embrace the joy of food without fear of imperfection.