
This no bake peanut butter cookie recipe is my go-to when mornings spiral into chaos. No oven, no fuss, just a sticky, sweet handful of comfort that comes together in minutes. It’s honestly my secret weapon for those days when I need a quick hit of something familiar, warm, and satisfying.
There’s something about the simplicity—peanut butter, oats, a touch of sweetness—that feels like a warm hug in snack form. I love how adaptable it is; I’ve tweaked the ingredients over time but always come back to this easy, honest treat. It’s messy, unpolished, but real, and that’s what makes it special.
This recipe is my secret weapon for those chaotic mornings when I need a quick, satisfying treat that doesn’t require turning on the stove or oven. It’s a messy, honest kind of comfort—no-frills, just flavor, and a little bit of nostalgia wrapped up in one sweet bite. Perfect for when I crave something familiar but don’t have the time or energy to cook.
A Secret Morning Pick-Me-Up
- This recipe is my secret weapon for those chaotic mornings when I need a quick, satisfying treat that doesn’t require turning on the stove or oven. It’s a messy, honest kind of comfort—no-frills, just flavor, and a little bit of nostalgia wrapped up in one sweet bite. Perfect for when I crave something familiar but don’t have the time or energy to cook.
- There’s something about the simplicity—peanut butter, oats, a touch of sweetness—that feels like a warm hug in snack form. I love how adaptable it is; I’ve tweaked the ingredients over time but always come back to this easy, honest treat. It’s messy, unpolished, but real, and that’s what makes it special.
- Making these cookies feels like a small victory—quick, no fuss, and always satisfying. It’s a reminder that sometimes, the best things are the simplest. I’ve handed out dozens of these at gatherings, and they always disappear faster than I expect.
- I remember the first time I made these in a rush, sticky fingers and all. It was a mess, but the smell of peanut butter melting and oats crunching was pure comfort. Now, they’re my go-to whenever I need a little sweet, no oven required.
- There’s a nostalgic rush when I bite into one — that perfect chewiness, the oozing peanut butter, the faint hint of vanilla. It’s imperfect, but that’s what I love. These cookies remind me that sometimes, simplicity is the best kind of magic.
A Warm Memory in Every Bite
- I stumbled into this recipe during a lazy weekend when I was out of baked goods but craving something sweet and peanut buttery. It was one of those moments where I threw everything together just to see if it would work, and it did—better than I expected. Since then, it’s become a go-to for quick, no-fuss treats that don’t require heating up the kitchen.
- There’s a certain charm in how these cookies come together—messy, spontaneous, and a little imperfect. They remind me of childhood afternoons, the smell of peanut butter melting into oats, and the rush of making something satisfying with whatever I had on hand. It’s a recipe born out of necessity but loved for its simplicity and honest flavor.
- heading: ‘A Warm Memory in Every Bite’
Historical and Cultural Roots
- This recipe likely emerged in the 1970s when convenience foods gained popularity in American kitchens, making quick treats essential.
- No bake cookies became a staple for busy families, especially in rural areas where oven access was limited or cooking time was scarce.
- The combination of peanut butter and oats in snack form has roots in wartime rations, turning simple pantry staples into satisfying sweets.
- Originally, recipes like this were shared around campfires and in community cookbooks, embodying the spirit of resourcefulness and simplicity.
- Today, these cookies are experiencing a nostalgic revival, reminding us of simpler times and the joy of quick, homemade treats.
Ingredient breakdown: key components
- Creamy peanut butter: I like the natural, oozing kind that melts into everything. It’s rich and adds that unmistakable peanut aroma. Swap for almond butter if you want a nuttier twist, but the flavor will change a bit.
- Old-fashioned oats: They give these cookies their chewy backbone. I prefer the slightly rough texture, but quick oats work in a pinch—just watch the consistency gets a little softer.
- Honey or maple syrup: I’ve used both to sweeten and help everything stick together. Honey’s richer, maple syrup adds a smoky sweetness. You can skip it for a less sweet, more peanut-forward cookie.
- Vanilla extract: Just a splash enhances the overall flavor. Skip if you’re out, but it brightens the richness of peanut butter, no substitute needed.
- Optional chocolate chips: I love adding semi-sweet chips for bites of melty chocolate. You can toss in chopped nuts or coconut flakes if you want more texture—whatever makes your mouth happy.
- Salt: A pinch amplifies the sweetness and balances the peanutty richness. Don’t skip it, even if you’re not a big salt fan—it makes everything pop.
- Optional add-ins (like flaxseed or chia): I like a tablespoon of these for a slight crunch and extra nutrition. They don’t change the flavor much but give a little boost in texture and health.
Spotlight on key ingredients
Peanut Butter:
- Creamy peanut butter: I prefer the natural, oozy kind that melts into everything, filling the air with a rich, roasted peanut aroma. Swap for almond butter if you want a nuttier twist, but the flavor will change a bit.
- Creamy texture: It becomes smooth and velvety when warmed, helping everything stick together easily. If you use chunky, expect more texture and less uniformity.
- Oozes when heated: It melts quickly over low heat, turning glossy and inviting. If it scorches or gets too thick, lower the heat and stir constantly.
Old-fashioned oats:
- They give these cookies their chewy backbone, with a slightly rough texture that crunches as you bite. Quick oats work too but tend to soften faster, making the cookies less chewy.
- Slightly nutty aroma: When mixed and cooled, they add a warm, toasted scent that complements the peanut butter. Toasting oats beforehand intensifies this aroma.
- Absorbs moisture: They soak up the sticky mixture, helping it hold shape. If too dry, add a touch more honey or a splash of milk to loosen the mixture.
Notes for ingredient swaps
- Nuts-Free: Use sunbutter or tahini instead of peanut butter. Keep in mind, tahini will add a slightly smoky, bitter edge.
- Sweetener Swap: Maple syrup can replace honey for a more caramelized flavor, but the texture might be a touch softer.
- Oats: Swap old-fashioned oats for quick oats if you’re in a pinch; they’ll make the cookies slightly softer and more uniform.
- Vegan Version: Use agave syrup instead of honey, and dairy-free chocolate chips if adding chocolate.
- Coconut Lover: Toss in shredded coconut instead of chocolate chips for a chewy, tropical twist.
- Salt: Use sea salt flakes for a more pronounced salt crunch, which enhances sweetness and peanut flavor.
- Add-ins: Chopped nuts or dried fruit can be mixed in for extra texture and flavor, just reduce the oats slightly if needed.
Equipment & Tools
- Medium saucepan: For melting peanut butter and honey evenly.
- Wooden spoon or spatula: To stir and combine ingredients smoothly.
- Baking sheet: To hold cookies while they set in the fridge.
- Parchment paper: Prevent sticking and make cleanup easier.
Step-by-step guide to no bake cookies
- Gather your equipment: a medium saucepan, a spoon, a baking sheet, and parchment paper. The saucepan is for melting, the sheet for setting, and parchment keeps things tidy.
- Combine 1 cup of peanut butter, 1 cup of honey or maple syrup, and 1 teaspoon of vanilla in your saucepan. Warm over low heat (about 70°C / 160°F). Stir until smooth and oozy, about 2-3 minutes. Smell that warm nutty aroma.
- Add 2 cups of old-fashioned oats to the saucepan. Mix thoroughly until all oats are coated and sticky. If the mixture feels too stiff, add a splash more honey or a tiny bit of milk to loosen.
- Drop spoonfuls of the mixture onto your parchment-lined baking sheet. Use about a tablespoon per cookie, and flatten slightly with the back of your spoon. The cookies should be roughly 1 inch thick.
- Place the tray in the refrigerator. Let the cookies chill for about 30 minutes, or until firm. The edges will look matte and slightly set, with a chewy texture developing as they cool.
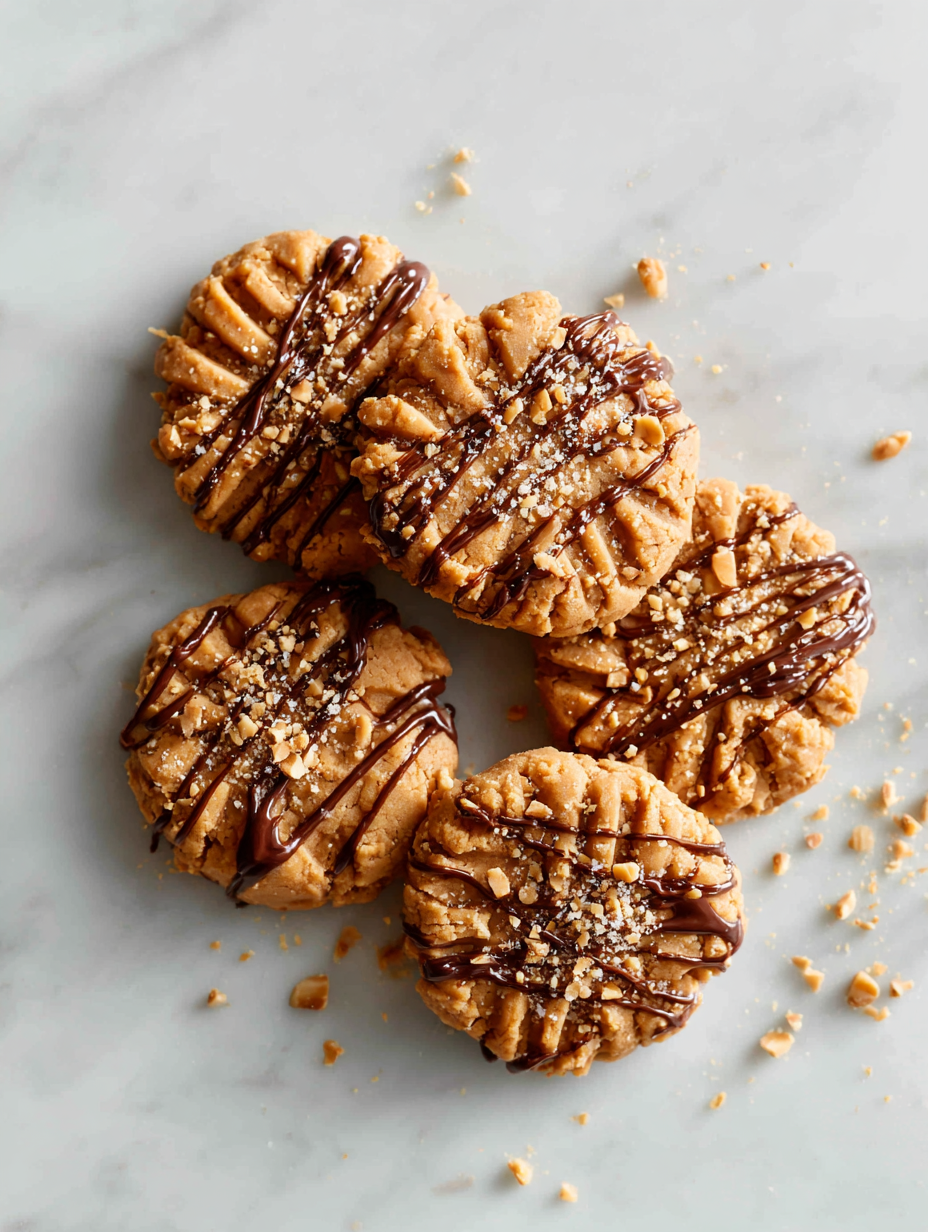
- Once firm, remove from fridge. If you want, sprinkle with a few chocolate chips or a pinch of sea salt on top for extra flavor. Serve immediately, or store in an airtight container.
- For best texture, let the cookies sit at room temperature for 5 minutes before serving. They should be chewy but hold their shape, with a glossy peanut butter sheen on top.
Chill the cookies in the fridge for at least 30 minutes until firm. Serve directly from the fridge or at room temperature for a slightly softer bite. Store in an airtight container in the fridge for up to a week.
How to Know It’s Done
- Cookies feel firm and set when touched, without sticking to your fingers.
- The surface looks glossy with a slight sheen, indicating proper chilling.
- When gently pressed, cookies bounce back slightly, showing they’re not too soft or crumbly.
No Bake Peanut Butter Cookies
Ingredients
Equipment
Method
- Combine the peanut butter, honey, and vanilla extract in your medium saucepan. Warm over low heat, stirring constantly, until the mixture is smooth, glossy, and fragrant—about 2-3 minutes. You’ll notice it bubbling gently and turning golden.
- Remove the saucepan from heat and add the oats to the warm mixture. Stir thoroughly until every oat is coated and the mixture becomes thick and sticky—this should take about 2 minutes. If you’re adding chocolate chips, fold them in now.
- Line a baking sheet with parchment paper for easy cleanup. Using a tablespoon or cookie scoop, drop spoonfuls of the mixture onto the parchment, spacing them about 1-2 inches apart. Flatten each mound slightly with the back of your spoon or fingers—this helps them set evenly.
- Sprinkle a tiny pinch of sea salt on top of each cookie for that perfect salty-sweet balance. Once all cookies are shaped, place the tray in the fridge and chill for about 30 minutes until they firm up and develop a shiny, chewy exterior.
- After chilling, remove the cookies from the fridge. They should be firm but still chewy, with a glossy peanut butter sheen. Serve immediately or store in an airtight container in the fridge for up to a week for optimal freshness and chewiness.
Notes
Tips & Tricks for Perfect Cookies
- Bolded mini-head: Use fresh peanut butter for a richer flavor and easier melting, avoiding the dry or crusty texture.
- Bolded mini-head: Warm the honey or syrup gently to help it blend smoothly into the peanut butter mixture, avoiding clumps.
- Bolded mini-head: Stir constantly when melting to prevent scorching and ensure a glossy, even consistency.
- Bolded mini-head: Chill the mixture briefly if it feels too sticky to scoop, making forming cookies easier and neater.
- Bolded mini-head: Flatten cookies slightly with the back of a spoon for even thickness and quicker chilling.
- Bolded mini-head: Add chocolate chips or nuts after mixing to keep their shape intact and prevent melting into the mixture.
- Bolded mini-head: Store in an airtight container in the fridge to keep cookies fresh and chewy, especially in warm weather.
Common mistakes and how to fix them
- FORGOT to watch heat: Turn down if mixture bubbles or smells burnt; it’s easy to scorch.
- DUMPED too much sugar: Keep to recipe to avoid overly sweet cookies that won’t set properly.
- OVER-TORCHED the mixture: Remove from heat immediately if it starts to brown or smell smoky.
- MISSED the fridge step: Chill until firm; soft or sticky cookies won’t hold their shape.
Quick fixes and pantry swaps
- When mixture is too stiff, splash in a little hot water and stir until smooth.
- If cookies spread too much, chill the mixture 10 minutes before scooping again.
- Splash a tiny bit of milk if oats aren’t sticking—helps bind everything together.
- Patch cracked cookies with a dab of warm peanut butter for a seamless look.
- Shield burnt mixture by immediately removing from heat and stirring in more oats.
Prep, store, and reheat tips
- Prepare the cookie mixture ahead of time by melting and mixing everything. Keep it in the fridge for up to 24 hours; it firms up and makes scooping easier.
- Cookies can be stored in an airtight container in the fridge for up to a week. The cool environment helps maintain their chewy texture and keeps the peanut butter aroma fresh.
- For longer storage, freeze the cookies in a sealed container for up to 3 months. Thaw in the fridge or at room temperature until soft enough to bite into comfortably.
- Reheating is unnecessary; these cookies are best served chilled or at room temperature. If you want softer cookies, leave them out for 10 minutes before serving.
- To revive any that have stiffened in the fridge, let them sit at room temperature for a few minutes until they regain their chewiness and aroma.
Top questions about peanut butter cookies
1. Can I use crunchy peanut butter?
Yes, you can use crunchy peanut butter, but expect more texture and less smoothness in the finished cookies.
2. My mixture is too sticky, what do I do?
Chill the mixture for at least 30 minutes; if it’s too soft, refrigerate longer until firm enough to scoop.
3. Can I swap honey for another sweetener?
Yes, substituting maple syrup for honey works, but cookies might be a bit softer and have a slightly different flavor.
4. How should I store these cookies?
Storing in an airtight container in the fridge keeps them fresh for up to a week. They firm up when chilled but soften at room temperature.
5. Can I add chocolate chips?
Add chocolate chips after mixing; sprinkle on top before chilling for melty bites, or fold into the mixture for even distribution.
6. Can I substitute other nut butters?
Yes, you can use almond or cashew butter as a substitute, but expect a different flavor and slightly different texture.
7. My cookies aren’t firming up, what’s wrong?
If the cookies aren’t setting, ensure the mixture is properly chilled and the peanut butter is fresh and creamy.
8. Can I use quick oats instead of old-fashioned oats?
Use quick oats if you don’t have old-fashioned oats; your cookies will be softer but still delicious.
9. The mixture is too dry, what now?
If the mixture feels dry, add a small splash of hot water or milk to loosen it up before forming cookies.
10. When should I serve these cookies?
No-bake cookies are best served after chilling, but you can leave them at room temperature for a softer texture.
These cookies are more than just a quick treat; they’re a reminder that simplicity often makes the best sweets. When the peanut butter aroma fills the kitchen, it’s like a warm hug that sticks around long after you’ve finished. Sometimes, the most honest recipes are the ones you turn to again and again, especially when life gets busy. They’re rough around the edges but always comforting.
In the end, it’s about those little moments—breaking apart a cookie, feeling the chew, tasting that rich, peanutty burst. No matter how chaotic your day, a batch of these can bring a fleeting sense of calm and satisfaction, no oven needed. Just good ingredients, a bit of patience, and a quiet moment to enjoy.
Welcome to Proud of This Mess – a place where food, creativity, and a little chaos come together on a plate!
I’m Emily Carter, the founder and heart behind this little corner of the internet. Born and raised in the United States, I’ve always had a passion for cooking, experimenting, and sharing the messy, delicious journey of creating food that brings people together. My philosophy is simple: good food doesn’t have to be perfect, and a little mess makes it memorable.
At Proud of This Mess, we believe that cooking is more than just following recipes—it’s about exploring flavors, discovering new techniques, and making every meal an experience worth savoring. From comforting weeknight dinners to indulgent desserts, our goal is to inspire home cooks of all levels to embrace the joy of food without fear of imperfection.