
This recipe is all about embracing the imperfect, the spontaneous, and the cozy chaos of making dessert without the fuss of baking. It’s perfect for those moments when you want something sweet fast, but still crave that rich, creamy texture that makes cheesecakes special. No oven, no stress—just simple, honest ingredients coming together in a way that feels like a little kitchen rebellion.
I’ve always loved the idea of mini desserts—small, easy to share, and a little more forgiving than a big cheesecake. These no-bake mini cheesecakes are my go-to when I need a quick treat that feels fancy but doesn’t demand a lot of fuss. Plus, they’re endlessly customizable, which means I can switch up toppings or flavors depending on what I have in the fridge.
There’s something satisfying about assembling these little jars of creamy goodness. It’s almost meditative, pressing the crust, mixing the filling, then watching it set in the fridge. And honestly, it’s a relief to skip the oven—no worries about cracks or overbaking. Just pure, simple comfort with a side of kitchen spontaneity.
This recipe is all about embracing the imperfect, the spontaneous, and the cozy chaos of making dessert without the fuss of baking. It’s perfect for those moments when you want something sweet fast, but still crave that rich, creamy texture that makes cheesecakes special. No oven, no stress—just simple, honest ingredients coming together in a way that feels like a little kitchen rebellion.
A Spontaneous Dessert Escape
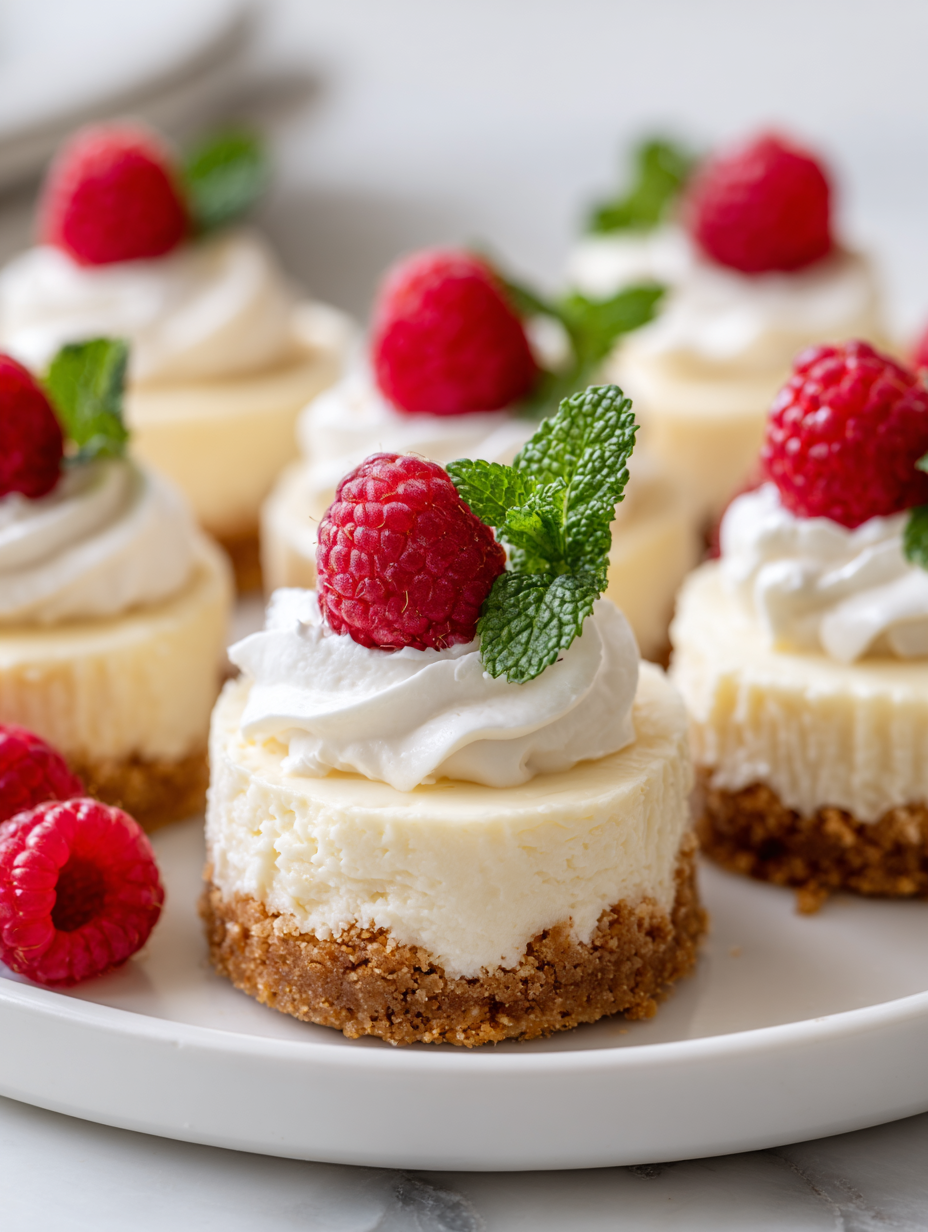
- These mini cheesecakes remind me of summer picnics—light, cool, and just enough sweetness to brighten a day.
- I love how forgiving this recipe is—perfect for those times I forget to soften cream cheese or don’t have a springform pan.
- Biting into one of these cold, creamy bites feels like a tiny, sweet rebellion against my busy kitchen chaos.
- Making these with friends or kids turns a simple dessert into a spontaneous, laughter-filled moment that feels extra special.
The story behind this recipe
- This recipe came about during a summer of endless backyard barbecues and last-minute get-togethers. I wanted something that felt indulgent but didn’t demand turning on the oven after a long day in the sun. Making individual cheesecakes in jars became my little kitchen rebellion—simple, portable, and endlessly customizable.
- I remember the first time I whipped up a batch for friends. We sat around, digging into these creamy bites, laughing at how fuss-free they were. That moment made me realize how powerful a little dessert can be—quick to assemble, yet somehow special enough to make you feel like you’ve pulled off a small miracle.
- heading:
Historical and Cultural Tidbits
- This recipe likely evolved from the mid-20th century rise of instant desserts, emphasizing quick, no-bake options for busy households.
- Mini cheesecakes gained popularity in the 1980s as elegant, individual servings that suited modern, casual gatherings.
- The no-bake approach aligns with a broader trend toward simpler, less heat-intensive desserts, making it accessible even in warm climates.
Key ingredients and tips
- Cream Cheese: I love how soft and slightly tangy it becomes when at room temp—if you forget to soften it, just give it a few more minutes or zap briefly in the microwave. Now’s the time for that oozy, smooth texture.
- Graham Cracker Crumbs: I prefer using finely crushed for that perfect, buttery crust—if you want a gluten-free version, swap in almond meal or crushed gluten-free cookies, but you might need slightly more butter to hold it together.
- Sugar: I usually go for a bit less than the recipe states—aim for just enough to balance the tang and creaminess without turning the filling overly sweet. Feel free to adjust based on your taste.
- Lemon Juice: Brightens the whole mixture with just a splash—if you want more zing, add a little grated lemon zest. It’s that fresh, citric note that keeps it lively.
- Heavy Cream: Whipped until soft peaks, it gives the filling a light, airy feel—if you’re dairy-free, coconut cream works but won’t quite match the richness, so consider adding a touch of coconut sugar.
- Toppings (like berries or chocolate chips): I love the contrast of fresh, juicy berries—if using chocolate, go for dark or semi-sweet to keep it balanced, and sprinkle just before serving so they stay vibrant.
- Optional Add-ins (like vanilla or fruit purée): A teaspoon of vanilla extract adds depth—if experimenting, a swirl of fruit purée can turn these into a tart, colorful surprise, just keep the layers distinct.
Spotlight on Key Ingredients
Cream Cheese:
- I love how soft and slightly tangy it becomes when at room temp—if you forget to soften it, just give it a few more minutes or zap briefly in the microwave. Now’s the time for that oozy, smooth texture.
- Graham Cracker Crumbs: I prefer using finely crushed for that perfect, buttery crust—if you want a gluten-free version, swap in almond meal or crushed gluten-free cookies, but you might need slightly more butter to hold it together.
Heavy Cream:
- Lemon Juice: Brightens the whole mixture with just a splash—if you want more zing, add a little grated lemon zest. It’s that fresh, citric note that keeps it lively.
- Whipped until soft peaks, it gives the filling a light, airy feel—if you’re dairy-free, coconut cream works but won’t quite match the richness, so consider adding a touch of coconut sugar.
Notes for ingredient swaps
- Dairy-Free: Swap cream cheese for a soft, dairy-free cream cheese alternative. It won’t be as tangy, but still creamy.
- Gluten-Free: Use almond meal or gluten-free cookie crumbs instead of graham crackers. Expect a nuttier flavor and slightly denser crust.
- Sweetener: Replace sugar with honey or maple syrup for a more natural sweetness, which might slightly alter the texture.
- Lemon Juice: Use lime juice or a splash of orange juice for different citrus brightness—less tangy, more mellow.
- Heavy Cream: Coconut cream can be a good dairy-free substitute, but it’s richer and might add a coconut flavor.
- Toppings: Fresh berries, chopped nuts, or dark chocolate shavings—feel free to experiment based on what you love or have on hand.
- Flavor Enhancers: Add a teaspoon of vanilla extract or a splash of liqueur like Grand Marnier for an extra flavor layer.
Equipment & Tools
- Small jars or ramekins: To serve individual cheesecakes and keep portions neat.
- Mixing bowl: To blend the filling ingredients smoothly.
- Spatula: For smoothing the filling and pressing crust evenly.
- Small saucepan: To melt butter for the crust.
- Refrigerator: To set the cheesecakes properly.
Step-by-step guide to no bake cheesecakes
- Gather your equipment: 4 small jars or ramekins, a mixing bowl, a spatula, a small saucepan, and a baking sheet for setup.
- Make the crust: Crush 150g graham crackers finely, then mix with 50g melted butter and a pinch of salt. Press evenly into the bottoms of each jar. Chill in the fridge for 10 minutes until set.
- Prepare the filling: In a bowl, beat 200g softened cream cheese until smooth (about 2 minutes). Add 50g sugar, 1 tsp vanilla, and 2 tbsp lemon juice. Mix until combined and slightly fluffy.
- Whip the cream: In a separate bowl, whip 150ml heavy cream until soft peaks form (about 3-4 minutes). Gently fold into the cream cheese mixture in thirds, maintaining lightness.
- Divide the filling: Spoon or pipe the creamy mixture into each jar over the crust, smoothing the tops with a spatula. Cover loosely with plastic wrap.
- Refrigerate: Chill the cheesecakes for at least 4 hours, preferably overnight, so they set firmly and flavors meld.
- Finish and serve: Before serving, top with fresh berries, chocolate shavings, or a drizzle of fruit compote. Serve cold for best texture.
- Optional: For a quick fix, if the filling cracks, gently smooth with a warm spatula or add a fruit topping to hide imperfections.
Cover the cheesecakes with plastic wrap and refrigerate for 4 hours or overnight. Top with desired garnishes just before serving to keep toppings fresh and vibrant.
How to Know It’s Done
- Crust is firm and slightly golden after chilling.
- Filling is smooth, light, and holds shape when spooned.
- Cheesecakes are firmly set with a slight jiggle in the center.
No-Bake Mini Cheesecakes
Ingredients
Equipment
Method
- Begin by crushing the graham crackers into fine crumbs, then transfer to a small bowl.
- Melt the butter in a small saucepan over low heat, then pour it over the graham cracker crumbs. Mix well until the crumbs are evenly coated and resemble wet sand.
- Press this crumb mixture firmly into the bottoms of your small jars or ramekins, creating an even crust. Chill in the refrigerator for about 10 minutes to set.
- In a mixing bowl, beat the softened cream cheese with a spatula until smooth and creamy, about 2 minutes. Add the sugar and lemon juice, stirring until fully combined and slightly fluffy.
- In a separate bowl, whip the chilled heavy cream until soft peaks form, which takes around 3-4 minutes. Gently fold the whipped cream into the cream cheese mixture in thirds, maintaining a light, airy texture.
- Spoon or pipe the creamy filling into each jar over the chilled crust, smoothing the tops with a spatula for an even surface.
- Cover the jars loosely with plastic wrap and refrigerate for at least 4 hours, or preferably overnight, to allow the cheesecakes to set and develop their full flavor.
- Before serving, top each mini cheesecake with fresh berries, chocolate shavings, or your favorite fruit purée for a colorful, flavorful finish.
- Gently serve the cheesecakes cold, and enjoy their creamy, smooth texture with a burst of fresh flavor on top.
Notes
Tips & Tricks for Best Results
- Bolded Mini-Head: Chill the crust mixture thoroughly before pressing—this prevents crumbles and keeps everything neat.
- Bolded Mini-Head: Gently fold whipped cream into the filling—avoid overmixing to keep that airy, light texture.
- Bolded Mini-Head: Use room temperature cream cheese—soft, oozy, and easier to blend smoothly without lumps.
- Bolded Mini-Head: When pressing the crust, use the bottom of a glass for an even, compact layer—no uneven edges.
- Bolded Mini-Head: Chill the assembled cheesecakes at least 4 hours—this helps them set perfectly and enhances flavor.
- Bolded Mini-Head: For a shiny top, briefly warm the toppings before adding—berries or chocolate melt beautifully when slightly warmed.
- Bolded Mini-Head: If the filling cracks, add a dollop of whipped topping or fruit compote on top—instant fix and pretty presentation.
Common mistakes and how to fix them
- FORGOT to chill the crust? Repress and chill for 10 more minutes before filling.
- DUMPED the filling? Gently fold in whipped cream to restore lightness.
- OVER-TORCHED the crust? Reduce oven temp or extend baking time slowly.
- MISSED the setting point? Chill longer until filling is firm and jiggles slightly.
Quick fixes and pantry swaps
- When the cheesecake cracks, gently smooth with a warm spatula or add a fruit topping.
- If the filling is too runny, add a bit more whipped cream or refrigerate longer to set.
- Splash a little lemon juice if the flavor isn’t bright enough—brightens and enhances the tang.
- Patch a cracked surface with extra whipped cream or fruit compote for a polished look.
- Shield delicate toppings from moisture or condensation in the fridge to keep colors vibrant.
Prep, store, and reheat tips
- Prepare the crust mixture and press into jars up to one day ahead; keep chilled for a firm base.
- Assemble the filling up to 24 hours in advance; cover tightly and store in the fridge, the flavors deepen overnight.
- Cheesecakes can be stored in the fridge for 2-3 days; the texture stays creamy, but toppings may soften over time.
- Reheat if desired by letting them sit at room temp for 10 minutes—will soften slightly, but maintain that creamy texture.
Top questions about no bake cheesecakes
1. Can I make these without turning on the oven?
Absolutely. Using a cookie crumb crust and no baking means less heat and fuss, perfect for hot days or busy schedules.
2. How long do they need to set in the fridge?
Yes. Chill the cheesecakes for at least 4 hours, but overnight is best for full firmness and flavor melding.
3. Can I substitute the cream cheese?
You can swap out cream cheese for Greek yogurt or ricotta for a tangier or lighter version, but expect a softer set.
4. What toppings work best?
Use fresh berries or chopped nuts as toppings for a burst of texture and flavor. Keep toppings refrigerated if not served immediately.
5. How can I make this dairy-free?
Replace heavy cream with coconut cream for a dairy-free option. It’s richer and adds a subtle coconut aroma.
6. What if the filling is too soft or cracks?
If the filling is runny, add a bit more whipped cream or chill longer. For cracks, smooth with a warm spatula or cover with toppings.
7. How do I keep the filling fluffy?
Use a gentle folding motion when combining whipped cream with the filling to keep it airy and light.
8. Can I prep parts ahead?
Prepare the crust in advance and keep refrigerated. Fill the jars the day of serving for freshness.
9. How long can I keep leftovers?
Store leftovers covered in the fridge for up to 3 days. Toppings might soften, but the creamy texture remains good.
10. How do I fix soggy toppings?
If toppings get soggy, add fresh fruit or a sprinkle of nuts just before serving for a crisp contrast.
These no-bake mini cheesecakes are a testament to how little fuss can still bring big smiles. They’re perfect for spontaneous gatherings or a quick treat that feels a little special. In a season that often calls for simplicity, they fit right in, delivering creamy comfort with just a few honest ingredients. Sometimes, the best desserts are the ones you make on a whim, with no stress and a lot of flavor.
And when you’re craving something sweet but don’t want to fuss with ovens or complicated steps, these little bites are your go-to. They come together in a flash, and the flavors—bright lemon, rich cream, crunchy crust—keep you coming back for more. No matter the occasion, they remind me that sometimes, simplicity really is the sweetest secret.
Welcome to Proud of This Mess – a place where food, creativity, and a little chaos come together on a plate!
I’m Emily Carter, the founder and heart behind this little corner of the internet. Born and raised in the United States, I’ve always had a passion for cooking, experimenting, and sharing the messy, delicious journey of creating food that brings people together. My philosophy is simple: good food doesn’t have to be perfect, and a little mess makes it memorable.
At Proud of This Mess, we believe that cooking is more than just following recipes—it’s about exploring flavors, discovering new techniques, and making every meal an experience worth savoring. From comforting weeknight dinners to indulgent desserts, our goal is to inspire home cooks of all levels to embrace the joy of food without fear of imperfection.