
There’s something about no-bake desserts that feels like a small victory, especially when the heat is oppressive or your schedule is packed tighter than you’d like. This cheesecake bars recipe is my go-to because it’s straightforward, doesn’t require turning on the oven, and still delivers that luscious, creamy texture I crave. Plus, it’s a no-fuss way to bring something rich and satisfying to any gathering without breaking a sweat.
I first discovered these bars on a hectic summer afternoon when I needed a sweet fix that wouldn’t add to the chaos in the kitchen. The moment I tasted that first bite—crunchy graham cracker crust, velvety cheese filling—felt like a small, cool secret in the middle of a busy day. They’re simple enough for anyone to whip up, but the flavor feels indulgent enough to impress. It’s the kind of dessert I turn to when I want something comforting, quick, and no-questions-asked.
Focusing on the convenience and nostalgia of no-bake desserts, this recipe is perfect for those who want a creamy, satisfying cheesecake without turning on the oven, especially during hot summer days or busy schedules. It emphasizes the simplicity of assembly, the richness of the flavor, and the joy of a dessert that feels indulgent but is quick to prepare.
The nostalgic charm of quick desserts
- These bars remind me of summer afternoons at grandma’s, where the simple sweetness feels like a warm hug.
- I love how quick they come together—sometimes I make a batch just to have a little bit of comfort waiting in the fridge.
- There’s a quiet pride in pulling these off without turning on the oven, especially during that heatwave last week.
- Biting into one takes me back to childhood birthday parties, that perfect balance of creamy and crunchy.
- Honestly, these are my secret weapon when I need a dessert that feels fancy but is foolproof.
The story behind this recipe
- This recipe came together during a weekend when I was overwhelmed with last-minute guests and no time to bake. I wanted something that felt special but wouldn’t add to my stress, so I started improvising with what I had in the fridge and pantry. The first batch was a happy accident—rich, creamy, and incredibly satisfying without any oven fuss.
- I’ve always loved cheesecake but hated how long it takes and how much effort it demands. These bars are my little rebellion against that, a way to get that luscious creaminess in a fraction of the time. Whenever I need a quick, impressive dessert, this is what I turn to—no oven, no mess, just good old-fashioned comfort.
- heading: The joy of simple pleasures
Historical & Cultural Tidbits
- This no-bake cheesecake bar concept originated in mid-20th-century America, when convenience foods gained popularity in home baking.
- Originally, recipes used gelatin to set the filling, a technique that made them easier to prepare without an oven.
- The creamy, layered style reflects a trend during the 1960s to mimic restaurant desserts at home, emphasizing simplicity and elegance.
- Today, these bars have evolved with new ingredients like mascarpone and Greek yogurt, adding richness and tang.
Key Ingredients Breakdown
- Cream cheese: I love how it becomes silky and smooth when softened, giving that luscious texture. Skip the softening step or rush it, and you’ll end up with lumps that don’t blend well.
- Graham cracker crumbs: I prefer a fine, even crumb that sticks together when pressed. If yours are chunky or dry, add a touch of melted butter and press firmly for a sturdy crust.
- Sweetened condensed milk: Its rich sweetness is key, but if you want a lighter version, try coconut milk plus a little honey—though the flavor will shift a bit.
- Lemon juice: Brightens the filling with a zing that cuts through richness. Use fresh for the best aroma, or swap with lime for a more tropical vibe.
- Vanilla extract: A splash of pure vanilla deepens the flavor. If you don’t have it, a tiny splash of almond extract adds a nice twist, just don’t overdo it.
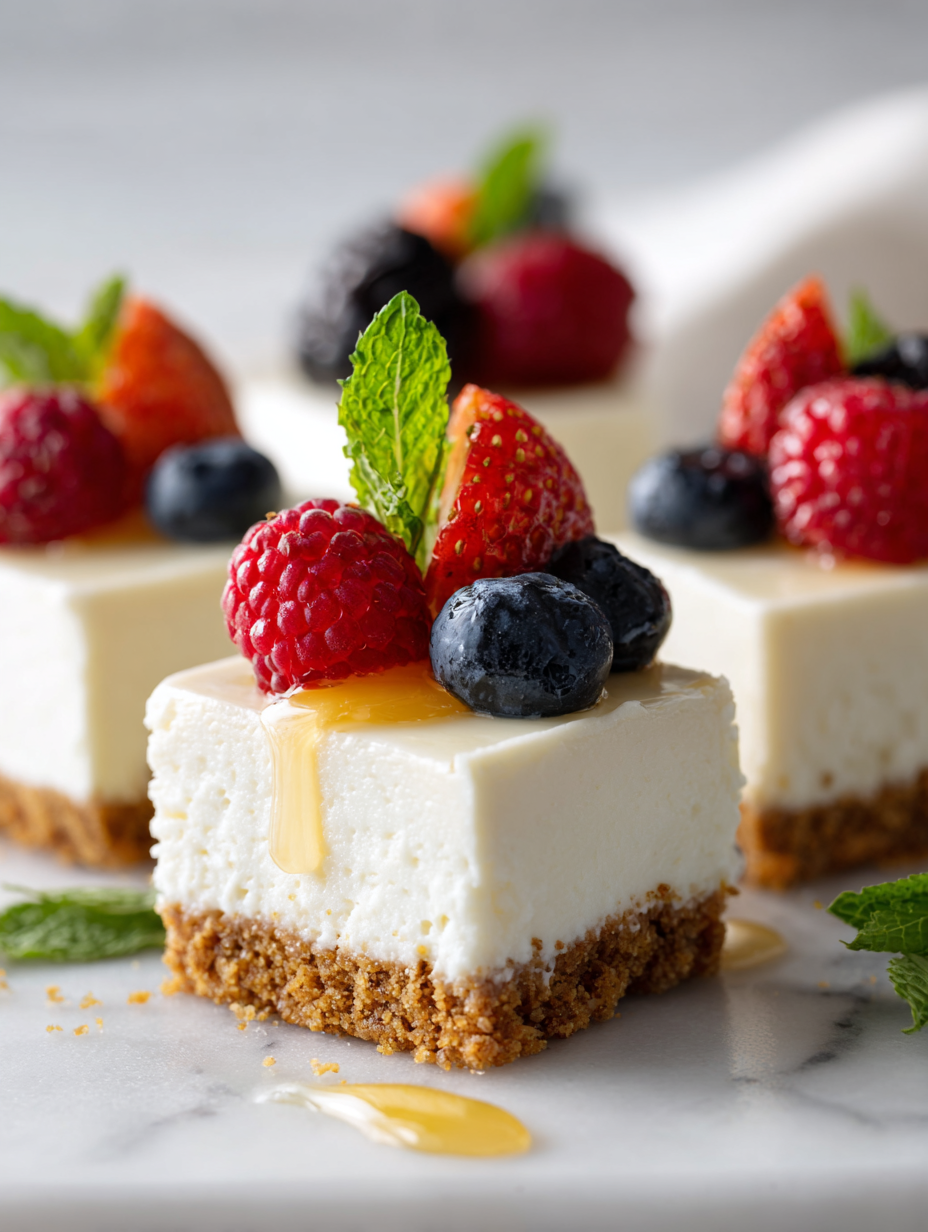
- Optional toppings: Fresh berries or a drizzle of melted chocolate make each bite more interesting. I like the contrast of tangy berries against the creamy filling.
- Cookie crust options: Oats or digestive biscuits can replace graham crackers, giving a different texture and flavor—experiment to suit your mood.
Spotlight on key ingredients
Cream cheese:
- I love how it becomes silky and smooth when softened, giving that luscious texture. Skip the softening step or rush it, and you’ll end up with lumps that don’t blend well.
- Graham cracker crumbs: I prefer a fine, even crumb that sticks together when pressed. If yours are chunky or dry, add a touch of melted butter and press firmly for a sturdy crust.
Sweetened condensed milk and lemon juice:
- Sweetened condensed milk: Its rich sweetness is key, but if you want a lighter version, try coconut milk plus a little honey—though the flavor will shift a bit.
- Lemon juice: Brightens the filling with a zing that cuts through richness. Use fresh for the best aroma, or swap with lime for a more tropical vibe.
Notes for ingredient swaps
- Dairy-Free: Swap cream cheese for coconut cream or cashew-based cheese. Expect a slightly sweeter, more tropical flavor.
- Gluten-Free: Use gluten-free graham crackers or crushed rice cereal. Will alter the classic crumb texture, but still tasty.
- Sweetener Options: Replace condensed milk with coconut condensed milk or sweetened evaporated milk for different sweetness profiles.
- Lemon Juice: Lime juice gives a more tart, tropical brightness. Or omit for a more neutral flavor.
- Vanilla Extract: Almond extract adds a nutty note; use sparingly to avoid overpowering the filling.
- Crust Variations: Oats or digestive biscuits can replace graham crackers. They add a different crunch and flavor twist.
- Sugar-Free: Use a sugar substitute like erythritol or monk fruit, but note the texture might change slightly.
Equipment & Tools
- 20x20cm (8×8 inch) baking pan: To assemble and chill the cheesecake bars.
- Mixing bowl: To combine and beat the filling ingredients.
- Spatula: To smooth and level the filling and crust.
- Parchment paper: For easy removal and cleanup.
- Knife: To cut the bars cleanly.
Step-by-step guide to cheesecake bars
- Gather your equipment: a 20x20cm (8×8 inch) square baking pan, a mixing bowl, a spatula, and a parchment paper sling for easy removal.
- Line the pan with parchment paper, leaving overhang for lifting out later. This keeps cleanup quick and the bars intact.
- Make the crust: crush 200g (about 1 1/2 cups) of graham crackers into fine crumbs. Mix with 100g (1/2 cup) melted butter and 2 tbsp sugar. Press evenly into the base of the prepared pan. Chill for 10 minutes to firm up.
- Prepare the filling: in a bowl, beat 400g (about 1 2/3 cups) softened cream cheese until smooth, about 2 minutes. Add 1 can (397g) sweetened condensed milk, 1 tbsp lemon juice, and 1 tsp vanilla extract. Mix until completely combined and creamy, about another 2 minutes.
- Pour the filling over the chilled crust. Use a spatula to smooth the surface. Tap the pan gently on the counter to remove air bubbles.
- Refrigerate uncovered for at least 4 hours, or until set. For best results, refrigerate overnight to develop flavor and firmness.
- Once set, lift the cheesecake out using the parchment overhang. Place on a cutting board and cut into bars with a sharp knife.
- Optional: drizzle with melted chocolate or top with fresh berries before serving for extra flair.
- Serve chilled, and enjoy the creamy, no-bake goodness with a cold glass of milk or tea.
Refrigerate the assembled bars uncovered for at least 4 hours or overnight. Slice into squares and serve straight from the fridge. For a neater presentation, wipe the knife clean between cuts.
How to Know It’s Done
- Crust is golden and firm when pressed; no crumbles.
- Filling jiggles slightly in the center but holds shape when gently nudged.
- Edges are set and smooth, with no liquid visible when fully chilled.
No-Bake Cheesecake Bars
Ingredients
Equipment
Method
- Line your pan with parchment paper, leaving overhang for easy removal, and press it into place gently.
- Combine the graham cracker crumbs with melted butter and sugar in a bowl, mixing until the crumbs are evenly coated and resemble wet sand.
- Press the crumb mixture firmly into the bottom of the prepared pan, creating an even crust. Chill in the fridge for about 10 minutes to set.
- In a large bowl, beat the softened cream cheese with a spatula or mixer until silky and smooth, about 2 minutes. You want it to be creamy and free of lumps.
- Add the sweetened condensed milk, lemon juice, and vanilla extract to the cream cheese. Mix well until the filling is thick, creamy, and uniform in texture.
- Pour the cheese filling over the chilled crust, smoothing the top with a spatula. Tap the pan gently on the counter to release any air bubbles and create a flat surface.
- Refrigerate the bars uncovered for at least 4 hours, or preferably overnight, until the filling is firm and set.
- Once the cheesecake is set, lift it out of the pan using the parchment overhang. Place it on a cutting board and slice into clean squares with a sharp knife.
- Optional: top with fresh berries or drizzle melted chocolate for extra flavor and visual appeal.
- Serve the bars chilled, straight from the fridge, and enjoy the luscious, creamy texture with each bite.
Tips for perfect cheesecake bars
- Chill the crust before adding filling to prevent sogginess.
- Use room temperature cream cheese for a silky, lump-free filling.
- Tap the filled pan on the counter to release air bubbles and smooth the surface.
- Refrigerate uncovered for at least 4 hours or overnight for best set.
- Slice with a hot knife for clean, neat edges.
- Add a pinch of salt to the crust for extra flavor contrast.
- Gently shake the pan to settle the filling evenly before chilling.
Common mistakes and how to fix them
- TOO MUCH BUTTER: Use less or skip to prevent greasy crust and fix with more crumbs.
- MISSED CHILL TIME: Don’t skip chilling; it helps bars set and prevents crumbling.
- UNDER-SET FILLING: If jiggles excessively, refrigerate longer or add a bit more lemon juice.
- OVERTURNED BARS: If edges crack or edges turn dark, reduce fridge time or check ingredient ratios.
Quick fixes and pantry swaps
- When the filling cracks, splash a bit of hot water on the edges and smooth with a spatula.
- If the bars are too soft, patch with an extra layer of chilled filling and chill again.
- Dumped too much butter in the crust? Add more crumbs to balance the fat and firm it up.
- Over-torched edges? Shield with a piece of foil and lower the fridge temperature slightly.
- When in doubt, rescue with a quick freeze for 10 minutes to firm the texture before serving.
Prep, store, and reheat tips
- Prepare the crust and press into the pan a day ahead; keep refrigerated for a firm base when assembling.
- The cheesecake filling can be made up to 24 hours in advance; store covered in the fridge, where it remains silky and fresh.
- Bars will keep well for up to 3 days in an airtight container in the fridge, maintaining their creamy texture and chilled feel.
- For longer storage, freeze the bars up to 1 month—wrap tightly in plastic wrap and foil. Thaw in the fridge before serving.
- Reheat or serve chilled: these bars are best straight from the fridge, with a cold, dense bite that’s just right; no reheating needed.
Frequently Asked Questions
1. Can I use block cream cheese instead of softened?
Use softened cream cheese to avoid lumps and ensure a smooth filling. Cold cheese will be harder to blend well.
2. Can I swap cream cheese with Greek yogurt?
Yes, you can substitute Greek yogurt for some or all of the cream cheese for a tangy twist, but expect a slightly lighter texture.
3. What can I use instead of graham crackers for the crust?
Graham crackers give that classic flavor, but digestive biscuits or crushed cookies work well for different tastes.
4. How long should I chill the cheesecake bars?
Make sure to chill the bars for at least 4 hours, preferably overnight, to let them set properly and achieve that firm, clean cut.
5. Can I add toppings to these bars?
Adding fresh berries or a drizzle of chocolate on top just before serving adds a nice flavor contrast and visual appeal.
6. How do I get clean slices?
Use a hot, sharp knife and wipe it clean between cuts for smooth, neat slices without cracking or crumbling.
7. What if my filling is too soft or runny?
If the filling is too runny, extend chilling time or add a little more lemon juice to help it set better.
8. Can I freeze these cheesecake bars?
You can freeze the bars for up to a month; just wrap tightly and thaw in the fridge before serving.
9. How can I make these bars healthier?
For a lighter version, substitute coconut condensed milk or use a sugar substitute, though flavor and texture will change slightly.
10. How do I know when the filling is ready?
Always taste the filling before setting — it should be tangy, sweet, and fragrant with vanilla and lemon aromas.
These no-bake cheesecake bars are more than just a quick dessert; they’re a reminder that simple ingredients can come together into something special. Every time I make them, I’m transported back to carefree summer days and easy family gatherings. They’re perfect for when you want something rich, creamy, and satisfying without the fuss.
In a world that feels increasingly hectic, these bars offer a moment of calm and indulgence. They’re a small, sweet break that you can whip up in no time, yet still feel like a treat. Sometimes, that’s exactly what a good dessert should do—bring comfort without complication.
Welcome to Proud of This Mess – a place where food, creativity, and a little chaos come together on a plate!
I’m Emily Carter, the founder and heart behind this little corner of the internet. Born and raised in the United States, I’ve always had a passion for cooking, experimenting, and sharing the messy, delicious journey of creating food that brings people together. My philosophy is simple: good food doesn’t have to be perfect, and a little mess makes it memorable.
At Proud of This Mess, we believe that cooking is more than just following recipes—it’s about exploring flavors, discovering new techniques, and making every meal an experience worth savoring. From comforting weeknight dinners to indulgent desserts, our goal is to inspire home cooks of all levels to embrace the joy of food without fear of imperfection.