
This no-bake peanut butter cheesecake feels like a little secret I keep in my back pocket for when I need something sweet and satisfying without the fuss of heat. It’s surprisingly simple—just a handful of ingredients thrown together, no oven required, which makes it perfect for those days when I want dessert but don’t want to wait. Plus, the creamy peanut butter and tangy cream cheese come together in a way that’s both nostalgic and indulgent.
Making this cheesecake is almost meditative—mixing, pressing, chilling. It’s the kind of dessert that rewards patience with a silky texture and a rich, nutty flavor. I’ve served it at everything from casual brunches to unexpected dinner guests, and it always gets a warm, surprised smile. It’s a reminder that sometimes, the easiest recipes are the most loved.
This recipe is my secret weapon for those days when I crave something rich and satisfying but don’t want to turn on the oven. The no-bake aspect makes it feel almost rebellious in a kitchen full of hot appliances. Plus, peanut butter and cream cheese together remind me of childhood treats, but with a grown-up twist.
A Secret No-Bake Indulgence
- This recipe feels like a secret I keep for myself—rich, quick, and utterly satisfying on busy nights.
- I love how the smooth peanut butter punches through each bite, making me feel like a kid again, but with a grown-up twist.
- There’s a strange relief in not turning on the oven—just mixing, chilling, and waiting, like a tiny act of rebellion.
- Sharing this cheesecake always surprises people—no bake, no fuss, just pure indulgence that looks fancy but is so simple.
- It’s become my go-to when I want comfort, nostalgia, and a little sweetness without the usual kitchen chaos.
A Secret No-Bake Indulgence
- This recipe came together one chaotic afternoon when I needed something quick, but still wanted it to feel special. I was actually out of oven-ready desserts, but I had a jar of peanut butter and some cream cheese hanging around. The idea of no-bake comfort food that hits all the right notes of richness and nostalgia just clicked. It’s like the dessert version of a cozy sweatshirt—simple, familiar, and unexpectedly indulgent.
- I remember the first time I made it for a friend who was going through a rough patch. Watching her smile as she took her first bite made me realize how sometimes, the simplest recipes carry the biggest warmth. Now, it’s become my secret weapon for last-minute gatherings or when I just need a dessert that doesn’t demand much but still feels like a treat.
- heading:
Trivia and Historical Tidbits
- This recipe has roots in 1970s no-bake dessert trends, when home cooks sought quick, refrigerator-friendly treats.
- Peanut butter and cream cheese pairing first gained popularity in mid-20th-century American kitchens as a rich, accessible dessert option.
- The idea of no-bake cheesecakes likely evolved from traditional cheesecake methods, adapting ingredients for modern, fuss-free kitchens.
- Some say this dessert is a modern reinterpretation of classic fridge cakes, blending nostalgic flavors with ease of preparation.
Key Ingredients Breakdown
- Cream cheese: I love how it’s tangy and velvety, giving the cheesecake its rich base. If you want it lighter, try Neufchâtel, but it’ll be slightly less creamy.
- Peanut butter: Natural, crunchy, or creamy—your choice. I prefer creamy for that smooth, oozy texture that makes each bite feel indulgent. For a sweeter version, stir in a touch of honey.
- Graham cracker crust: I use classic graham crackers, but digestive biscuits work too—just crush ’em fine. For a nuttier flavor, add crushed peanuts or almonds into the crust.
- Sweetener: I usually stick with powdered sugar; it dissolves nicely without graininess. If you’re avoiding refined sugar, coconut sugar adds a smoky depth, but might darken the crust slightly.
- Heavy cream: Whipped until soft peaks, it lightens the filling. If you want a dairy-free version, coconut cream gives a similar richness with a hint of coconut aroma.
- Lemon juice or vinegar: Just a splash brightens everything up. If you don’t have lemon, a tiny dash of apple cider vinegar works—just don’t overdo it, or you’ll lose the creamy harmony.
Spotlight on Key Ingredients
Cream cheese:
- I love how it’s tangy and velvety, giving the cheesecake its rich base. If you want it lighter, try Neufchâtel, but it’ll be slightly less creamy.
- Peanut butter: Natural, crunchy, or creamy—your choice. I prefer creamy for that smooth, oozy texture that makes each bite feel indulgent. For a sweeter version, stir in a touch of honey.
- Graham cracker crust: I use classic graham crackers, but digestive biscuits work too—just crush ’em fine. For a nuttier flavor, add crushed peanuts or almonds into the crust.
Peanut butter:
- I love how it’s velvety and rich, with a slightly salty, nutty punch. It melts into the filling, making each bite deeply satisfying. For a different vibe, try crunchy peanut butter for texture.
- Graham cracker crust: Its buttery, slightly sweet crunch is the perfect base. I find that a mix of crushed cookies and a little butter creates a sturdy, flavorful crust that doesn’t get soggy.
Notes for ingredient swaps
- Dairy-Free: Swap cream cheese for a coconut-based cream cheese alternative. It may be slightly less tangy but still creamy.
- Peanut Butter: Use almond or cashew butter for a different nutty flavor. Keep in mind they have different oils and textures.
- Crust Base: Digestive biscuits or graham crackers work interchangeably. For a gluten-free option, try gluten-free cookie crumbs, but check for added sugars.
- Sweetener: Substitute powdered sugar with maple sugar or agave syrup, but reduce the amount slightly to prevent sogginess.
- Heavy Cream: Coconut cream whipped to soft peaks can replace dairy cream for a dairy-free, rich, and slightly coconutty flavor.
- Flavor Brightener: Lime juice can replace lemon for a slightly different citrus note—think less bright, more mellow.
- Add-ins: Swirl in melted chocolate or fruit preserves before chilling for extra flavor layers and visual appeal.
Equipment & Tools
- Springform pan: For easy removal and clean edges.
- Mixing bowls: To combine crust and filling ingredients.
- Spatula: To smooth the filling and crust.
- Food processor or zip-top bag: To crush the cookies evenly.
- Electric hand or stand mixer: To whip the cream smoothly.
Step-by-step Guide to No Bake Cheesecake
- Gather your equipment: a 20cm (8-inch) springform pan, mixing bowls, spatula, and a food processor or zip-top bag for crushing cookies.
- Prepare the crust: crush 200g (about 1 1/2 cups) of graham crackers into fine crumbs. Mix with 50g (1/4 cup) melted butter and a tablespoon of sugar. Press firmly into the bottom of the springform pan. Chill in the fridge for 15 minutes.
- Make the filling: in a large bowl, beat 250g (8 oz) of softened cream cheese until smooth, about 2 minutes. Add 1/2 cup creamy peanut butter and mix until fully incorporated, about another minute.
- Add sweetness: stir in 1/3 cup powdered sugar and a teaspoon of vanilla extract. Mix well until smooth and creamy.
- Whip the cream: in a separate bowl, whip 1/2 cup heavy cream until soft peaks form, about 2-3 minutes. Fold gently into the peanut butter mixture until well combined.
- Assemble the cheesecake: pour the filling over the chilled crust. Smooth the top with a spatula. Cover loosely with plastic wrap.
- Chill to set: refrigerate for at least 4 hours, preferably overnight. The filling should be firm and slightly jiggle-proof when ready.
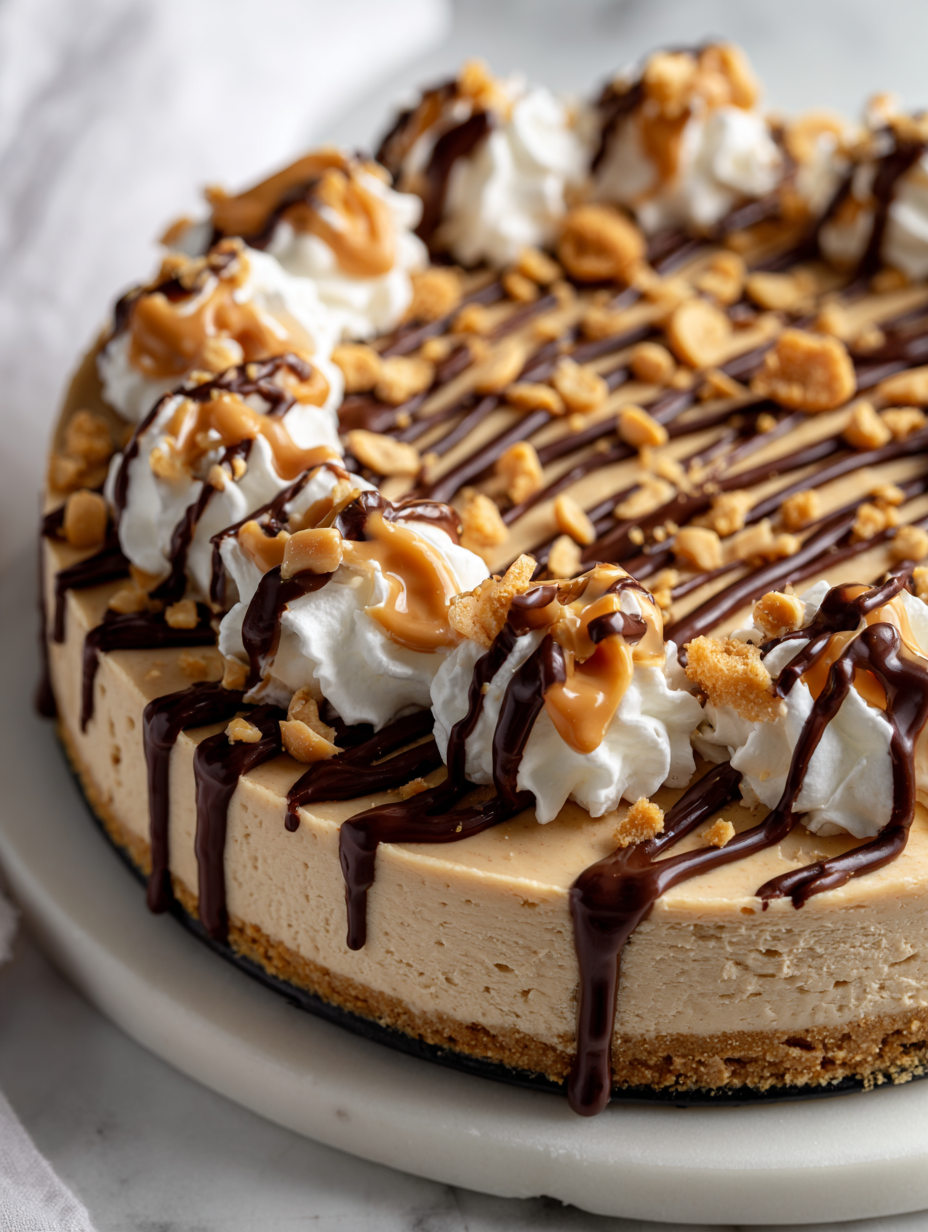
- Final touch: before serving, you can swirl a little extra peanut butter on top or sprinkle chopped peanuts for crunch. Carefully remove the sides of the springform pan for a clean presentation.
- Check doneness: the cheesecake should be set around the edges, with a slight jiggle in the center. It should look smooth and glossy on top.
Let the cheesecake rest in the fridge for at least 4 hours or overnight. Before serving, add any toppings like whipped cream, chopped peanuts, or a drizzle of caramel. Carefully release the springform sides and serve cold for best texture.
How to Know It’s Done
- Filling feels firm but slightly jiggly in the center after chilling.
- Edges are set and slightly pull away from the pan sides.
- Top is glossy, with no liquid or cracks.
No-Bake Peanut Butter Cheesecake
Ingredients
Equipment
Method
- Crush the graham crackers into fine crumbs using a food processor or placing them in a zip-top bag and crushing with a rolling pin.
- Mix the crushed graham crackers with the melted butter until evenly coated and crumbly, then press this mixture firmly into the bottom of a springform pan to form an even crust.
- Chill the crust in the fridge for about 15 minutes to set it up nicely.
- In a large bowl, beat the softened cream cheese until smooth and creamy, using an electric mixer for about 2 minutes.
- Add the peanut butter and vanilla extract to the cream cheese, mixing until fully incorporated and smooth.
- Stir in the powdered sugar until the mixture is sweet and fluffy.
- In a separate bowl, whip the heavy cream until soft peaks form, then gently fold it into the cream cheese mixture to lighten it.
- Pour the creamy filling over the chilled crust, smoothing the top with a spatula for an even surface.
- Cover the cheesecake loosely with plastic wrap and refrigerate for at least 4 hours, preferably overnight, until firm and set.
- Before serving, optionally swirl extra peanut butter on top or sprinkle chopped peanuts for added crunch and presentation.
- Carefully remove the sides of the springform pan, slice, and enjoy this silky, nutty no-bake cheesecake.
Tips and Tricks for Success
- Bolded mini-head: Chill the crust thoroughly → Keeps it firm and prevents crumbling when adding filling.
- Bolded mini-head: Fold whipped cream gently → Maintain airiness and avoid deflating the filling’s light texture.
- Bolded mini-head: Watch crust browning → Bake at 180°C (350°F) until golden, about 8-10 minutes, for perfect crunch.
- Bolded mini-head: Chill for at least 4 hours → Ensures the cheesecake is set and slices cleanly with a silky texture.
- Bolded mini-head: Use room temperature ingredients → Mix smoothly without lumps, especially cream cheese and peanut butter.
- Bolded mini-head: Add toppings just before serving → Keeps garnishes fresh and visually appealing, not soggy.
- Bolded mini-head: Press crust evenly → Use the bottom of a glass to flatten for a uniform base that holds together.
Common mistakes and how to fix them
- FORGOT to chill crust → Chill for 15 minutes to prevent crumbling.
- DUMPED filling too quickly → Fold gently to maintain light texture.
- OVER-TORCHED crust → Bake at 180°C (350°F) for even browning, watch for golden edges.
- SKIPPED resting time → Rest in fridge for at least 4 hours to set properly.
Quick Fixes and Pantry Swaps
- When mixture feels too loose → Splash in a little more crushed cookies to firm up.
- If crust cracks when pressing → Patch with extra melted butter and press again firmly.
- When cheesecake doesn’t set → Shield with plastic wrap and extend chilling time by a few hours.
- Dipped in chocolate before chilling → Rescue by gently reheating and smoothing the surface.
- When ingredients clump together → Swap in smooth natural peanut butter for better mixing.
Prep, store, and reheat tips
- Prepare the crust and press it into the pan the day before. It firms up and becomes easier to work with later.
- The assembled cheesecake can be made a day in advance and kept covered in the fridge for up to 24 hours. The flavors meld nicely overnight, and it firms up further.
- For best texture and flavor, serve it within 48 hours. After that, the cream may start to soften and the crust may lose its crunch.
- Reheat? Not recommended. Serve cold straight from the fridge. If it’s too firm, let it sit at room temperature for 10 minutes to soften slightly, releasing a nutty aroma.
Top questions about peanut butter cheesecake
1. Can I use natural peanut butter?
Yes, using natural peanut butter can make the filling slightly oilier, but it still works well. Just stir it well before adding.
2. How long should I chill the cheesecake?
Chilling for at least 4 hours really helps set the cheesecake. Overnight is best for a firm, sliceable texture.
3. How can I enhance the flavor?
If you want a richer flavor, add a pinch of sea salt or a drizzle of honey on top before serving.
4. Can I use a different cheese?
You can substitute cream cheese with Neufchâtel cheese for a lighter, slightly less tangy result.
5. Is it possible to make this dairy-free?
Yes, to keep it dairy-free, swap the cream cheese for coconut cream-based cheese and use coconut whipped cream.
6. My crust crumbles, what do I do?
If the crust is too crumbly, press it more firmly or add a tiny splash of melted butter to bind it better.
7. How do I get a smooth top?
Use a spatula or the back of a spoon to smooth the top evenly. Chill before adding any toppings to prevent slipping.
8. My filling is too runny, how do I fix it?
If the filling feels too loose, fold in a bit more whipped cream or crushed cookies to thicken it up.
9. How should I serve it?
For best results, serve the cheesecake cold straight from the fridge. Let it sit at room temp for 10 minutes if too firm.
10. Can I freeze leftovers?
Yes, you can freeze slices for up to a month. Thaw in the fridge for a few hours before serving.
This no-bake peanut butter cheesecake is one of those recipes that sneaks into my regular rotation. It’s simple, satisfying, and hits just right—creamy with a nutty punch that makes you pause for a second, savoring the moment. Honestly, it’s a little reminder that some of the best desserts don’t need the oven to shine.
In the end, it’s about those small, effortless wins in the kitchen—something you can whip up on a whim and still feel a little proud of. Whether it’s a quick treat for yourself or a last-minute guest surprise, this cheesecake always makes an appearance and somehow, always feels just right.
Welcome to Proud of This Mess – a place where food, creativity, and a little chaos come together on a plate!
I’m Emily Carter, the founder and heart behind this little corner of the internet. Born and raised in the United States, I’ve always had a passion for cooking, experimenting, and sharing the messy, delicious journey of creating food that brings people together. My philosophy is simple: good food doesn’t have to be perfect, and a little mess makes it memorable.
At Proud of This Mess, we believe that cooking is more than just following recipes—it’s about exploring flavors, discovering new techniques, and making every meal an experience worth savoring. From comforting weeknight dinners to indulgent desserts, our goal is to inspire home cooks of all levels to embrace the joy of food without fear of imperfection.