
There’s something almost hypnotic about watching pork ribs go from raw to gorgeously caramelized. It’s that slow build of sticky, sweet, smoky glaze that makes me reach for the ribs again and again. Patience is key here, especially during the final broil, when that crust transforms into something finger-licking perfect, crackling with sugar and spice.
I’ve learned to really lean into the timing — giving the ribs enough time to develop their deep, rich flavor before rushing the final caramelization. It’s a dance of heat and patience, but the payoff is worth every minute. Nothing beats the smell of those ribs bubbling in a sticky glaze, filling the kitchen with a sweet, smoky aroma that pulls everyone to the table.
This recipe isn’t just about the end result; it’s about the process, the anticipation, and that moment when you finally get to dive in. The glaze’s glossy, crackly surface is a testament to patience, and knowing exactly when to hit that broil button is what separates good ribs from great ones. It’s a messy, satisfying process, but one that rewards you with ribs that are sticky, tender, and packed with flavor.
Focusing on the sticky, caramelized glaze that forms during the final broil, highlighting the importance of patience and timing to achieve that perfect, finger-licking crust.
The caramelization secret
- Watching the glaze turn glossy and deep amber as it bubbles over the ribs always feels like witnessing a small miracle.
- That rush of pride when I finally get the perfect sticky, crackly crust—it’s a messy, delicious victory.
- I still get nostalgic thinking about the first time I nailed that caramelized finish after hours of patience.
- Nothing beats the chaos of everyone reaching in at once, fingers sticky with that sweet, smoky glaze.
- There’s a strange comfort in the simple act of pulling those ribs from the oven, knowing I crafted every bit of that sticky goodness.
The story behind this recipe
This recipe sprouted from a lazy summer evening when I realized I was craving something deeply flavorful but without fuss. I remember experimenting with different spice blends and sticky sauces, trying to replicate those smoky, caramelized ribs from a tiny roadside joint I used to visit. Each attempt brought me closer, especially once I got the glaze just right—thick, shiny, and clingy. Now, it’s become a Sunday staple, a messy, sweet-salty ritual that always draws folks in. The secret’s in that slow simmer and patience, letting the sugars and spices meld into something irresistibly sticky.
Trivia and History of Sticky Ribs
- Pork ribs have been a staple in many cultures for centuries, often slow-cooked over open flames or coals.
- The sticky glaze technique likely originated from Asian barbecue traditions, where caramelized sauces are brushed onto meat.
- In American Southern cuisine, ribs became iconic for their smoky, slow-cooked style, especially in barbecue competitions.
- The use of sugar in the glaze helps to create that irresistible caramelized crust, a technique perfected over generations.
Ingredient breakdown: key components
- Pork ribs: I love choosing meaty, well-marbled ribs that feel heavy in hand—look for a nice pink hue and a good layer of fat. Swap for chicken thighs if you want a leaner, quicker option, but beware—they won’t get that same sticky crust.
- Brown sugar: It’s my secret to that deep, caramelized glaze—use light or dark, depending on how intense you want the sweetness. If you want a less sweet glaze, cut back or substitute with honey or maple syrup for a different kind of richness.
- Soy sauce: Adds saltiness and umami that balances the sweetness—use tamari for gluten-free or coconut aminos for a milder, slightly sweeter twist. Skip it if you’re avoiding soy, but add a dash of fish sauce for depth.
- Garlic: Fresh, minced garlic gives the glaze a pungent, aromatic punch—if pressed for time, garlic powder works, but it’s not quite the same. For a smoky hint, toss in some smoked paprika or chipotle powder.
- Apple cider vinegar: Brightens the glaze with a tangy kick—if unavailable, lemon juice or rice vinegar works fine, but don’t skip the acid, it’s key to balance that sticky sweetness.
- Honey: I use honey to boost the stickiness and add a floral note—substitute with agave syrup or molasses for a richer, darker flavor, but watch the sweetness level.
- Smoked paprika: My go-to for that smoky depth—if you don’t have it, chipotle powder or a splash of liquid smoke can do the trick. Skip for a milder, sweeter finish.
Spotlight on key ingredients
Pork Ribs:
- I look for ribs with a good amount of marbling and a pinkish hue, which ensures juiciness and flavor. If you prefer leaner meat, chicken thighs can be an alternative, though they won’t develop that same sticky crust.
- Brown sugar: I prefer using dark brown for a richer, more molasses-like flavor, which helps create that deep, caramelized glaze. Light brown works too, but it’s a bit milder and subtler in sweetness.
Garlic:
- Soy sauce: I rely on soy or tamari for that umami punch and saltiness that balances the sweetness. When using coconut aminos, expect a milder, slightly sweeter taste, but it still adds depth.
- Fresh minced garlic gives the glaze a pungent, aromatic kick that can’t be replicated with powders. During cooking, it softens and infuses the sauce with a fragrant, spicy aroma.
Notes for ingredient swaps
- Pork Ribs: Use chicken thighs for quicker cooking and less mess, but expect a leaner, less sticky result.
- Brown Sugar: Swap for maple syrup or molasses for a different sweetness profile, though the glaze might be less thick and shiny.
- Soy Sauce: Tamari or coconut aminos work as gluten-free options; they provide similar umami but may alter the saltiness slightly.
- Garlic: Garlic powder can replace fresh garlic in a pinch, but it won’t offer the same pungent punch or aromatic depth.
- Apple Cider Vinegar: Lemon juice or rice vinegar can brighten the glaze if cider vinegar isn’t available, maintaining that tangy balance.
- Honey: Agave syrup or dark corn syrup boost stickiness with a slightly different flavor, but reduce quantity to avoid overly sweet glaze.
- Smoked Paprika: Use chipotle powder or a splash of liquid smoke for smoky depth; omit if a milder, sweeter glaze is preferred.
Equipment & Tools
- Oven: To gently cook and then broil the ribs for caramelization
- Baking dish: Holds the ribs during slow cooking, traps moisture
- Aluminum foil: Seals the dish for tender, moist ribs
- Saucepan: Prepares the sticky glaze
- Pastry brush: Brushing glaze onto the ribs
- Tongs: Handling hot ribs and turning during broiling
- Meat thermometer (optional): Checking internal temperature if desired (around 70°C/160°F for safe, tender ribs)
Step-by-step guide to sticky ribs
- Preheat your oven to 150°C (300°F). Gather a baking dish large enough to hold the ribs in a single layer. This gentle heat will start the slow cook, making the meat tender and juicy.
- Pat the pork ribs dry with paper towels. Remove the thin membrane from the back if it’s still attached; this helps the glaze stick better and keeps the ribs from curling during cooking.
- Rub the ribs generously with your spice blend—paprika, garlic powder, salt, pepper, and a touch of cayenne if you like heat. Let them sit at room temp for 15 minutes to absorb the flavors.
- Place the ribs in the baking dish, bone side down. Cover tightly with foil—this traps moisture, helping the ribs become fall-off-the-bone tender. Bake for 2.5 hours, checking once to ensure they’re gently bubbling and softening.
- Meanwhile, prepare your sticky glaze. In a saucepan, combine brown sugar, soy sauce, minced garlic, apple cider vinegar, honey, smoked paprika, and a splash of water. Bring to a simmer over medium heat, stirring until the sugar dissolves and the sauce thickens slightly, about 8-10 minutes. It should be glossy and sticky.
- Carefully remove the ribs from the oven. Uncover and brush generously with the glaze, ensuring all sides are coated. Increase the oven temperature to broil—around 230°C (450°F).
- Place the ribs under the broiler on the top rack. Watch closely, about 3-5 minutes, until the glaze bubbles and forms a crackly, caramelized crust. If the glaze starts to burn, cover with foil and lower the heat slightly.
- Once the crust is glossy and deep amber, remove from the oven. Let the ribs rest for 5 minutes—this helps the juices redistribute. Slice between the bones or serve whole, glazed side up.
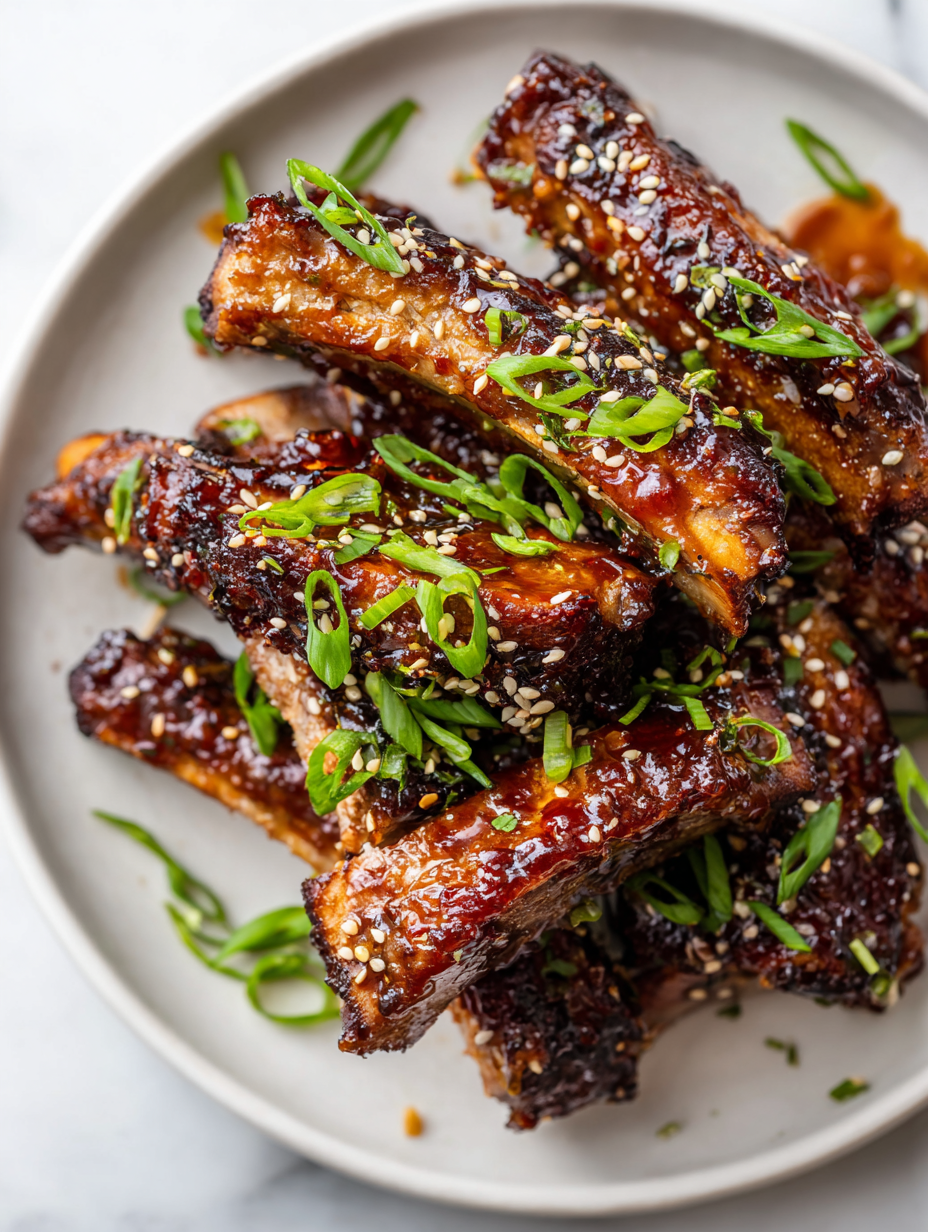
- For serving, brush with a little extra glaze if needed, and garnish with chopped herbs or scallions for contrast. Serve hot, with plenty of napkins—those sticky fingers are inevitable.
Rest the ribs for 5 minutes on a cutting board before slicing. Brush with any remaining glaze for extra shine and sticky finish. Serve immediately with your favorite sides.
How to Know It’s Done
- Color of glaze: deep amber with crackle, not burnt
- Meat tenderness: meat pulls away easily from the bone when pierced
- Crust: glossy, caramelized, crispy on edges
Sticky Caramelized Pork Ribs
Ingredients
Equipment
Method
- Preheat your oven to 150°C (300°F). Place the ribs on a cutting board and pat them dry with paper towels. Remove the thin membrane from the back of the ribs for better flavor absorption.
- Mix together paprika, garlic powder, salt, black pepper, and cayenne to create a flavorful spice rub. Rub this mixture generously all over the ribs, pressing it into the meat. Let sit at room temperature for 15 minutes.
- Arrange the ribs in a baking dish, bone side down. Cover tightly with aluminum foil to trap moisture. Bake in the preheated oven for about 2.5 hours until the meat is tender and starts pulling away from the bones.
- While the ribs are baking, combine brown sugar, soy sauce, minced garlic, apple cider vinegar, honey, and smoked paprika in a saucepan. Bring to a gentle simmer over medium heat, stirring until the sugar dissolves and the sauce thickens slightly, about 8-10 minutes. The sauce should be glossy and sticky.
- Carefully remove the ribs from the oven and discard the foil. Brush the ribs generously with the sticky glaze using a pastry brush, coating all sides evenly.
- Increase the oven temperature to broil (around 230°C/450°F). Place the glazed ribs on the top rack and broil for 3-5 minutes, watching closely. The glaze will bubble and develop a crackly, caramelized crust—look for a deep amber color.
- Once the glaze is bubbling and crackling, remove the ribs from the oven and let them rest for 5 minutes. This allows the juices and glaze to set, making the ribs easier to slice and serve.
- Slice the ribs between the bones or serve whole, brushed with any remaining glaze for extra shine. Enjoy the tender, sticky, smoky-sweet ribs with your favorite sides.
Pro tips for sticky ribs
- Sweet spot: Use a silicone brush for even glaze application, avoiding drips and ensuring a sticky, glossy surface.
- Timing: Broil ribs until the glaze bubbles and crackles—about 3-5 minutes—watching like a hawk to prevent burning.
- Layering: Reapply the glaze in thin layers during broiling for a deep, caramelized crust with multiple flavor hits.
- Patience: Let the ribs rest for at least 5 minutes after baking; this keeps the juices and sticky glaze intact when sliced.
- Heat control: During slow baking, keep the oven steady at 150°C (300°F). Sudden temperature spikes can toughen the meat.
- Crackling: For an extra crispy crust, broil until the glaze turns dark amber and crackles, but keep a close eye to avoid charring.
Common mistakes and how to fix them
- FORGOT to monitor heat during broil → Keep a close eye to prevent burning.
- DUMPED glaze before caramelization → Brush in layers, building flavor gradually.
- OVER-TORCHED ribs → Remove early if glaze darkens too quickly, cover with foil.
- MISSED resting time → Allow ribs to rest 5 minutes for juices to settle.
Quick fixes and pantry swaps
- When glaze shimmers and crackles, splash with a little water to stop burning.
- If ribs stick during broiling, patch with a quick brush of glaze and lower heat.
- Splash vinegar on burnt spots to mellow bitterness and restore shine.
- When ribs are undercooked, rescue with a gentle simmer in sauce for 10 minutes.
- Pantry swap: honey for agave syrup—both sticky, but honey adds a floral note.
Prep, store, and reheat tips
- You can prep the glaze and spice rub a day in advance; keep them in airtight containers in the fridge. The sugars and spices meld overnight, making the final coat even more flavorful.
- Raw ribs can be seasoned a few hours ahead—just wrap tightly and refrigerate. The salt and spices penetrate better, which means more tender, flavorful meat when cooked.
- Cooked ribs can be stored in an airtight container in the fridge for up to 3 days. The sticky glaze may set, but a quick reheat loosens it up and brings back the shine.
- Reheat gently in a 150°C (300°F) oven covered with foil for about 20 minutes. The meat should be hot and tender, with the glaze slightly bubbling—look for that glossy, sticky sheen again.
- For longer storage, freeze cooked ribs wrapped tightly in foil and then in a freezer bag for up to 2 months. Thaw in the fridge overnight, then reheat as above, watching for the glaze to crackle back to life.
Top questions about sticky pork ribs
1. How do I choose the best pork ribs?
Look for ribs with a good amount of marbling and a pink hue. If you prefer leaner meat, chicken thighs are an option, but they won’t develop that same sticky crust.
2. Can I substitute brown sugar in the glaze?
Use light or dark brown sugar depending on how deep you want the caramel flavor. Dark gives a richer, more molasses-like glaze.
3. What’s a good soy sauce substitute?
Soy sauce adds saltiness and umami. If you’re avoiding soy, try tamari or coconut aminos, but expect a slight flavor change.
4. Can I use garlic powder instead of fresh garlic?
Fresh minced garlic gives a pungent, aromatic punch. Garlic powder can be used in a pinch but lacks the same robust flavor.
5. What’s a good substitute for apple cider vinegar?
Apple cider vinegar brightens the glaze with a tangy kick. Lemon juice or rice vinegar work as good alternatives if needed.
6. Can I replace honey in the recipe?
Honey helps boost stickiness and adds floral sweetness. Agave syrup or dark corn syrup are good swaps, but adjust quantities to avoid overly sweet glaze.
7. What can I use instead of smoked paprika?
Smoked paprika adds smoky depth. If you don’t have it, use chipotle powder or a splash of liquid smoke for that smoky flavor.
8. How do I know when to remove the ribs from the broiler?
Ensure you keep a close eye during broiling, about 3-5 minutes, until the glaze bubbles and crackles, to avoid burning.
9. Why is resting the ribs important?
Let the ribs rest for 5 minutes after baking. This helps juices settle and keeps the glaze sticky and intact when slicing.
10. What should I do if the glaze burns during broiling?
If the glaze starts to burn, quickly cover with foil and lower the oven temperature to prevent charring.
There’s something incredibly satisfying about pulling those sticky, caramelized ribs from the oven. The smell of smoky, sweet glaze filling the kitchen is a reminder that patience and attention to detail really do pay off.
This dish isn’t just about the taste—it’s about the messy, joyful process of creating something finger-licking and memorable. A good batch of sticky ribs is a celebration of simple ingredients and a little bit of culinary patience, perfect for sharing with friends or just indulging yourself.
Welcome to Proud of This Mess – a place where food, creativity, and a little chaos come together on a plate!
I’m Emily Carter, the founder and heart behind this little corner of the internet. Born and raised in the United States, I’ve always had a passion for cooking, experimenting, and sharing the messy, delicious journey of creating food that brings people together. My philosophy is simple: good food doesn’t have to be perfect, and a little mess makes it memorable.
At Proud of This Mess, we believe that cooking is more than just following recipes—it’s about exploring flavors, discovering new techniques, and making every meal an experience worth savoring. From comforting weeknight dinners to indulgent desserts, our goal is to inspire home cooks of all levels to embrace the joy of food without fear of imperfection.