
Achieving that perfect gooey center in a chocolate fondant feels like catching lightning in a bottle. It’s a small miracle of timing and technique, and honestly, I love how each attempt teaches me something new—whether it’s about oven quirks or ingredient tweaks. It’s not just dessert; it’s a lesson in patience and precision, served with a side of rich, melted chocolate.
I’ve always been drawn to the dual nature of this treat—the firm shell hiding a molten, runny heart. It’s a bit chaotic, really, trying to get it just right, but that’s part of the charm. When it works, the aroma of warm chocolate spilling out as you cut into it is pure, unfiltered joy. And in those moments, I realize why I keep coming back to this recipe, despite the mess and the missed timing here and there.
Focusing on the secret technique of achieving the perfect gooey center, I want to share how gentle, precise timing transforms a simple chocolate dessert into a moment of pure indulgence. It’s about understanding the delicate balance between a soft, molten core and a firm exterior—something I’ve spent years perfecting in my tiny, cluttered kitchen.
The secret to molten chocolate
- Baking this reminds me of lazy Sunday mornings at my grandma’s house, where the smell of melting chocolate filled every corner.
- I still get nervous before the timer dings, hoping my fondant will be perfectly gooey, not overcooked and dry.
- Sharing this dessert with friends always sparks conversations about childhood favorites and simple pleasures.
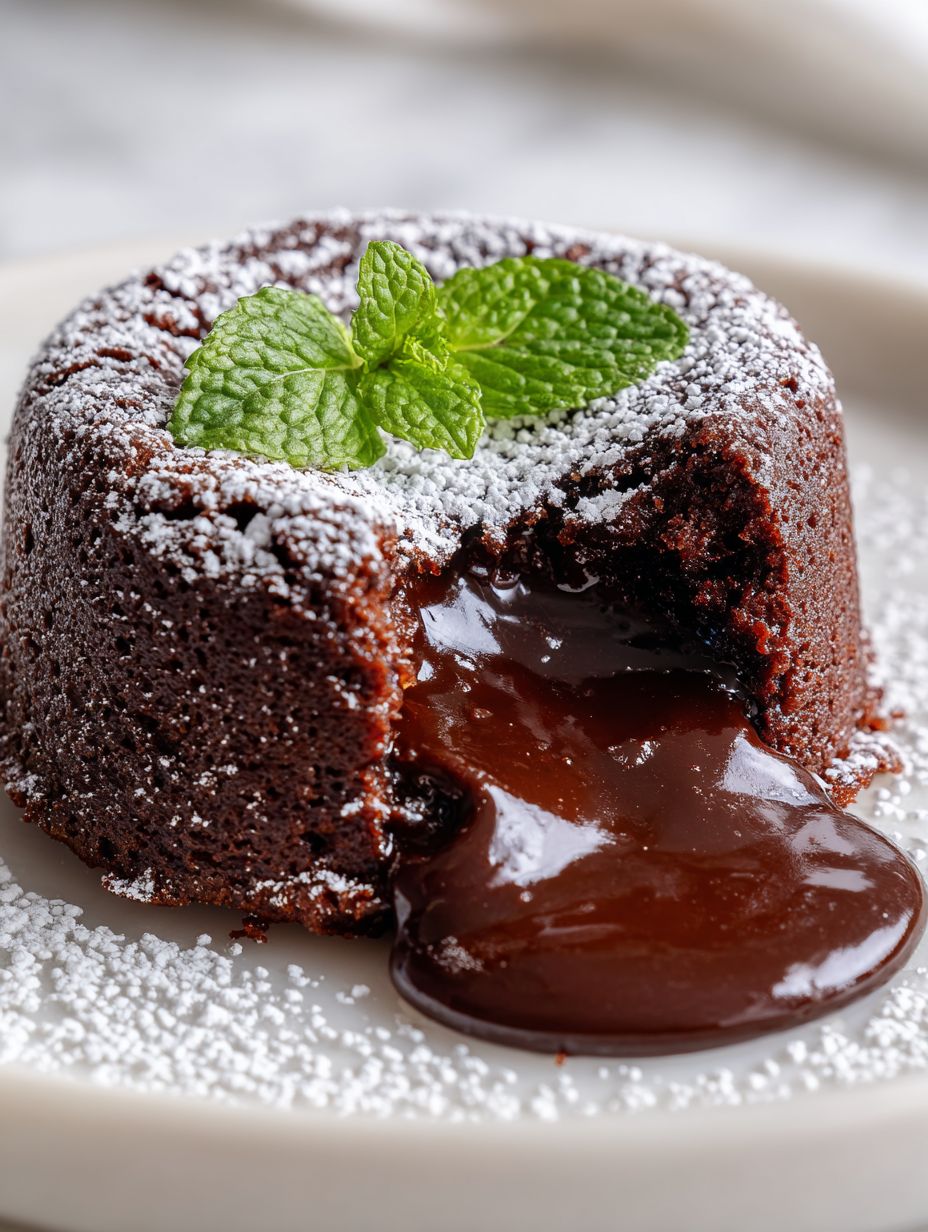
- There’s a quiet joy in watching the molten center ooze out when you cut into it—like uncovering a secret each time.
- Nothing beats the feeling of pulling a warm, glossy fondant from the oven, knowing I’ve just created a little bit of magic.
The inspiration behind this fondant
This recipe was born out of a late-night craving for something intensely chocolatey but with that elusive, velvety melt. I’ve tinkered with it over the years—adjusting baking times, trying different chocolates—until I found that sweet spot where the outside is just firm enough to hold the gooey heart inside. It’s funny how a simple idea like molten chocolate can turn into a little science experiment with each batch. But honestly, the thrill of pulling out a perfectly wobbly, fragrant fondant is what keeps me hooked.
Chocolate Fondant Trivia
- Chocolate fondant, also known as molten lava cake, originated in France in the 1980s, gaining popularity for its contrasting textures.
- Its invention is often credited to French pastry chef Michel Bras, who sought to create a dessert with a gooey center that would melt in the mouth.
- The term ‘fondant’ refers to the soft, flowing chocolate core, which is a hallmark of the dish’s appeal and name.
- This dessert is a modern reinterpretation of classic chocolate cakes, emphasizing the contrast between a firm exterior and liquid interior.
- Chocolate fondant has inspired countless variations worldwide, from adding chili or sea salt to experimenting with different types of chocolate.
Ingredient breakdown
- Chocolate: I prefer a high-quality dark chocolate with a deep cocoa aroma—makes the fondant intensely chocolatey, with that velvety melt. Swap for semi-sweet if you want a sweeter, less bitter finish.
- Butter: Use unsalted butter for control over saltiness, and it adds a rich, creamy base. Margarine can be a substitute, but it dulls the lushness a bit.
- Eggs: Fresh eggs help the batter set just right—slightly wobbly in the middle. If you’re out, a splash of cream can add moisture but won’t give the same structure.
- Sugar: Fine caster sugar dissolves smoothly, giving that glossy, sweet finish. Brown sugar adds a caramel note—try it if you want a slightly richer, more rounded flavor.
- Flour: Just a touch to give structure without making it dense. Almond flour can be a subtle change, adding nuttiness and extra moisture, but keep the amount small to avoid sogginess.
- Cocoa Powder: Unsweetened cocoa gives a deep chocolate flavor and a slight earthy note. Dutch-process cocoa intensifies the richness—use it for a more decadent result.
- Butter or Oil for Greasing: I use butter to coat my ramekins—helps the fondant release cleanly. You can also spray with non-stick spray, but butter adds a bit of flavor and a shiny crust.
Spotlight on key ingredients
Chocolate:
- I prefer a high-quality dark variety with a deep, rich aroma—gives that velvety melt and intense cocoa flavor. Sub in semi-sweet for a milder, sweeter note.
- Chocolate’s behavior: It melts smoothly and becomes glossy, helping create that luscious, oozy center. Over-melting can cause it to seize, so gentle heat is key.
Butter:
- I use unsalted butter for control—adds richness and helps the crust form perfectly. Margarine can be a substitute but dulls the lushness a bit.
- Butter’s quirks: It melts quickly and helps the batter come together smoothly. In the oven, it contributes to that shiny, crackly top when baked just right.
Notes for ingredient swaps
- Dairy-Free: Swap butter for coconut oil or a neutral vegetable oil. You might notice a slightly different richness and a hint of coconut aroma.
- Vegan Chocolate: Use dairy-free dark chocolate and a plant-based butter substitute. Expect a similar gooey texture, but flavor can be a bit more bitter.
- Sugar Alternatives: Replace with maple syrup or agave nectar. Adjust the liquid content slightly; expect a more caramelized taste.
- Gluten-Free: Substitute all-purpose flour with almond flour or gluten-free baking mix. Be mindful of the texture—may be slightly denser.
- Cocoa Powder: Use Dutch-process cocoa for a richer, deeper flavor. Natural cocoa gives a brighter, more acidic chocolate punch.
- Egg-Free: Replace eggs with unsweetened applesauce or a flaxseed egg. The texture might be slightly less firm but still moist and indulgent.
- Chocolate Type: Opt for milk chocolate for a sweeter, creamier fondant—less intense, more dessert-like. Dark chocolate keeps it rich and velvety.
Equipment & Tools
- Oven: To bake the fondants at precise temperature
- Ramekins: To shape and contain the batter during baking
- Heatproof bowl: To melt chocolate gently over simmering water
- Spatula: For folding ingredients and smoothing batter
- Mixing bowls: To whisk eggs and combine ingredients
- Measuring spoons and scale: To ensure accurate ingredient quantities
Step-by-step guide to chocolate fondant
- Preheat your oven to 200°C (390°F). Grease 4 ramekins with butter, dust with cocoa powder to prevent sticking.
- Chop 200g of high-quality dark chocolate into small pieces. Melt in a heatproof bowl over simmering water, stirring until smooth. Let cool slightly.
- In a mixing bowl, whisk 3 large eggs and 100g sugar until pale and slightly thickened, about 2 minutes by hand or 30 seconds with a mixer.
- Add a pinch of salt, then gently fold in the melted chocolate. Mix until fully combined, smooth, and glossy.
- Sift 50g all-purpose flour and 20g unsweetened cocoa powder into the batter. Gently fold until just combined—don’t overmix or it’ll lose fluffiness.
- Divide the batter evenly among prepared ramekins. Tap lightly to settle the mixture and smooth the top with a spatula.
- Bake in the middle of the oven for exactly 12 minutes. The edges should be firm, but the center still wobbles when gently shaken.
- Remove the ramekins from the oven. Let them rest for 2 minutes—this helps the molten center settle just right.
- Run a small knife around the edges to loosen, then carefully invert each fondant onto serving plates. Gently tap the ramekin if needed to release.
- Serve immediately—observe the shiny, oozy center and enjoy the crackling crust giving way to molten chocolate. Pair with a dollop of cream or berries if desired.
Let the baked fondants rest for 2 minutes outside the oven. Carefully invert onto plates, then serve immediately to enjoy the molten interior while warm and gooey.
How to Know It’s Done
- Edges are set and firm, but center jiggles slightly when shaken.
- Surface is crackly and shiny, indicating proper crust formation.
- When cut, center flows out smoothly, showing a molten core.
Chocolate Fondant
Ingredients
Equipment
Method
- Preheat your oven to 200°C (390°F). Generously grease four ramekins with butter and dust them with cocoa powder to prevent sticking.
- Place the chopped dark chocolate and butter in a heatproof bowl. Melt them together over a pot of simmering water, stirring gently until smooth and glossy. Remove from heat and let cool slightly.
- In a mixing bowl, whisk the eggs and caster sugar together vigorously until the mixture becomes pale, thick, and slightly tripled in volume, about 2 minutes by hand or 30 seconds with a mixer. This aerates the eggs and helps create a tender crumb.
- Gently fold the melted chocolate mixture into the egg and sugar mixture using a spatula, ensuring the batter stays smooth and glossy.
- Sift the flour and cocoa powder together, then carefully fold them into the batter until just combined. Be gentle to keep the mixture airy and light.
- Divide the batter evenly among the prepared ramekins, smoothing the tops with a spatula for an even surface.
- Bake in the middle of the oven for exactly 12 minutes. The edges will be set while the center remains soft and jiggly—watch for a shiny, crackly crust forming on top.
- Once baked, remove the ramekins from the oven and let them rest for 2 minutes. This brief pause allows the molten center to settle slightly for the perfect gooey texture.
- Carefully run a small knife around the edges of each ramekin to loosen the fondant, then invert onto serving plates with a gentle tap to release the dessert. The shiny crust should crack open to reveal the luscious, molten center.
- Serve immediately while warm, with optional accompaniments like fresh berries or a dusting of powdered sugar for added elegance and contrast.
Notes
Pro tips for perfect fondant
- Use high-quality chocolate for a richer, more velvety melt that oozes beautifully when cut.
- Slightly under-bake by 30 seconds if the center isn’t molten enough—trust the jiggle test.
- Chill the batter for 15 minutes before baking to help control the gooey center and improve rise.
- Use room temperature eggs—they incorporate more smoothly and help create a tender, uniform crumb.
- Lightly tap the ramekins on the counter before baking to remove air bubbles and ensure even rising.
- For a glossy crust, brush the fondants with a tiny bit of warm apricot jam or melted butter just after baking.
- Rest the baked fondants for at least 2 minutes outside the oven—this helps the center settle into perfect gooeyness.
Common mistakes and how to fix them
- FORGOT to check oven temperature → Use an oven thermometer for accuracy.
- DUMPED the batter into ramekins without smoothing → Gently tap and level for even baking.
- OVER-TORCHED the fondant → Bake for exactly 12 minutes; edges should be firm, center jiggly.
- MISSED the resting time before flipping → Rest for 2 minutes outside oven to avoid cracks.
Quick fixes and pantry swaps
- When batter looks grainy, splash in a little hot water to loosen it up.
- If the fondant cracks upon inversion, patch with a tiny amount of warm melted chocolate.
- DUMPED too much flour? Shake off excess and add a teaspoon of melted butter for moisture.
- Over-baked and center is too firm? Shield with a drizzle of warm ganache or melted chocolate to rescue texture.
- When the oven shimmers too much and edges over-torch, swap with a lower temperature setting and bake for a minute less.
Prep, store, and reheat tips
- You can prepare the batter up to 24 hours in advance; keep it covered in the fridge to maintain freshness and prevent skin formation. The batter will thicken slightly but remains pourable and luscious.
- Baked fondants are best enjoyed fresh, but can be stored in an airtight container in the fridge for up to 2 days. Reheat gently in the oven at 150°C (300°F) for about 8 minutes, or until just warmed through—look for a slight shimmer on the surface and a soft, gooey center.
- Frozen fondants are tricky; for best results, bake fresh. If you must freeze, wrap tightly in plastic wrap and foil for up to 1 month. Thaw overnight in the fridge and reheat as above, but expect a slightly less gooey center.
- Reheating may cause loss of some of the molten quality, but a gentle warm-up will restore much of the gooey texture and rich aroma. Avoid microwaving, as it can overcook the edges and kill the luscious center’s flow.
- The flavors deepen slightly after a day or two—chocolate becomes more intense, but the texture may firm up a bit. For the best experience, serve fondant the day it’s baked, but short storage still preserves the indulgence.
Top questions about chocolate fondant
1. What exactly is a chocolate fondant?
A gooey chocolate center that flows out when you cut into it, with a tender, slightly firm shell.
2. How long do I bake it for perfect gooeyness?
Bake it for about 12 minutes at 200°C (390°F); the edges should be set but the center jiggly.
3. What are best ingredients for this dessert?
Use high-quality dark chocolate and fresh eggs; the combination creates that rich, velvety melt.
4. How do I fix a fondant that isn’t gooey?
If the center isn’t molten enough, try baking for 30 seconds less or check oven temperature accuracy.
5. Can I prepare the batter in advance?
Chill the batter for 15 minutes before baking to help control the center’s flow and rise.
6. When is the best time to serve the fondant?
Serve immediately after baking for the best molten effect; the center starts to set as it cools.
7. How do I know when it’s perfectly baked?
Overbaking will dry out the center; underbaking may cause it to be too runny. Use the jiggle test.
8. What if my fondant cracks or looks dull?
If the crust is cracked or dull, brush with warm melted chocolate or a light glaze to restore gloss.
9. Can I store and reheat the fondant later?
Store baked fondants in the fridge for up to 2 days, reheat gently in the oven for best results.
10. What’s the best way to prepare ramekins?
Use a ramekin that’s well-greased with butter or non-stick spray for easy release without cracking.
There’s something about that molten chocolate center that never gets old. It’s a messy, imperfect process, but when it works, it’s pure, rich comfort in every bite. That little moment of warm, velvety chocolate spilling out feels like a quiet victory every time.
In the end, this recipe isn’t just about the dessert—it’s about trust in the process and the thrill of pulling off something so delicate. No matter how many times I make it, it reminds me that the best things in the kitchen come from a bit of chaos and a lot of tasting along the way.
Welcome to Proud of This Mess – a place where food, creativity, and a little chaos come together on a plate!
I’m Emily Carter, the founder and heart behind this little corner of the internet. Born and raised in the United States, I’ve always had a passion for cooking, experimenting, and sharing the messy, delicious journey of creating food that brings people together. My philosophy is simple: good food doesn’t have to be perfect, and a little mess makes it memorable.
At Proud of This Mess, we believe that cooking is more than just following recipes—it’s about exploring flavors, discovering new techniques, and making every meal an experience worth savoring. From comforting weeknight dinners to indulgent desserts, our goal is to inspire home cooks of all levels to embrace the joy of food without fear of imperfection.