
Focusing on that glorious, crackly skin on salmon has always felt like a small victory in my kitchen. It’s a simple thing, but nailing that crispy exterior depends on controlling moisture and heat—things that seem straightforward but can be tricky in practice. When I finally cracked the code, it transformed weeknight dinners into something a little more satisfying, even if I’m just cooking for myself.
This recipe is about stripping back to basics, paying attention to the little details that make a big difference. I’ve learned that patience and a hot pan are your best friends here. It’s not just about crisp skin; it’s about that perfect contrast between the crunch and the tender, flaky inside. That balance keeps me coming back to this method, again and again.
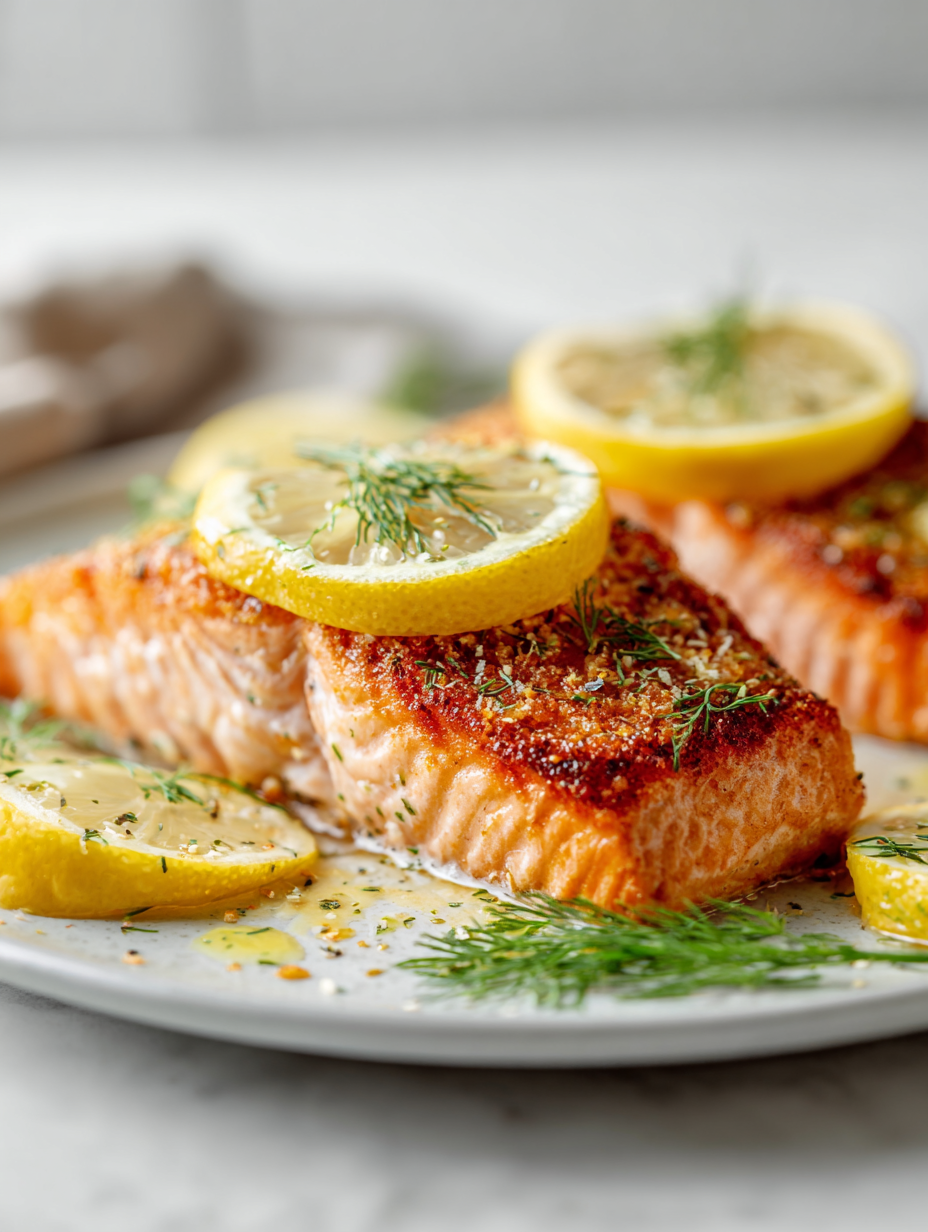
Focusing on achieving the perfect crispy skin on salmon by controlling moisture and heat, turning a simple fish into a textural masterpiece that elevates weeknight dinners.
The art of crispy skin
- Crisping the skin has always felt like a small, triumphant moment in my cooking—there’s a simple joy in that crackle.
- I used to get frustrated trying to get the skin just right until I realized patience and a smoking hot pan are key.
- That first bite of crispy skin, followed by tender, flaky flesh—nothing beats the texture contrast when done perfectly.
- Cooking salmon this way reminds me of lazy Sunday evenings, where a simple dish turns into a little celebration.
- Honestly, mastering this has made me more confident in pan-searing everything, not just fish.
The story behind this recipe
- Salmon with crispy skin always reminds me of a bustling weekend market in a coastal town, where simple ingredients shine brightest. I remember standing by a fishmonger’s stall, watching him expertly score and sear fillets, the skin crackling like it was alive. That moment sparked my obsession with mastering this technique, turning a humble piece of fish into something textured and satisfying.
- Over the years, I’ve learned that perfect crispy skin isn’t just about technique — it’s about patience, heat control, and respecting the fish’s natural moisture. I keep coming back to this method because it’s honest, straightforward, and reliably delivers that satisfying crunch every time. It’s a small victory, but in those moments, I feel like I’ve cracked a secret of the kitchen.
- heading
Crispy Skin Salmon Trivia
- Crispy skin on fish has roots in Asian cuisine, especially Japanese and Chinese methods of pan-frying fish to achieve that perfect crackle.
- The technique of crisping skin dates back centuries, originally used to preserve fish and enhance flavor through controlled frying and searing.
- In Scandinavian cooking, crispy fish skin is celebrated for its textural contrast, often served with simple, fresh accompaniments to highlight the skill involved.
- Modern culinary science shows that dry surface and high heat are crucial for achieving that iconic crunch, a lesson chefs have refined over decades.
Ingredient breakdown: key components
- Salmon fillet: I look for bright, firm flesh with shiny, moist skin—anything dull or flaky means skip it. Your skin should crackle with that initial sizzle.
- Salt: I prefer coarse sea salt, which helps draw out moisture and creates that crisp exterior. If you only have fine salt, use slightly less to avoid over-salting.
- Oil: I use a high-smoke-point oil like grapeseed or canola—nothing too fragrant, so the fish’s natural flavor shines through. Watch for that shimmering, smoky haze to signal heat.
- Pepper: Freshly ground black pepper adds a subtle kick—sprinkle it just before searing so it doesn’t burn and turn bitter.
- Optional herbs/seasonings: A sprig of thyme or a squeeze of lemon can brighten the dish, but I keep it simple to focus on that crispy skin experience.
- Pan: A heavy, non-stick or well-seasoned cast iron pan is best—something that distributes heat evenly and helps you get that golden crust.
- Thermometer: If you’re unsure about doneness, a quick probe (around 54°C/130°F for medium) helps avoid overcooking that delicate flesh.
Spotlight on key ingredients
Salmon:
- Salmon fillet: I look for bright, firm flesh with shiny, moist skin—anything dull or flaky means skip it. Your skin should crackle with that initial sizzle.
- Salt: I prefer coarse sea salt, which helps draw out moisture and creates that crisp exterior. If you only have fine salt, use slightly less to avoid over-salting.
- Oil: I use a high-smoke-point oil like grapeseed or canola—nothing too fragrant, so the fish’s natural flavor shines through. Watch for that shimmering, smoky haze to signal heat.
Pepper & seasonings:
- Pepper: Freshly ground black pepper adds a subtle kick—sprinkle it just before searing so it doesn’t burn and turn bitter.
- Optional herbs/seasonings: A sprig of thyme or a squeeze of lemon can brighten the dish, but I keep it simple to focus on that crispy skin experience.
Notes for ingredient swaps
- Salmon: If you can’t find wild salmon, farmed is fine—just look for bright, firm flesh and shiny skin, but expect a slightly milder flavor.
- Salt: Coarse sea salt helps draw out moisture for crisp skin, but if you only have fine salt, use a little less to prevent over-salting.
- Oil: Grape seed or canola oil are high-smoke-point options; if you prefer flavor, light avocado oil works, but avoid extra virgin olive oil for searing.
- Pepper: Freshly ground black pepper is best; skip if you want a milder dish or replace with white pepper for a subtler heat.
- Herbs & seasonings: Lemon zest or thyme sprigs add brightness—skip these if you want a cleaner fish flavor or prefer a more minimal approach.
- Pan: Heavy stainless steel or well-seasoned cast iron are good substitutes—just ensure they heat evenly for that perfect crust.
- Thermometer: An instant-read thermometer helps avoid overcooking; if you don’t have one, rely on visual cues like opacity and crackle.
Equipment & Tools
- Heavy skillet (cast iron preferred): Distributes heat evenly for a crisp, golden crust
- Spatula: Turns the fish gently without damaging the skin
- Paper towels: Pat dry the salmon for maximum crispness
- Thermometer: Checks internal temperature for perfect doneness
Step-by-step guide to pan searing
- Gather your equipment: a heavy skillet (preferably cast iron), a spatula, a paper towel, and a thermometer if you want precision. Keep everything within arm’s reach.
- Pat the salmon dry with paper towels; moisture is the enemy of crispness. Salt the skin generously—this helps draw out surface moisture. Let it rest for 10 minutes if you have time.
- Heat your pan over medium-high heat until it’s just starting to shimmer (about 2 minutes). Add a thin layer of high-smoke-point oil—grapeseed or canola works well.
- Lay the salmon skin-side down in the hot oil. Press gently with your spatula for 10 seconds to prevent curling. You should hear a steady crackle. Cook undisturbed for 4-5 minutes, or until the skin is deep golden and crispy. Check the color—dark amber is good.
- Flip the fillet carefully using your spatula. Cook for another 1-2 minutes on the flesh side, just until the fish is opaque and slightly firm to the touch. If you’re using a thermometer, aim for 54°C (130°F) in the thickest part.
- Remove the salmon from the pan. Rest it for 2 minutes—this helps the juices redistribute and keeps the inside tender. Plate immediately, skin side up for maximum crunch.
- For finishing, you can squeeze a little lemon or sprinkle fresh herbs, but I prefer to keep it simple—crisp skin, tender flesh. Serve with your favorite sides.
Let the salmon rest for 2 minutes off heat. Serve skin side up to preserve the crunch. Finish with a squeeze of lemon or herbs if desired.
How to Know It’s Done
- The skin is deep golden and crackly when ready to flip.
- The fish’s flesh becomes opaque and easily flakes with gentle pressure.
- The internal temperature reaches around 54°C (130°F) for perfect doneness.
Crispy Skin Salmon
Ingredients
Equipment
Method
- Pat the salmon fillets dry thoroughly with paper towels, especially on the skin side, until no moisture remains. This step is crucial for getting that crackly skin.
- Generously sprinkle coarse sea salt over the skin of each fillet, making sure to cover the surface evenly. Let the salt sit for about 10 minutes to help draw out excess moisture.
- Meanwhile, preheat your heavy skillet over medium-high heat until it’s just starting to shimmer and emits a faint smoky aroma, indicating it’s hot enough for searing.
- Remove the excess salt from the salmon skin with a quick brush or gentle wipe, leaving a light coating. Then, add a thin layer of high-smoke-point oil to the hot pan, swirling to coat the surface evenly.
- Carefully place the salmon fillets skin-side down into the hot oil, pressing gently with your spatula for about 10 seconds to prevent curling and ensure good contact.
- Listen for a steady crackling sound as the skin sizzles and turns a deep golden brown. Cook undisturbed for 4 to 5 minutes, checking that the skin is crisp and the color is rich and amber.
- Sprinkle freshly ground black pepper over the top of the fillet just before flipping to add flavor without burning the pepper.
- Gently flip the salmon using your spatula, and cook for an additional 1 to 2 minutes on the flesh side, just until the fish turns opaque and flakes easily. Use a thermometer to check for an internal temperature of around 54°C (130°F) if desired.
- Remove the cooked salmon from the pan and transfer to a plate. Let it rest for 2 minutes to allow the juices to settle and ensure a tender, flaky interior.
- Serve immediately, skin side up, to preserve the crispiness. Optionally, squeeze fresh lemon over the top or garnish with herbs for added brightness.
Tips for Perfect Crispy Skin
- Bolded tip: Ensure the skin is thoroughly dry before searing—moisture is the enemy of crispness.
- Bolded tip: Use a hot pan with just enough oil to shimmer—this prevents sticking and promotes even browning.
- Bolded tip: Press the salmon gently into the pan for the first 10 seconds—this helps prevent curling and ensures contact.
- Bolded tip: Don’t flip the fish too early—wait until the skin is deep golden and crackling for the best texture.
- Bolded tip: Rest the fish for a couple of minutes after cooking—this allows juices to redistribute and keeps the flesh tender.
- Bolded tip: If the skin isn’t crisp enough, increase heat slightly or cook a bit longer without moving the fish.
- Bolded tip: For extra crunch, finish the skin side in a hot oven for 1-2 minutes after searing—just watch closely!
Common mistakes and how to fix them
- FORGOT to pat the fish dry → Use paper towels thoroughly to remove surface moisture.
- DUMPED oil in the pan → Use just enough to coat the bottom evenly, avoid excess.
- OVER-TORCHED the skin → Lower heat slightly if the skin darkens too quickly, watch for golden hue.
- SKIPPED resting time → Rest the fish for 2 minutes after cooking to keep it tender inside.
Quick fixes for crispy skin
- When skin isn’t crisp, splash a little more oil and cook longer over medium-high heat.
- If fish sticks to the pan, patch with a gentle nudge and add more oil to prevent sticking.
- Dumped too much oil? Wipe excess with paper towel, then continue searing for a crispier skin.
- Overcooked the fish? Rest it immediately and serve with a squeeze of lemon to brighten flavors.
- When skin isn’t crackling, swap to a hotter pan or increase the heat slightly for that perfect crunch.
Prep, store, and reheat tips
- Prepped salmon skin-side up with salt can be refrigerated uncovered for up to 24 hours, which helps dry the skin for extra crispness.
- Stored cooked salmon keeps well in an airtight container in the fridge for up to 2 days; reheat gently to avoid drying out.
- Reheating in a hot skillet for 1-2 minutes until the skin shimmers again will revive some crispness, but it won’t be as perfect as fresh.
- For best texture, avoid freezing cooked salmon, as moisture loss during freezing can make the skin less crispy upon reheating.
Common Questions About Crispy Skin Salmon
1. Why is my salmon skin not crispy?
Pat the salmon skin thoroughly dry with paper towels before cooking. Moisture prevents crispiness, so a dry surface helps achieve that crackly texture.
2. How do I get the skin to crackle?
Use a hot pan with enough oil until it shimmers. Place the fish skin-side down and resist the urge to move it early—wait for it to crackle and turn golden.
3. How long should I sear the salmon?
Cook the salmon skin-side down for about 4-5 minutes over medium-high heat, until it’s deep amber and crispy. Flip carefully and cook briefly on the flesh side.
4. Why should I rest the salmon after cooking?
Rest the fish for 2 minutes after cooking. This allows juices to redistribute inside and keeps the flesh tender, while the skin stays crisp.
5. My skin isn’t crisping up, what now?
Ensure your pan is hot enough before adding the fish. If the skin isn’t crackling, turn up the heat slightly and give it a bit more time.
6. What kind of pan is best for crispy skin?
Use a heavy skillet like cast iron or stainless steel for even heat. A well-heated pan is key to that perfect golden, crispy skin.
7. Can I cook multiple fillets at once?
Avoid overloading the pan with too much fish at once. Work in batches if necessary to keep the temperature high and ensure even crisping.
8. My salmon sticks to the pan, what do I do?
If the skin sticks, gently loosen it with a spatula and add a little more oil. Patience helps release the fish without tearing the skin.
9. How do I tell when the salmon is done?
Use a thermometer to check for an internal temperature of around 54°C (130°F) for perfect doneness—opaque and flaky inside.
10. Can I finish the salmon in the oven?
For extra crispness, finish the skin side in a hot oven for 1-2 minutes after searing. Keep an eye to avoid overcooking.
Crispy skin salmon is a reminder that simplicity and patience can create something genuinely satisfying. That crackling skin paired with tender flesh feels like a small victory in my busy kitchen. It’s a dish I come back to when I need a straightforward, honest treat.
This method keeps me grounded—focused on heat, timing, and respecting the fish. It’s not about fancy ingredients, but about honing a skill that makes weeknight dinners feel a little more special. In those quiet moments, the sound of crackling skin is a small, honest joy.
Welcome to Proud of This Mess – a place where food, creativity, and a little chaos come together on a plate!
I’m Emily Carter, the founder and heart behind this little corner of the internet. Born and raised in the United States, I’ve always had a passion for cooking, experimenting, and sharing the messy, delicious journey of creating food that brings people together. My philosophy is simple: good food doesn’t have to be perfect, and a little mess makes it memorable.
At Proud of This Mess, we believe that cooking is more than just following recipes—it’s about exploring flavors, discovering new techniques, and making every meal an experience worth savoring. From comforting weeknight dinners to indulgent desserts, our goal is to inspire home cooks of all levels to embrace the joy of food without fear of imperfection.