
This no-bake chocolate bar recipe is my secret weapon when I need something sweet but don’t want to fuss in the kitchen. It’s honestly more of a kitchen freestyle—just melting, mixing, and pressing into a pan. No oven, no complicated steps, just pure chocolatey satisfaction that comes together in minutes.
What I love about this recipe is how adaptable it feels. You can toss in chopped nuts, a sprinkle of sea salt, or even a dash of chili flakes for a surprising kick. It’s a quick fix for those moments when a chocolate craving hits hard and I want something homemade but don’t have hours to spare.
These bars remind me of childhood afternoons—sticky fingers, big smiles, and that rush of sweet, fudgy goodness. But now, I tweak the ingredients to make it richer, more grown-up, and still totally effortless. It’s my go-to treat when I want comfort that’s honest, simple, and just a little bit special.
This recipe is inspired by childhood nostalgia, but with a twist—using unexpected ingredients like chili flakes or sea salt to elevate the simple pleasure of chocolate bars. It’s about reimagining comfort food for grown-up palates, blending sweet and savory in a no-bake format that’s quick, honest, and unexpectedly sophisticated.
The story behind this recipe
- This recipe came together on a rainy afternoon when I was craving something sweet but didn’t want to turn on the oven. I remembered how my grandma used to keep a stash of chocolate bars in the freezer, perfect for quick bites. One day, I decided to throw a few ingredients together just to see if I could make something similar but easier and more adaptable.
- It’s funny how a simple idea—melting chocolate and pressing it into a pan—can turn into a little ritual for me. Whenever I’m low on time but need a treat, I whip these up and feel a little nostalgic, a little proud, knowing I made something genuinely satisfying without fuss.
- heading
- story_type
Ingredient breakdown: key components
- Dark chocolate: I prefer a rich, slightly bitter dark chocolate that melts smoothly and gives a deep cocoa flavor. You can swap it for milk chocolate if you want it sweeter, but the contrast is less intense.
- Butter: I use unsalted butter for a silky texture and to control the saltiness. If you’re out, a splash of coconut oil works, adding a subtle tropical aroma and a slightly different mouthfeel.
- Sweetened condensed milk: This is the glue that keeps everything together and adds creamy sweetness. For a dairy-free version, try coconut condensed milk—it’s thicker and has a hint of coconut that plays nicely with the chocolate.
- Vanilla extract: Just a teaspoon adds warmth and depth, but if you’re out, a pinch of cinnamon or a splash of almond extract can give a unique twist.
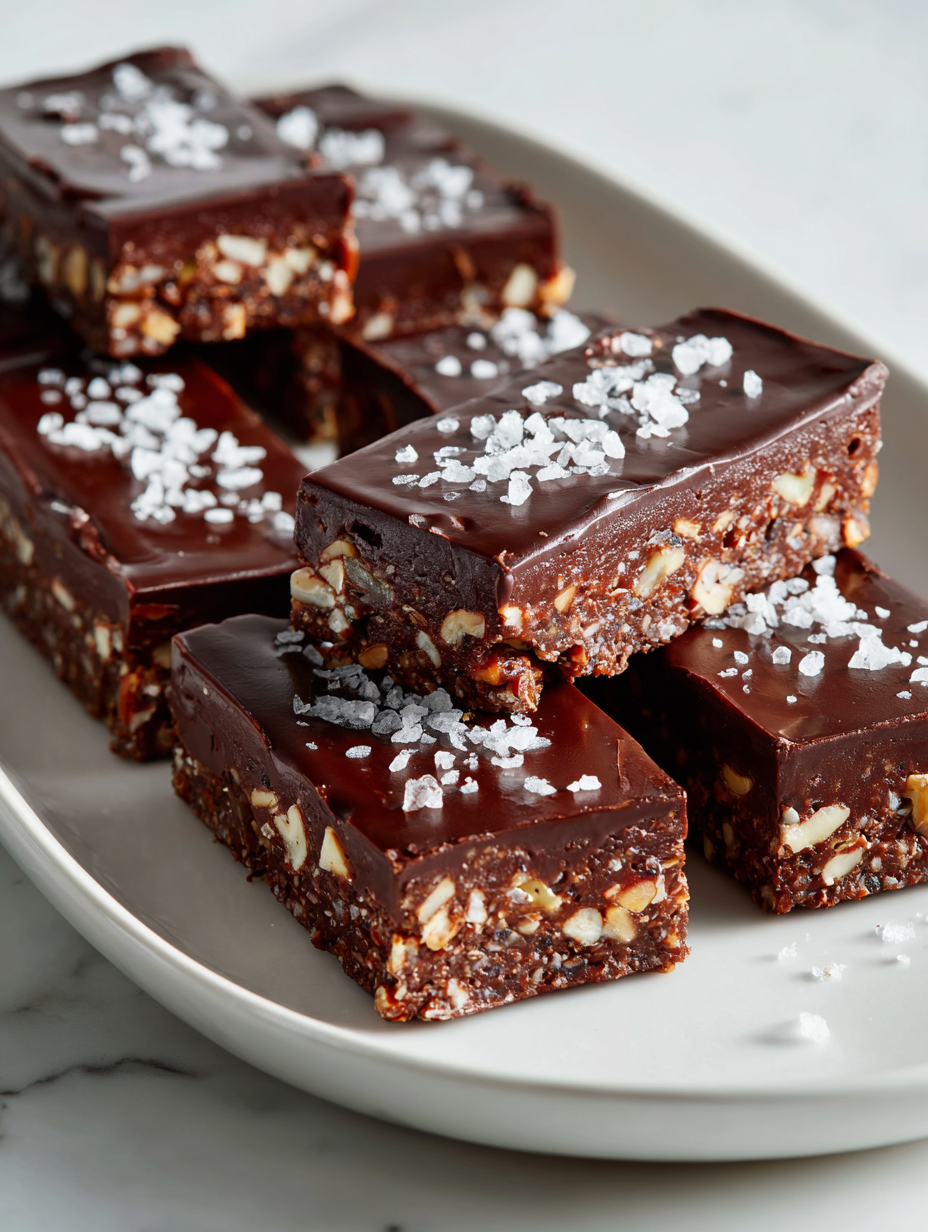
- Sea salt: A sprinkle on top enhances the chocolate’s richness and creates that perfect sweet-salty contrast. Try smoked sea salt if you want a smoky note that’s unexpectedly sophisticated.
- Optional toppings: Chopped nuts, dried fruit, or chili flakes can elevate the bars. I love a crunch of sea salt or a kick of spice—play around and find your favorite combo.
- Pan and parchment: I use a simple 9×9 inch pan lined with parchment for easy lifting. A silicone spatula helps spread the mixture smoothly, and a sharp knife cuts cleanly once set.
Spotlight on key ingredients
Chocolate, butter, condensed milk:
- Dark chocolate: I prefer a rich, slightly bitter dark chocolate that melts smoothly and gives a deep cocoa flavor. You can swap it for milk chocolate if you want it sweeter, but the contrast is less intense.
- Butter: I use unsalted butter for a silky texture and to control the saltiness. If you’re out, a splash of coconut oil works, adding a subtle tropical aroma and a slightly different mouthfeel.
- Sweetened condensed milk: This is the glue that keeps everything together and adds creamy sweetness. For a dairy-free version, try coconut condensed milk—it’s thicker and has a hint of coconut that plays nicely with the chocolate.
Notes for ingredient swaps
- Dairy-Free: Swap regular chocolate for dairy-free dark or vegan chocolate chips. Expect a slightly different melt and a less creamy texture.
- Sweetener: Use coconut sugar or honey instead of sweetened condensed milk. The flavor will shift, adding caramel or floral notes.
- Nut Butter: Substitute with peanut or almond butter for a richer, more complex flavor. Keep in mind it might affect the set consistency.
- Salt: Replace sea salt with smoked salt for a smoky depth or flaky Maldon salt for a crunch and subtle mineral flavor.
- Add-ins: Swap nuts for dried fruit or chili flakes for a spicy kick. These add texture and surprise bursts of flavor.
- Pan Material: Use a glass or silicone mold instead of metal. The chocolate may set slightly differently, but it’ll still work fine.
Equipment & Tools
- 9×9 inch pan: To hold the mixture and shape the bars.
- Parchment paper: For easy removal and clean cuts.
- Heatproof bowl: To melt the chocolate gently over simmering water.
- Spatula: To stir and spread the melted chocolate evenly.
- Knife: To cut the set bars into neat pieces.
Step-by-step guide to no bake chocolate bars
- Gather your equipment: a 9×9 inch pan (for a sturdy base), parchment paper (for easy removal), a heatproof bowl (to melt chocolate), and a spatula (to spread).
- Chop the chocolate into small, even pieces. This helps it melt smoothly and quickly, reducing the risk of burning.
- Set up a double boiler: place the bowl over a pot of simmering water (about 80°C/176°F). Make sure the bottom doesn’t touch the water. Stir the chocolate gently until fully melted and glossy, about 5-7 minutes.
- Add butter: toss in small cubes, stirring until completely melted and integrated. The mixture should be smooth and shiny, with a faint chocolate smell filling your kitchen.
- Stir in sweetened condensed milk and vanilla: mix until you get a thick, velvety batter, about 2 minutes. If the mixture feels too stiff, warm it slightly over low heat, but don’t over-heat or it might seize.
- Pour the chocolate mixture into your prepared pan. Use a spatula to spread it evenly, pressing gently to fill all corners. Tap the pan on the counter to release air bubbles and level the surface.
- Add toppings now if desired: sprinkle sea salt, chopped nuts, or chili flakes. Press lightly to embed toppings into the surface for better adhesion.
- Let the bars set: transfer the pan to your fridge and chill for at least 2 hours, or until firm and crackly on top. The mixture should be hard and shiny.
- Once set, lift the slab out using the parchment paper. Cut into bars or squares with a sharp knife, wiping the blade clean between cuts for neat edges.
- Finish & serve: for a glossy look, lightly brush the edges with a bit of melted chocolate. Serve immediately or store in an airtight container.
Chill the bars in the fridge for at least 2 hours until firm. Lift out using parchment paper and cut into squares. For a shiny finish, brush with a little melted chocolate if desired. Serve immediately or store in an airtight container in the fridge for up to a week.
How to Know It’s Done
- Chocolate is fully melted and glossy before mixing in other ingredients.
- The mixture is thick and velvety, not grainy or stiff, after adding condensed milk and vanilla.
- Bars are firm and crackly on top after chilling, with a smooth surface and even edges.
No-Bake Chocolate Bars
Ingredients
Equipment
Method
- Line your 9x9 inch pan with parchment paper, leaving some overhang for easy lifting later.
- Place the chopped dark chocolate in a heatproof bowl.
- Set up a saucepan with simmering water and place the bowl over it, creating a double boiler.
- Gently stir the chocolate until it melts completely and becomes glossy, about 5-7 minutes. You’ll notice the aroma of cocoa filling your kitchen.
- Add the small cubes of butter to the melted chocolate and stir until fully incorporated and smooth.
- Stir in the sweetened condensed milk and vanilla extract, blending until the mixture thickens into a velvety, uniform batter.
- Pour the chocolate mixture into your prepared pan, using a spatula to spread it evenly across the surface.
- Gently tap the pan on the counter to level the mixture and release any air bubbles. Sprinkle a pinch of sea salt over the top for a savory contrast.
- Place the pan in the fridge and chill for at least 2 hours, or until the mixture is firm, shiny, and crackly on top.
- Once set, lift the slab out of the pan using the parchment overhang and transfer onto a cutting board.
- Use a sharp knife to cut into bars or squares, wiping the blade between cuts for clean edges. Serve immediately or store in an airtight container in the fridge.
Tips for perfect no bake bars
- Bolded mini-head: Melt chocolate gently → Use a double boiler to prevent scorching and achieve a silky finish.
- Bolded mini-head: Cool the mixture slightly → Let the melted chocolate cool just a bit before mixing to avoid seizing.
- Bolded mini-head: Use parchment paper → Line your pan for easy removal and clean cuts without sticking.
- Bolded mini-head: Tap to level → Gently tap the pan on the counter to settle the mixture and eliminate air bubbles.
- Bolded mini-head: Chill thoroughly → Let the bars set in the fridge for at least 2 hours until firm and crackly on top.
- Bolded mini-head: Cut with a warm knife → Wipe the blade between cuts and run it under hot water for clean edges.
- Bolded mini-head: Add toppings at the right moment → Sprinkle sea salt or nuts just before setting for better adhesion.
Common mistakes and how to fix them
- FORGOT to temper chocolate → Melt slowly to prevent seizing.
- DUMPED all ingredients at once → Add ingredients gradually for smooth melting.
- OVER-TORCHED chocolate → Remove from heat immediately if smell turns burnt.
- MISSED chilling time → Let set at least 2 hours; impatience causes soft bars.
Quick fixes and pantry swaps
- When chocolate seizes, splash in a bit of vegetable oil to loosen it up.
- If mixture is too thick, gently warm it over low heat to soften.
- DUMPED too much salt? Rinse and start with fresh, then add sparingly.
- Splash with hot water to melt stubborn chocolate chunks quickly.
- Patch a crumbly bar by pressing it back into the pan and chilling again.
Prep, store, and reheat tips
- Prepare the chocolate mixture ahead of time; it can be made up to 24 hours in advance and refrigerated, which helps the flavors meld and firms up the texture.
- Store the assembled bars in an airtight container in the fridge for up to a week. The chocolate will stay glossy and firm, with a rich aroma of cocoa.
- For longer storage, wrap the bars individually in plastic wrap and freeze for up to a month. Expect a slight change in texture upon thawing, but flavor remains intense.
- Reheat leftovers gently in the microwave or at room temperature. The chocolate softens and releases a warm, inviting scent—perfect for quick indulgence.
Top questions about no bake chocolate bars
1. What kind of chocolate works best?
Use good quality chocolate with a rich aroma. It melts smoothly and gives the bars a deep, satisfying flavor.
2. How do I know when the bars are set?
Chill the mixture for at least 2 hours until it’s firm and crackly on top. If it’s soft, it’s not ready.
3. When should I add toppings?
Add toppings like sea salt or nuts right before chilling to ensure they stick well and add texture.
4. What if the chocolate seizes?
If the chocolate seizes or becomes grainy, gently warm it over a double boiler or in short bursts in the microwave.
5. How should I store leftovers?
Store in an airtight container in the fridge for up to a week, or freeze for longer storage. Thaw in the fridge or at room temp.
6. How do I get clean cuts?
Use a warm knife to cut clean, smooth edges. Wipe the blade between cuts for neat pieces.
7. Can I substitute the chocolate?
You can swap dark chocolate with milk or vegan chocolate, but expect a different flavor and melting texture.
8. How can I fix thick chocolate?
Adding a splash of coconut oil can make the chocolate more glossy and easier to work with if it’s too thick.
9. Should I chill the mixture before pouring?
Chilling the mixture before pouring helps it spread evenly and prevents cracking or bubbling.
10. Can I customize the recipe?
For extra flavor, stir in spices like cinnamon or chili flakes, or fold in chopped nuts or dried fruit.
These no-bake chocolate bars are more than just a quick treat—they’re a little act of rebellion against busy days. When that rich, fudgy aroma hits your nose, it’s like a small victory, a reminder that simple ingredients can create something memorable.
In a world that’s always rushing, having a recipe like this on hand feels grounding. It’s honest, unpretentious, and perfect for sharing with someone who appreciates the small joys of homemade sweets. And honestly, that’s enough to keep coming back for more.
Welcome to Proud of This Mess – a place where food, creativity, and a little chaos come together on a plate!
I’m Emily Carter, the founder and heart behind this little corner of the internet. Born and raised in the United States, I’ve always had a passion for cooking, experimenting, and sharing the messy, delicious journey of creating food that brings people together. My philosophy is simple: good food doesn’t have to be perfect, and a little mess makes it memorable.
At Proud of This Mess, we believe that cooking is more than just following recipes—it’s about exploring flavors, discovering new techniques, and making every meal an experience worth savoring. From comforting weeknight dinners to indulgent desserts, our goal is to inspire home cooks of all levels to embrace the joy of food without fear of imperfection.